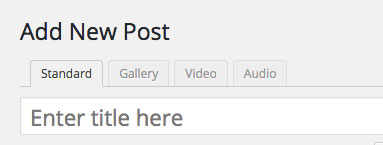
Close

Account

Documentation

Forum

Menu

Next
Prev

Post

There’re a few things that we’ll explain to you on this section :

  1. Post Format
  2. Post Subtitle
  3. Post Editor
  4. Primary Category
  5. Single Post Setting
  6. Sponsored Post


1. Post Format


With JNews, we provide 3 kinds of post format that you can use for your post. There are Standard Format, Gallery Format, and Video Format.

Before that, please make sure that you have installed and activated required plugins for JNews. For more complete information about required plugins, you can follow this link.

As seen on image above, you can choose standard, gallery, or video post format. Please check the following explanation below about post format :

  1. Standard Format
    This is the default option for post format. With this format, you can also add featured image for your post.
  2. Gallery Format
    If you want to show image gallery on featured post, this post format will fit in your need. With this format, you just need to simply select several images as gallery items and everything’s set.
  3. Video Format
    You can also use video for featured post by using video post format. Nothing complicated is required, just paste your video url and it’s done.


2. Post Subtitle


Beside post title, we also provide post subtitle a.k.a. secondary post title. You can insert some text for post subtitle normally just like inserting a post title.

Where it’s done, the post subtitle will be shown below the post title. Leave post subtitle field blank if you don’t want to use it.


3. Post Editor


On post editor, you will notice something different as you can see on the image below.

We added sidebar area on the right side of post editor. This area is where your sidebar will show up. With this feature you will know how your post content will look on the front end preview.

Also, as you can see on the image above. We provide additional element and formatting tools on the toolbar. You need to click Toggle Toolbar button to expand this toolbar, so you can use the additional element and formatting tools easily.

Here’s the list of additional element and formatting tools that we’ve provided for you (from left to right based on image on above) :

  • Grid Builder
    You can create custom grid column for your content with Grid Builder. On the grid builder panel, you will have three buttons.
    Green (+) button for increasing grid width, yellow (-) button for decreasing grid width and red (+) button for removing the current grid.


  • Intro
    You can use Intro format into certain important content of your post to attract the readers for focusing more on this content. Intro format also have different style compared to the default format.
  • Dropcap
    You can use Dropcap format to insert an interesting starting letter of a paragraph in your post content. We also provide several options that can be used to customize default dropcap style.
    Please note, you need to make selection or block the letter that you want to use as dropcap.

  • Highlight
    You can use Highlight format to highlight certain word on your content. There are several options that you can choose to customize the default highlight style.
    Please note, firstly you need to make selection of word(s) which want to be highlighted.

  • Pullquote
    You can use Pullquote element to insert pullquote into your content. We also provide alignment option for pullquote.
    Please note, you will need to make selection or put the cursor pointer of sentence that you want to use as pullquote.

  • Alert
    You can use Alert element to insert alert message into your content. We also provide several option to customize your alert element.

  • Button
    You can use Button element to insert custom button into your content. We also provide several button style that you can use.

  • Spacing
    You can use Spacing to insert additional space on your post content. Just simply to input size of spacing that you need into input field.


4. Primary Category


A category is one of important thing for post. With JNews, you will notice post category appears on several place such as on block post, hero, slider, breadcrumb and etc.

On certain post, you might use more than one categories. In this case, only the first post category will be used by default. However, if you personally want to use a certain category instead of the one selected by the system, you can setup Primary Category manually for your post.

Primary category will show on several place as category badge on post block module, hero element, post slider and breadcrumb category on single blog post.

As you can see on the image above, you can setup primary category on JNews : Primary Category metabox on the right side.


5. Single Post Setting


In some cases, you might want to have individual setting for certain post. To achieve that, we provide Single Post Setting that you can find on each post. With this feature you will be able to override Global Single Post Setting. So each post on your site can have its own personal setting.

If you are not familiar with Global Single Post Setting yet, you can follow this link and jump into Single Post Option part.

Please check the following explanation about JNews : Single Post Setting below :

Override Default Template :

  • Override Global Template Setting
    Turn on this option to override global template setting for the current post only.

This option list below will appear if Override Global Template Setting option above is enabled.

  1. Post Header Template
    Choose post header template that you want to use for the current post. Please note, several template may not work for certain post format.

    • Standard Format : This format will work best on all template.
    • Gallery Format : This format will works best with Template 1, Template 2, Template 3, Template 7, Template 8 and Template 9.
    • Video Format : This format will works best with Template 1, Template 2, Template 3, Template 7, Template 8 and Template 9.
  2. Enable Parallax Effect
    Turn on this option to enable parallax effect of featured image. Please note, this option will appear and work if you use Template 4 or Template 5 on Post Header Template option above.
  3. Enable Fullscreen Featured Image
    Turn on this option to enable fullscreen featured image. Please note, this option will appear and work if you use Template 4 or Template 5 on Post Header Template option above.
  4. Single Blog Post Layout
    Choose layout type for the current post.
  5. Single Post Sidebar
    Choose sidebar that you want to use for the current post. Please note, this option will appear and work if you use Left Sidebar or Right Sidebar on Single Blog Post Layout option above.
  6. Single Post Share Position
    Adjust the position of the share button for the current post.
  7. Float Share Style
    Adjust the style of float share for the current post. Please note, this option will appear and work if you use Only Float or Float + Bottom on Single Post Share Position option above.
  8. Show Share Counter
    Turn on this option to show share counter for the current post. Please note, this option will appear and work if you use Only Top or Top + Bottom on Single Post Share Position option above.
  9. Show View Counter
    Turn on this option to show view counter for the current post. Please note, this option will appear and work if you use Only Top or Top + Bottom on Single Post Share Position option above.
  10. Show Featured Image/Video
    Turn on this option to show featured image, gallery or video for the current post.
  11. Show Post Meta
    Turn on this option to show post meta on header for the current post.
  12. Show Post Author
    Turn on this option to show post author on  post meta container for the current post. Please note, this option will appear and work if Show Post Meta option enabled.
  13. Show Post Author Image
    Turn on this option to show post author image on  post meta container for the current post. Please note, this option will appear and work if Show Post Meta option enabled.
  14. Show Post Date
    Turn on this option to show post date on  post meta container for the current post. Please note, this option will appear and work if Show Post Meta option enabled.
  15. Show Category
    Turn on this option to show post category on  post meta container for the current post. Please note, this option will appear and work if Show Post Meta option enabled.
  16. Show Post Tag
    Turn on this option to show post tag on the below article for the current post.
  17. Show Prev/Next Post
    Turn on this option to show previous and next post navigation on the below article for the current post.
  18. Show Popup Post
    Turn on this option to show popup post on the bottom right side for the current post.
  19. Number of Post
    Set the number of popup post to show for the current post. Please note, this option will appear and work if Show Popup Post option enabled.
  20. Show Author Box
    Turn on this option to show author box on the below article for the current post.
  21. Show Post Related
    Turn on this option to show related post on the below article for the current post.


Override Image Size :

  • Override Image Thumbnail Size
    Turn on this option to override default image thumbnail size. Please note, if you’re using post template with image full size, this option will be ignored. 

This option list below will appear if Override Global Template Setting option above is enabled.

  1. Post Thumbnail Size
    Choose image thumbnail size for the current post.
  2. Post Gallery Thumbnail Size
    Choose image gallery thumbnail size for the current post.


6. Sponsored Post


In some cases, you might want to publish a sponsored post on certain posts. To achieve that, we provide Sponsored Post option in Single Post Setting that you can find on each post. With this feature, you will be able to set posts to a sponsored post.

Please check the following explanation about Sponsored Post below :

  • Sponsored Post
    Turn on this option to set the current post as a sponsored post.
  • Sponsored Post Label
    Fill this field to set sponsored post label. Please note, this option will appear and work if Sponsored Post option enabled.
  • Sponsored Post Name
    Fill this field to set the name of sponsor. Please note, this option will appear and work if Sponsored Post option enabled.
  • Sponsored Post URL
    Fill this field to set the url of sponsor. Please note, this option will appear and work if Sponsored Post option enabled.
  • Show Sponsor Logo
    Turn on this option to show the sponsor logo instead of sponsor name. Please note, this option will appear and work if Sponsored Post option enabled.
  • Sponsored Post Logo
    Choose image for the sponsor logo. Please note, this option will appear and work if Sponsored Post and Show Sponsor Logo option enabled.
  • Sponsored Description
    Fill this field to set sponsored post description. Please note, this option will appear and work if Sponsored Post option enabled.