If you use JNews-Social Login plugin for Social Login, please follow the steps below to enable Google Login on your WordPress website.
- Navigate to the Google API Console section and login to your Google Account if needed.
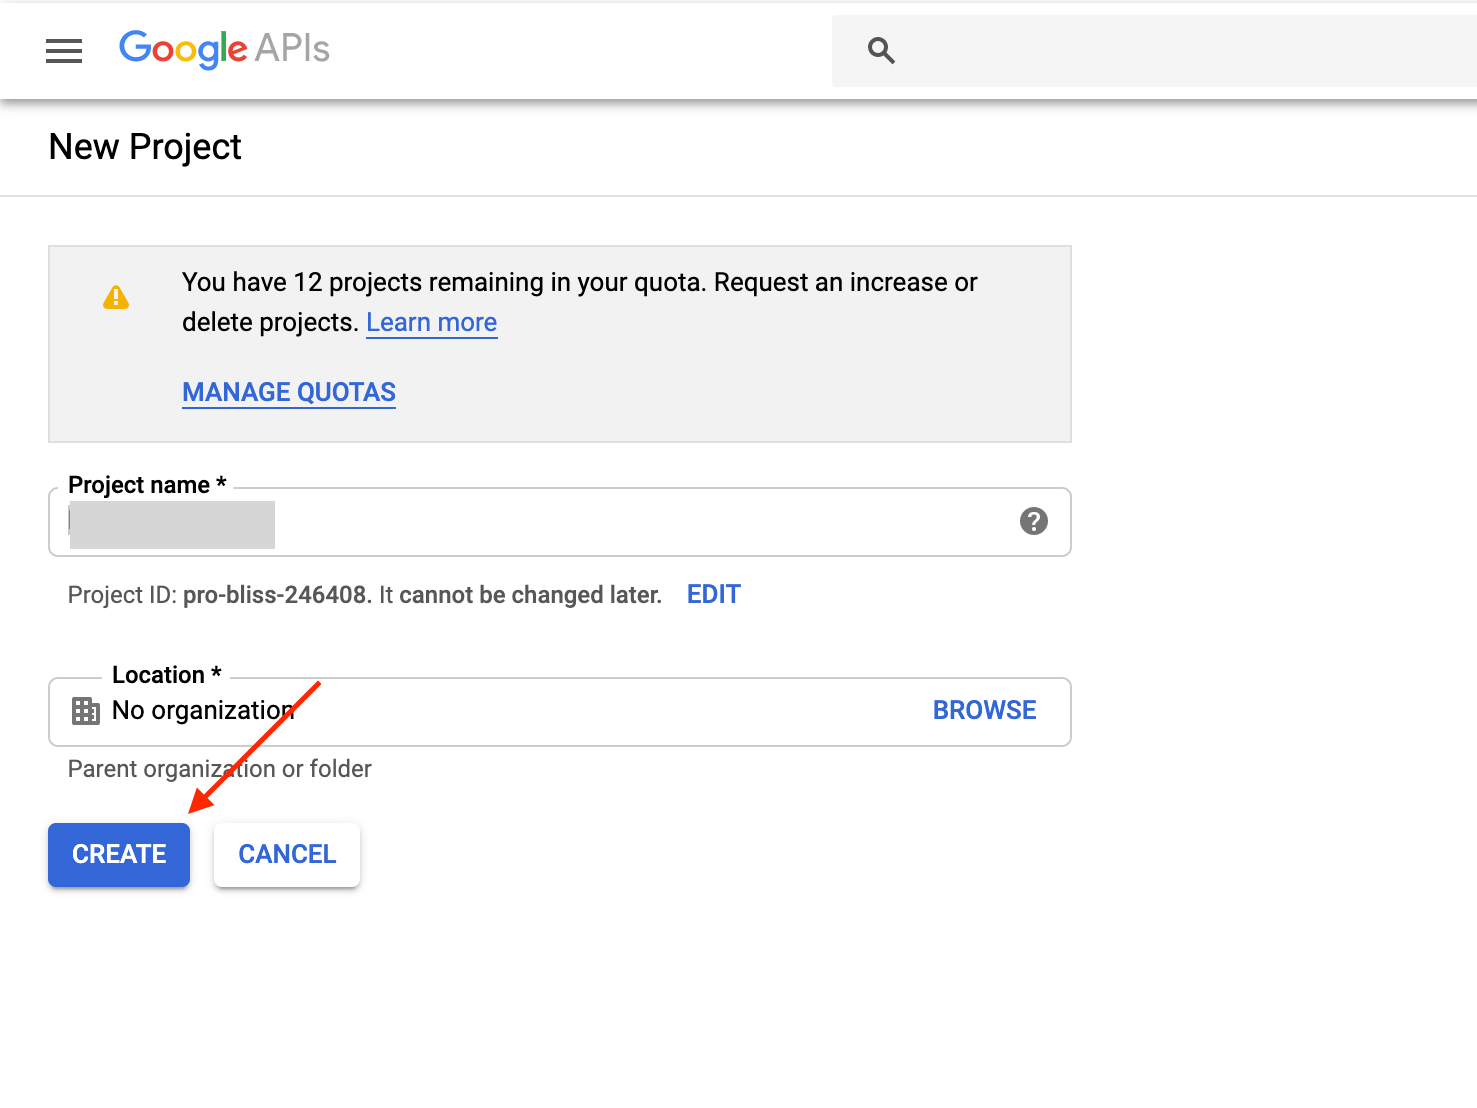
- If this is your first app, you will need to “create a project” and may also need to accept Terms and Conditions. If you do not see this page, continue to step 3.

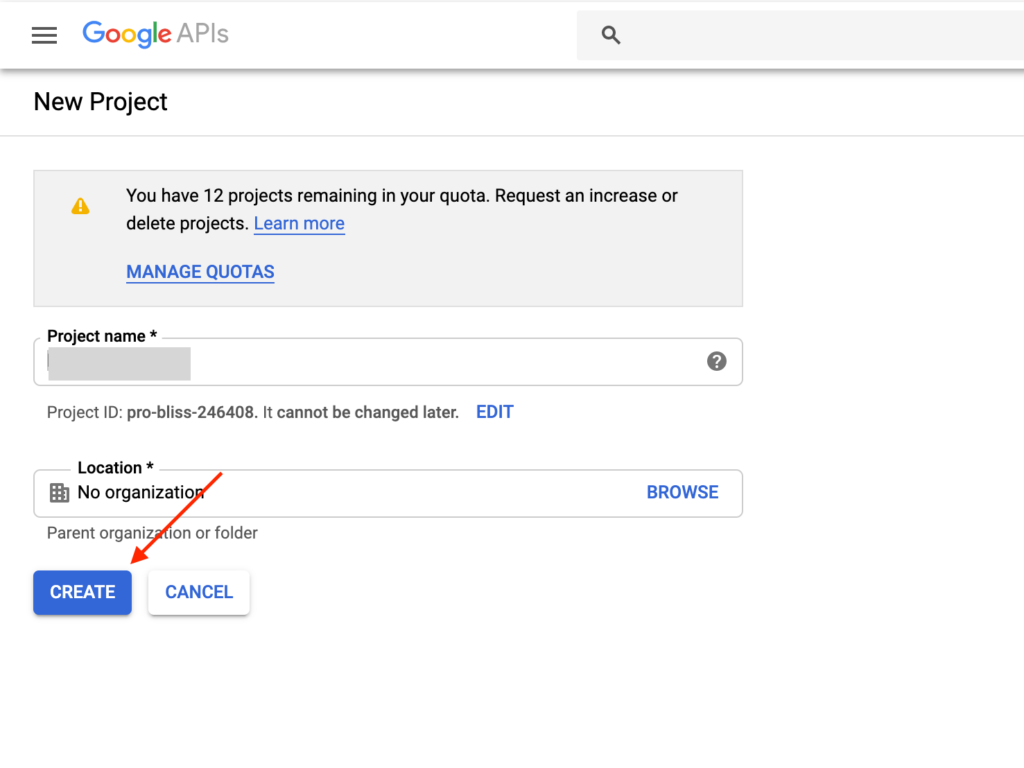
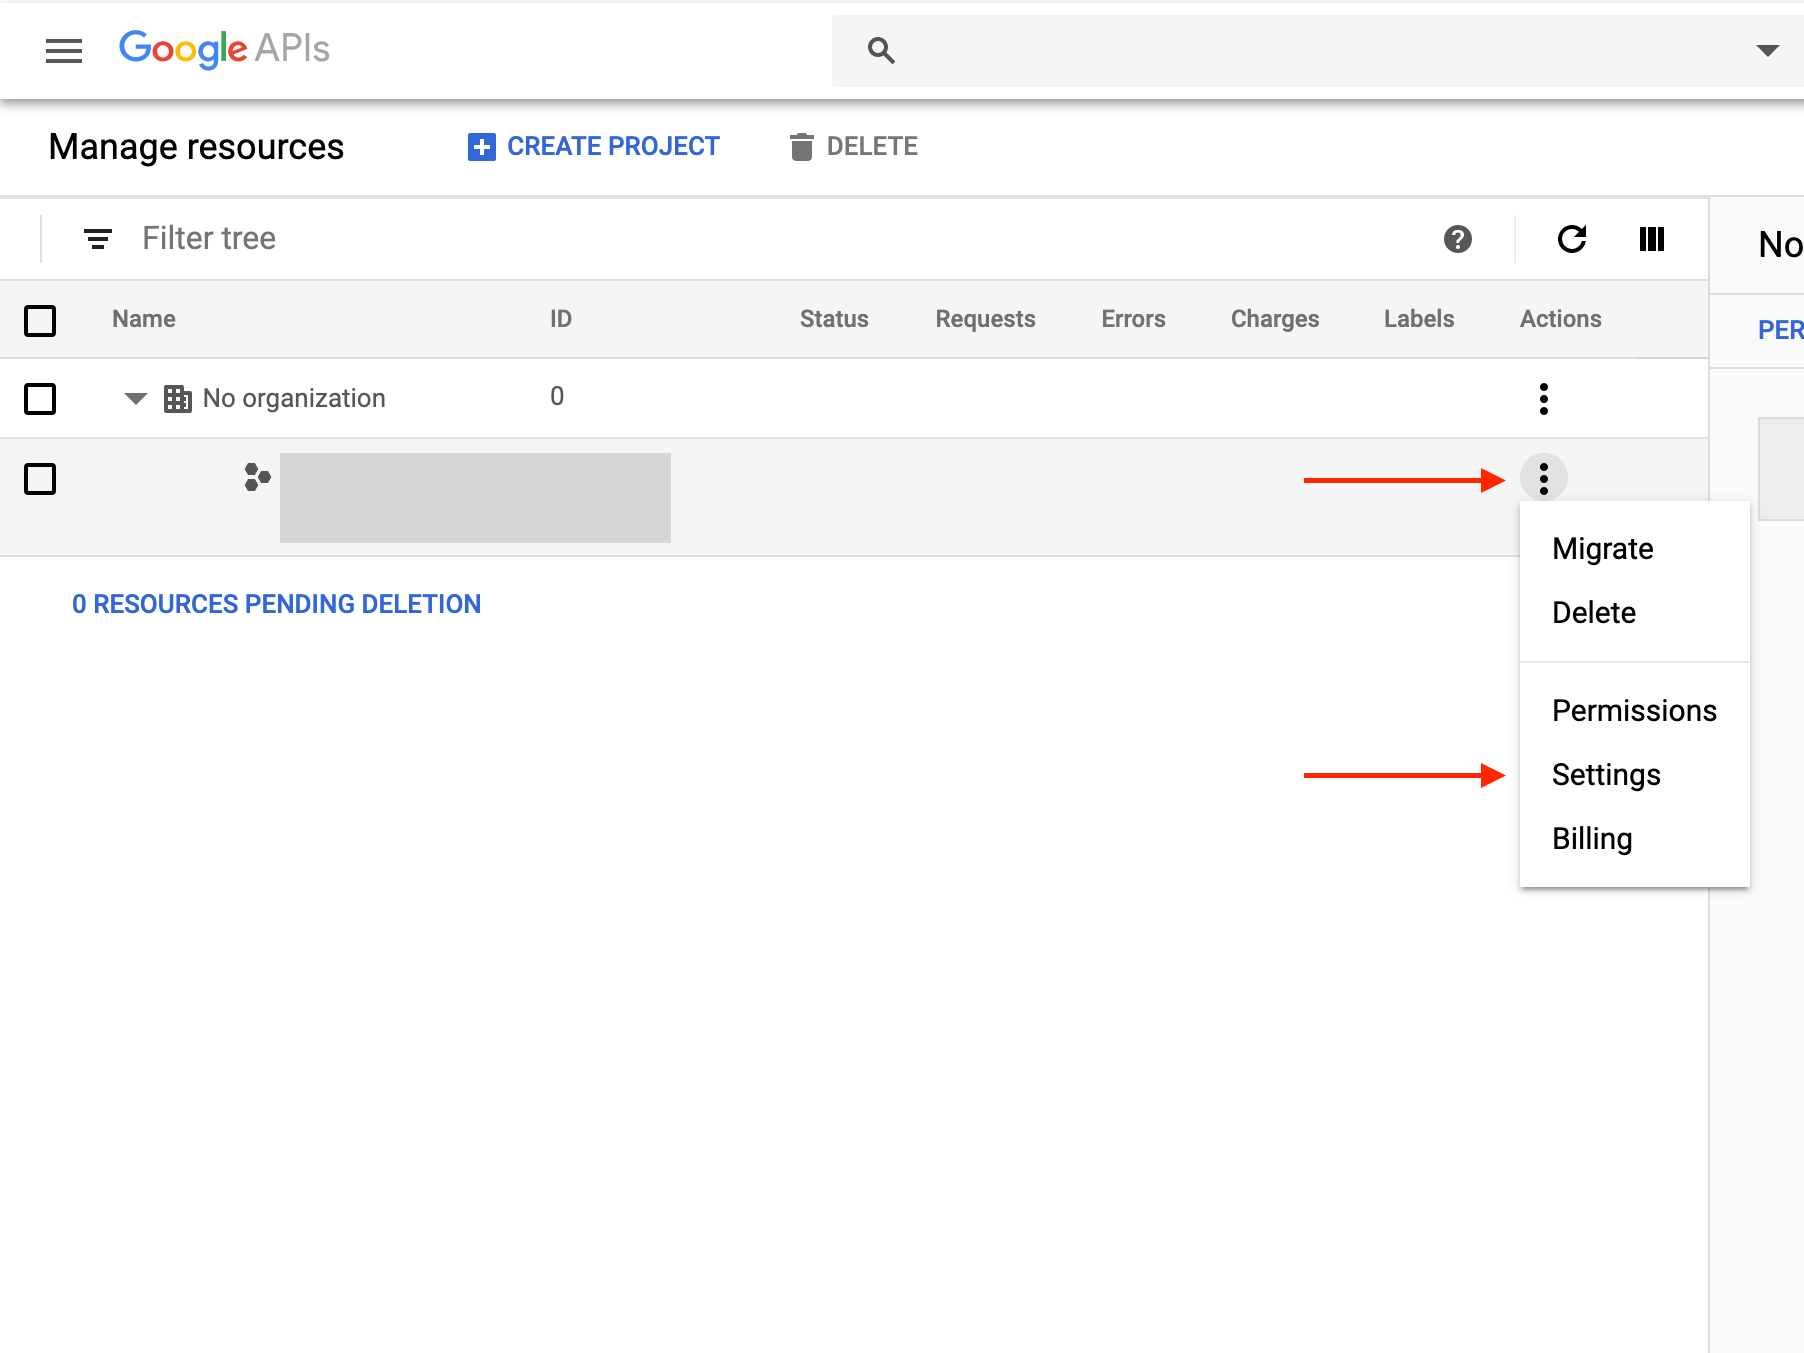
- if you have created apps before, here you will be able to see the project list. You can also create a new project by pressing “CREATE PROJECT” at the top. Click on the three dot of your project title you want to create an app for.

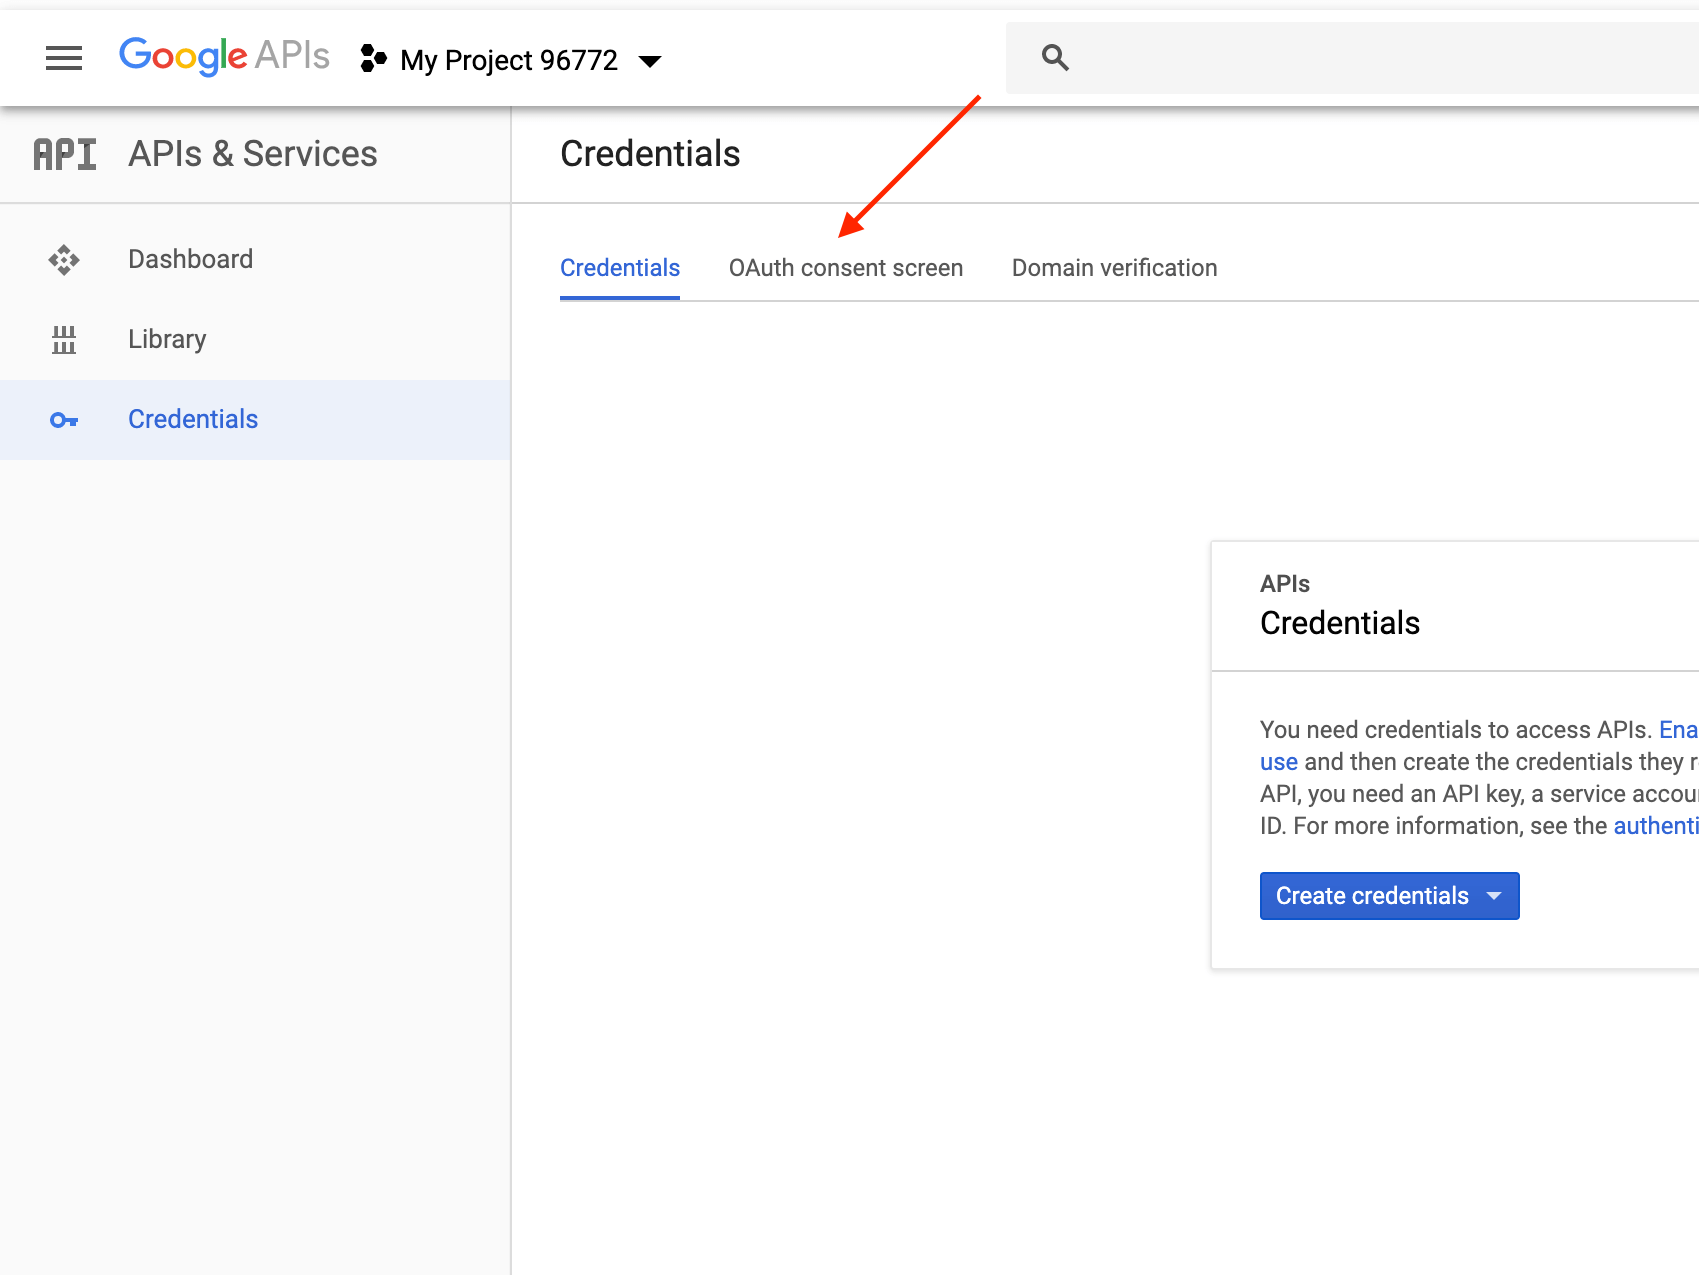
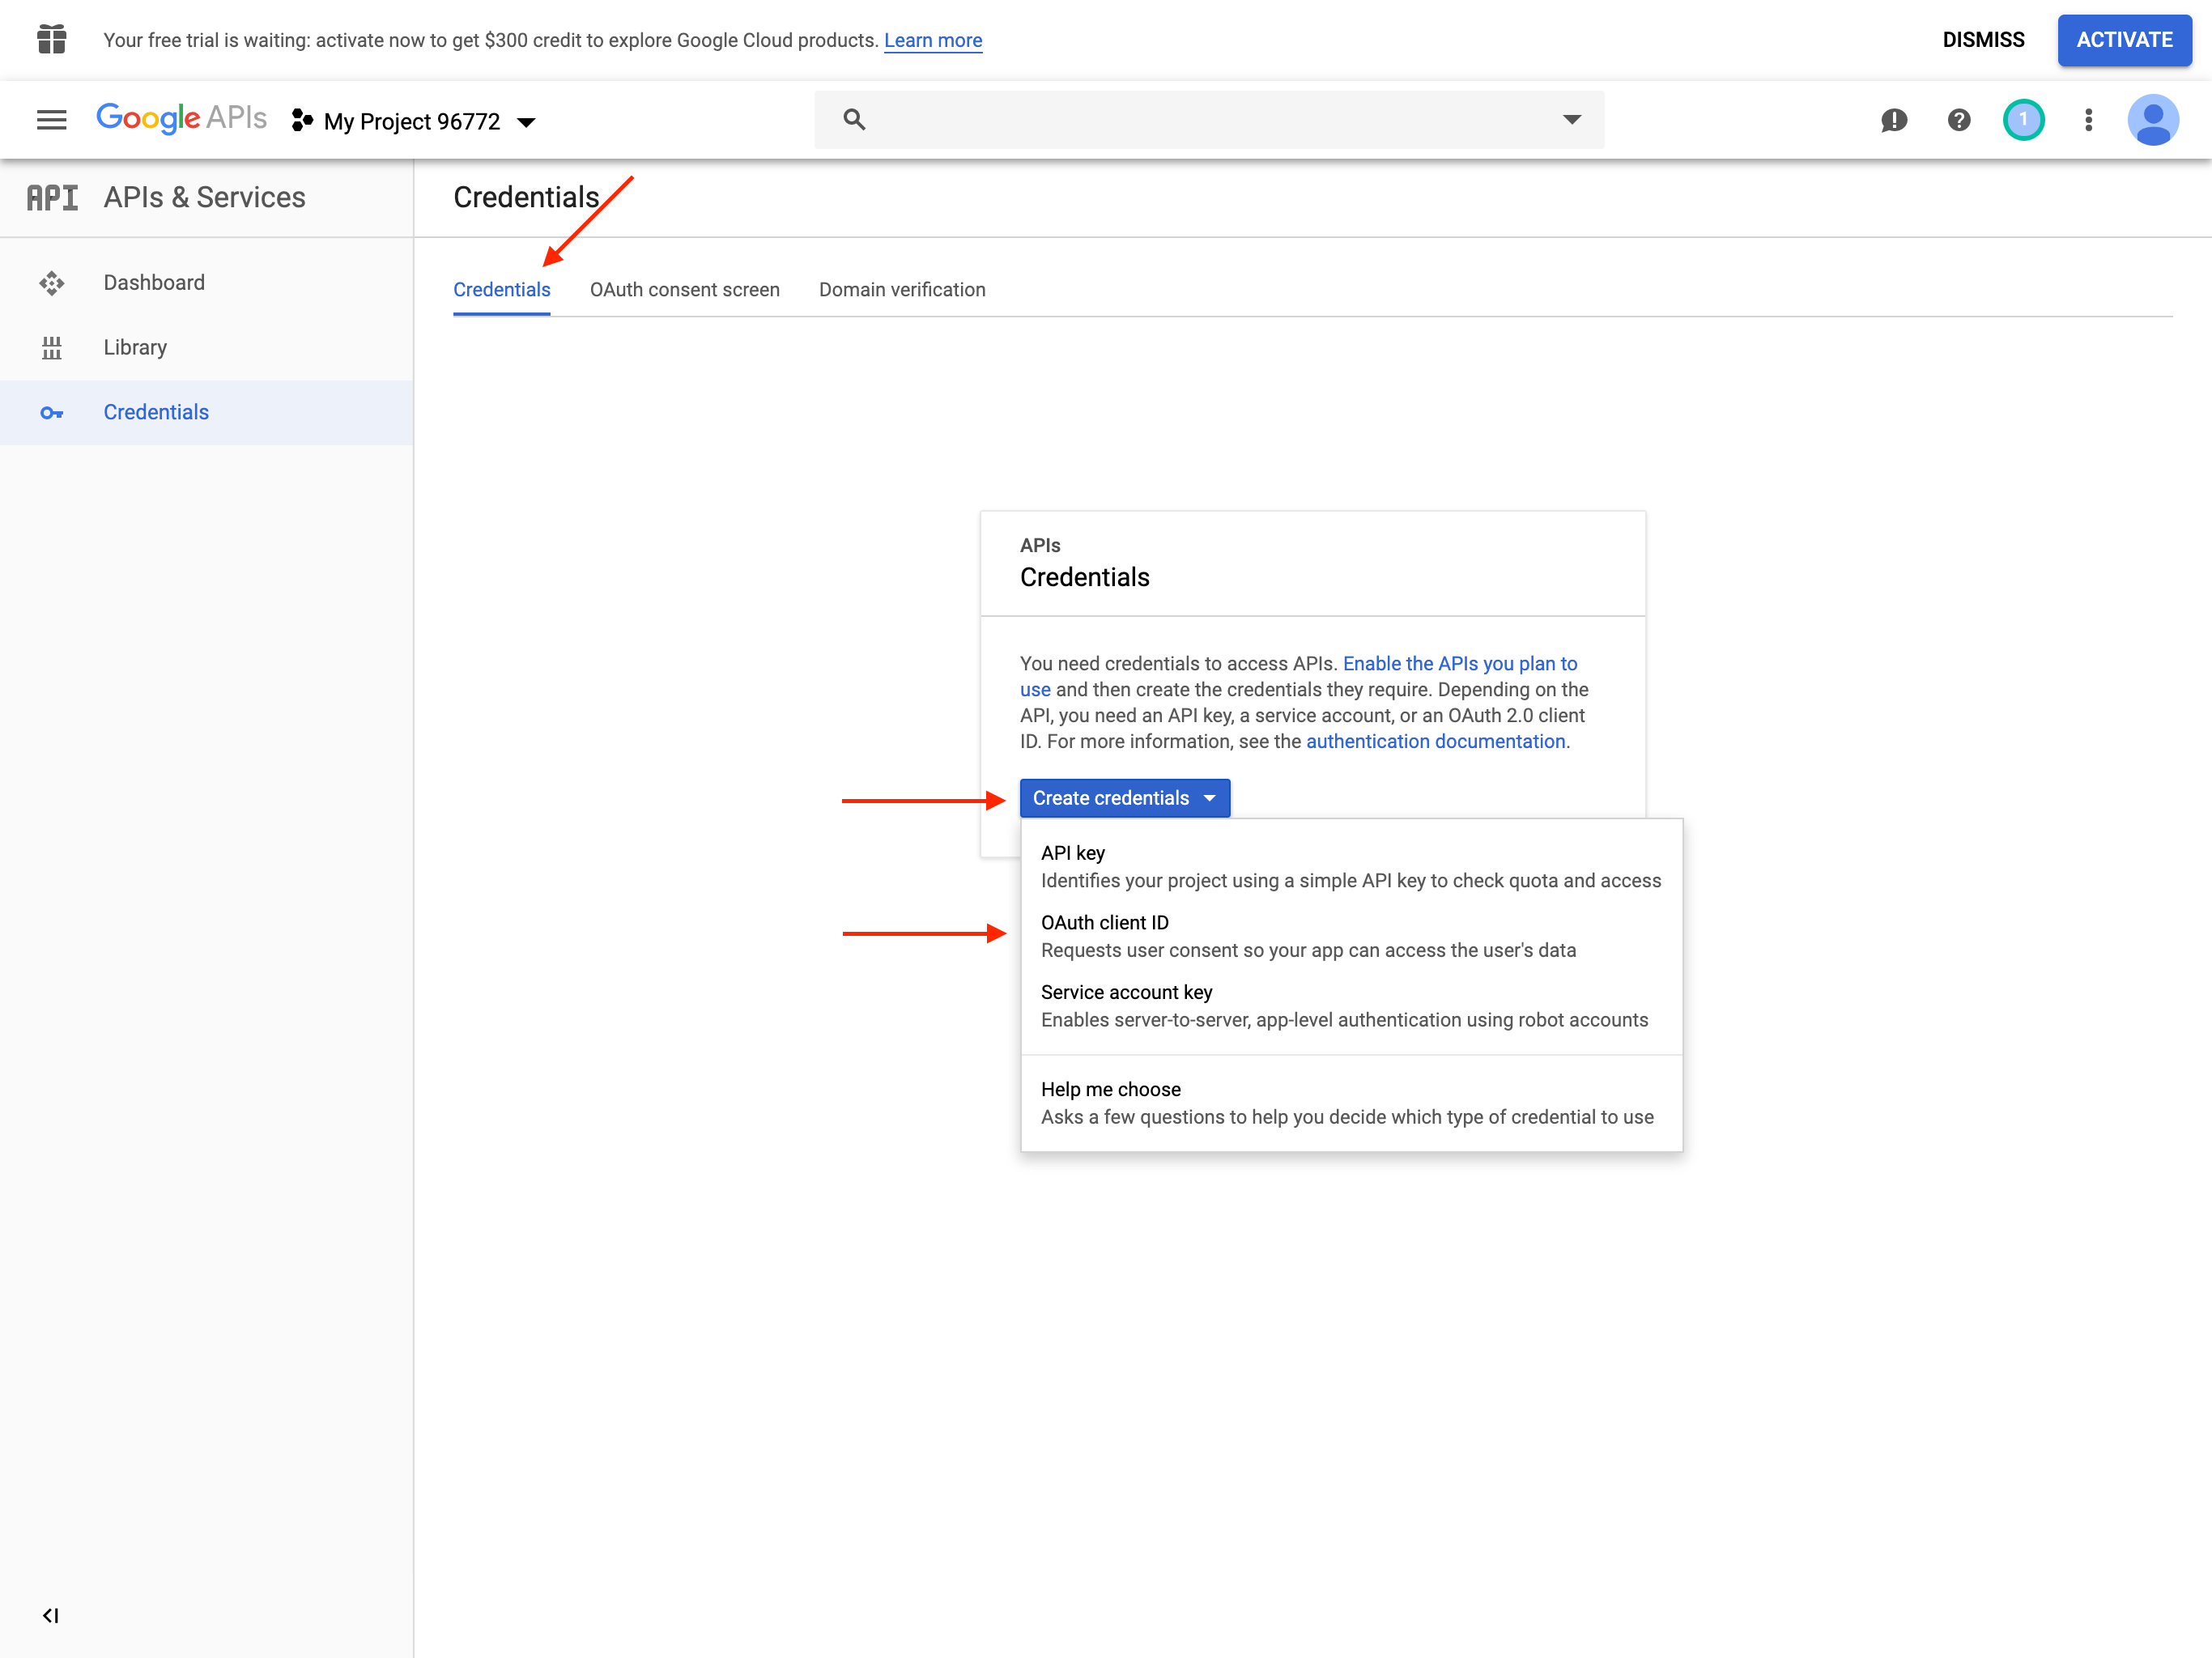
- Navigate to APIs and Services > Credentials section from the menu in the top-left corner
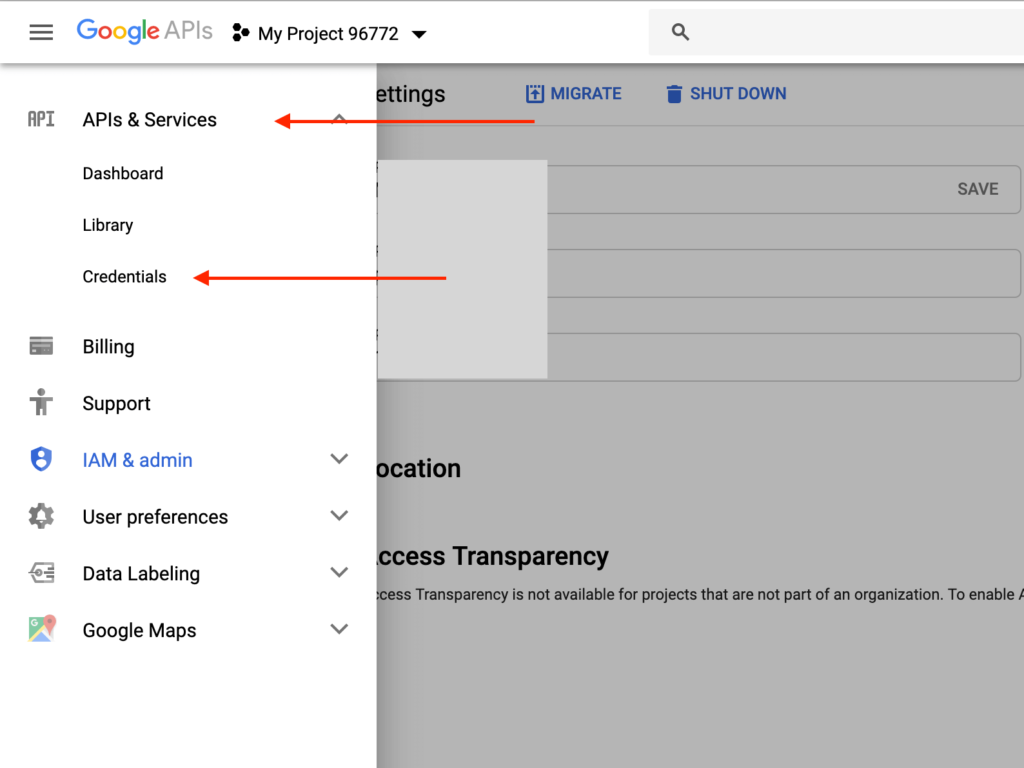 If you do not find the menu above, you can use this URL to open the menu
https://console.developers.google.com/apis/credentials?folder=&organizationId=[orgID]&project=[projectID]
- Navigate to OAuth consent screen section

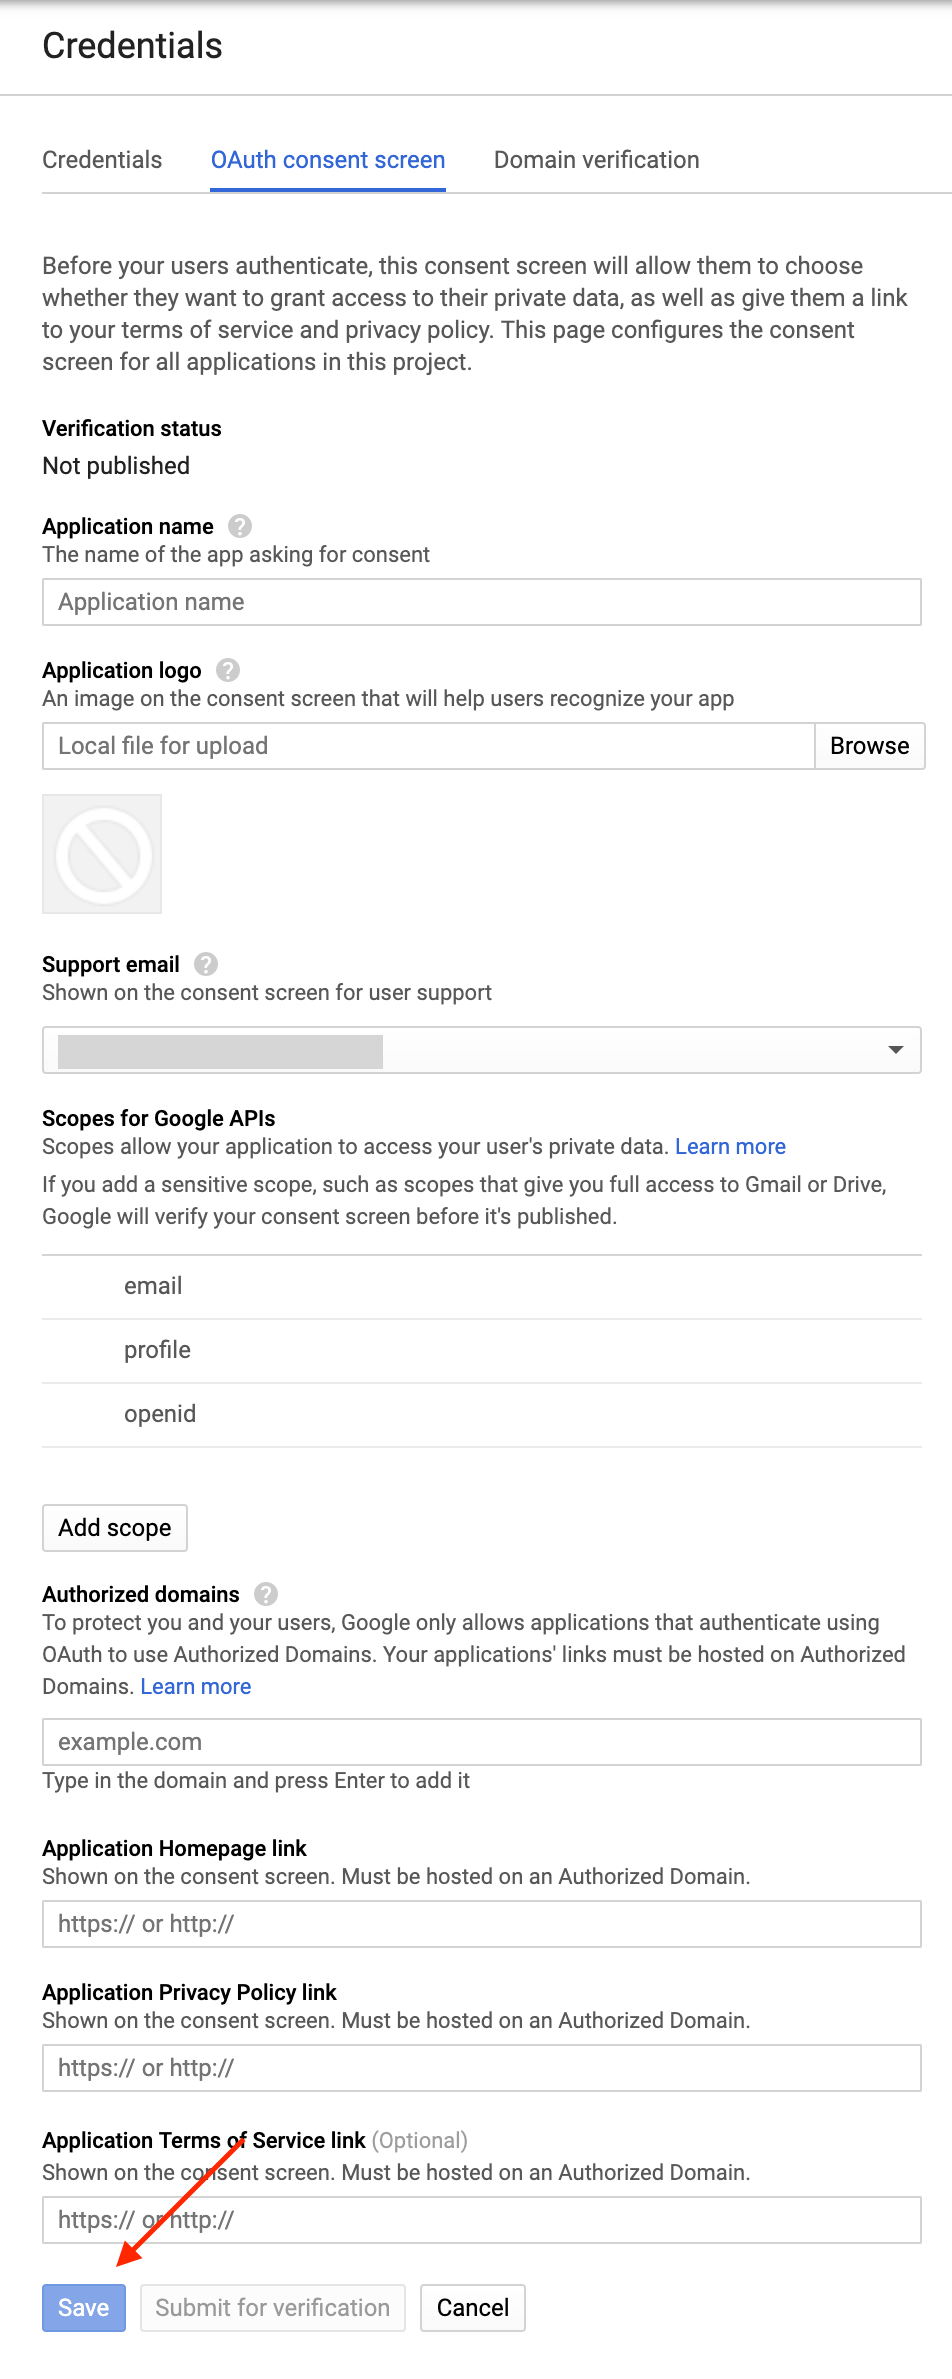
- Complete the fields as described below

- Application Name: Specify the name of your app (you can enter whatever name you want, but it is recommended that you enter your website or company name in this field).
- Application Logo: Upload the logo of your website that you will integrate social login.
- Support Email: Select/Specify the email
- Scopes for Google APIs: Three fields should already be added – email, profile, and OpenID. If these are not there, add these.
- Authorized Domains: Specify your website domain. For example, if your website homepage URL is www.website.com or website.com, you must save website.com. Click outside of the textbox after entering the domain name, otherwise, it will not be saved. You can fill other optional fields.
- Click the Save button.
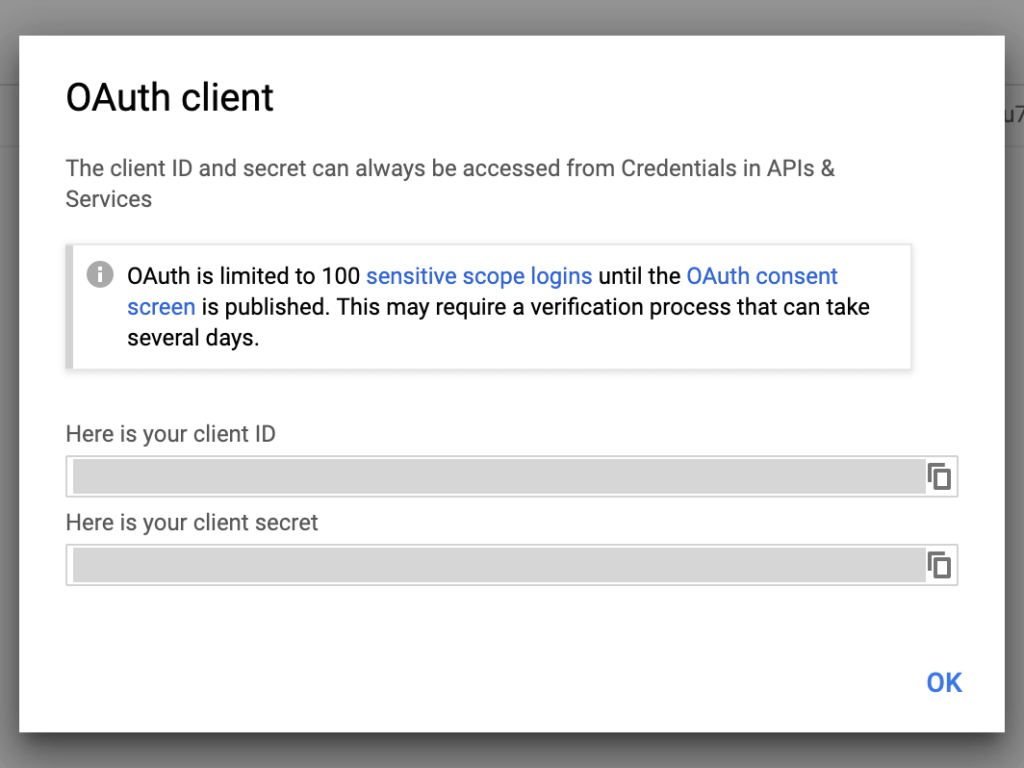
- Click OAuth client ID after clicking Create credentials button in the Credentials section

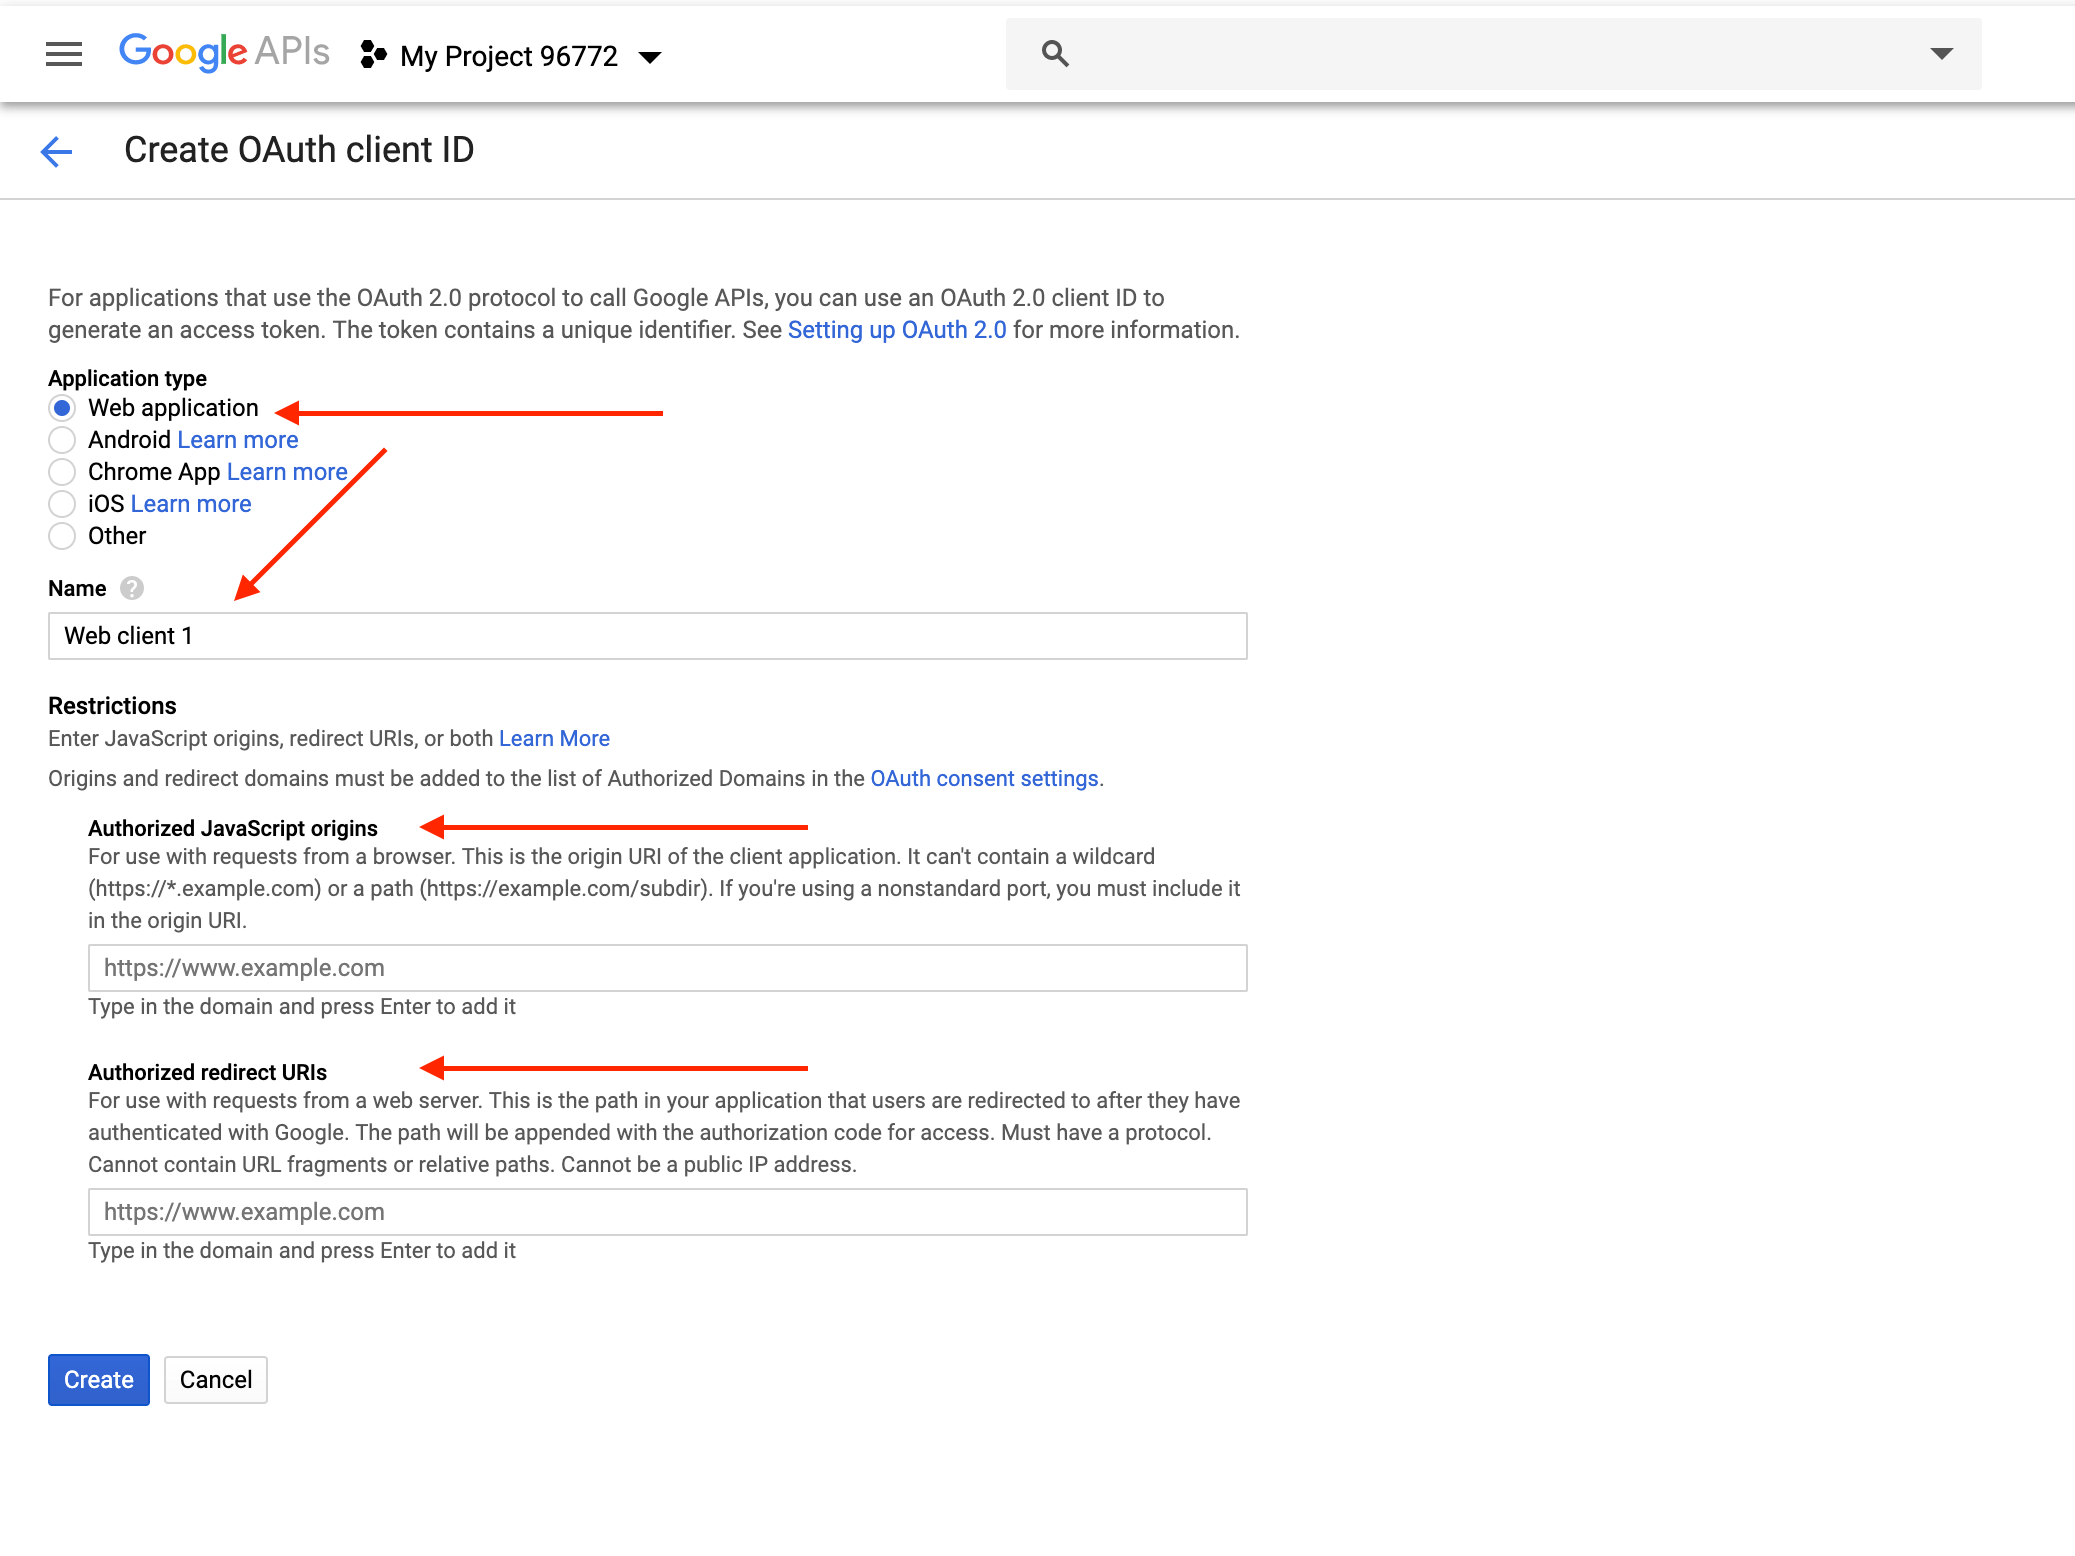
- Complete the fields as described below

- Application Type: Select Web application
- Name: Specify the name of your app (you can enter whatever name you want, but it is recommended that you enter your website or company name in this field).
- Authorized JavaScript origins: Leave empty
- Authorized redirect URIs: Open your website and go to Customizer > JNews : Social, Like & View > Social Login Setting , in there you will see Social Login Info section that will show the Callback URL. Copy and paste in this option. After entering the URL. Click outside of the textbox after entering the domain name, otherwise, it will not be saved.
- Click Create button
- Copy Client ID and Client Secret and paste these in the Google Client ID and Google Client Secret options on the customizer, respectively. Do not forget to Save Changes after configuring all the setting.


Created in Denpasar, Bali by Jegtheme. 2026