With JNews you can provide interesting weather forecast for your site’s visitors. It allows you to easily add weather forecast element into top header, widget, post, page, or everywhere you want on your site.
Not only that, we have also integrated JNews Weather with four well-known weather forecast data sources. There’re Yahoo Weather, Dark Sky, Open Weather Map and Aeris Weather.
In this part, we will guide you how to use weather forecast feature with JNews that only take few minutes and your site will be able to report the weather as seen on TV. There are few things that we’ll explain to you in this part :
- Install JNews Weather Plugin
- General Weather Setting
- Setup Weather on Top Bar Header
- Setup Weather Widget
- Setup Weather Shortcode
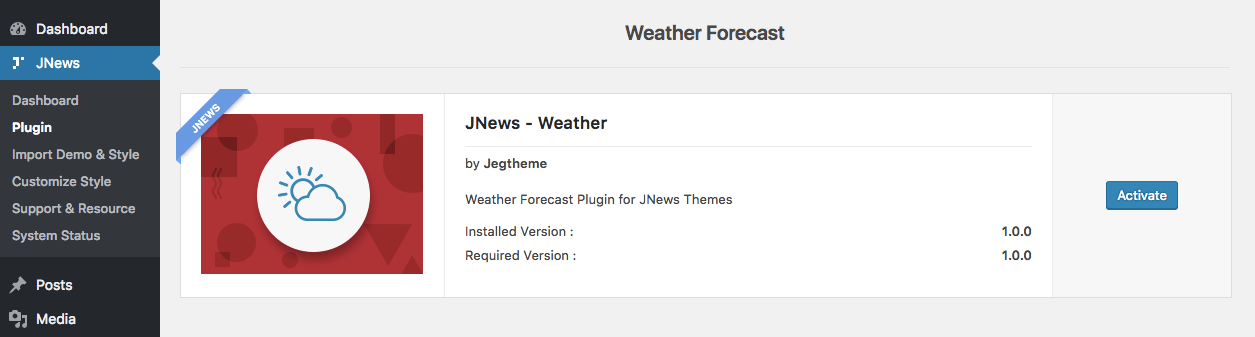
1. Install JNews Weather Plugin
To enable weather forecast on your website, you just need to install JNews – Weather plugin. You can easily install and activate this plugin from Plugin Dashboard by go to JNews Dashboard → Plugin
2. General Weather Setting
Right after you’ve done with the plugin activation, next you can setup general weather settings to fit with your website’s need. You can access general weather setting by simply go to JNews Dashboard → Customize Style → JNews : Additional Option → Weather Setting
- Weather Forecast Source
On this option, you can choose which weather forecast source that you want to use.
Yahoo Weather, Dark Sky, and Aeris Weather are no longer functioning. Additionally, OpenWeather currently restricts API usage, necessitating a subscription for access to its services. If you prefer a free Weather API, your only option is WeatherAPI.
- Dark Sky Secret Key
In case you have chosen Dark Sky source, this option will appear. Insert your Dark Sky secret key that you can find on this page here. - Open Weather Map API Key
In case you have chosen Open Weather Map source, this option will appear. Insert your Open Weather Map api key that you can find on this page here. - Aeris Weather Client ID
In case you have chosen Aeris Weather source, this option will appear. Insert your Aeris Weather client id that you can find on this page here. - Aeris Weather Client Secret
Right after you insert Aeris Weather client id, then you will need to insert Aeris Weather client secret that you can find on this page here. - WeatherAPI API Key
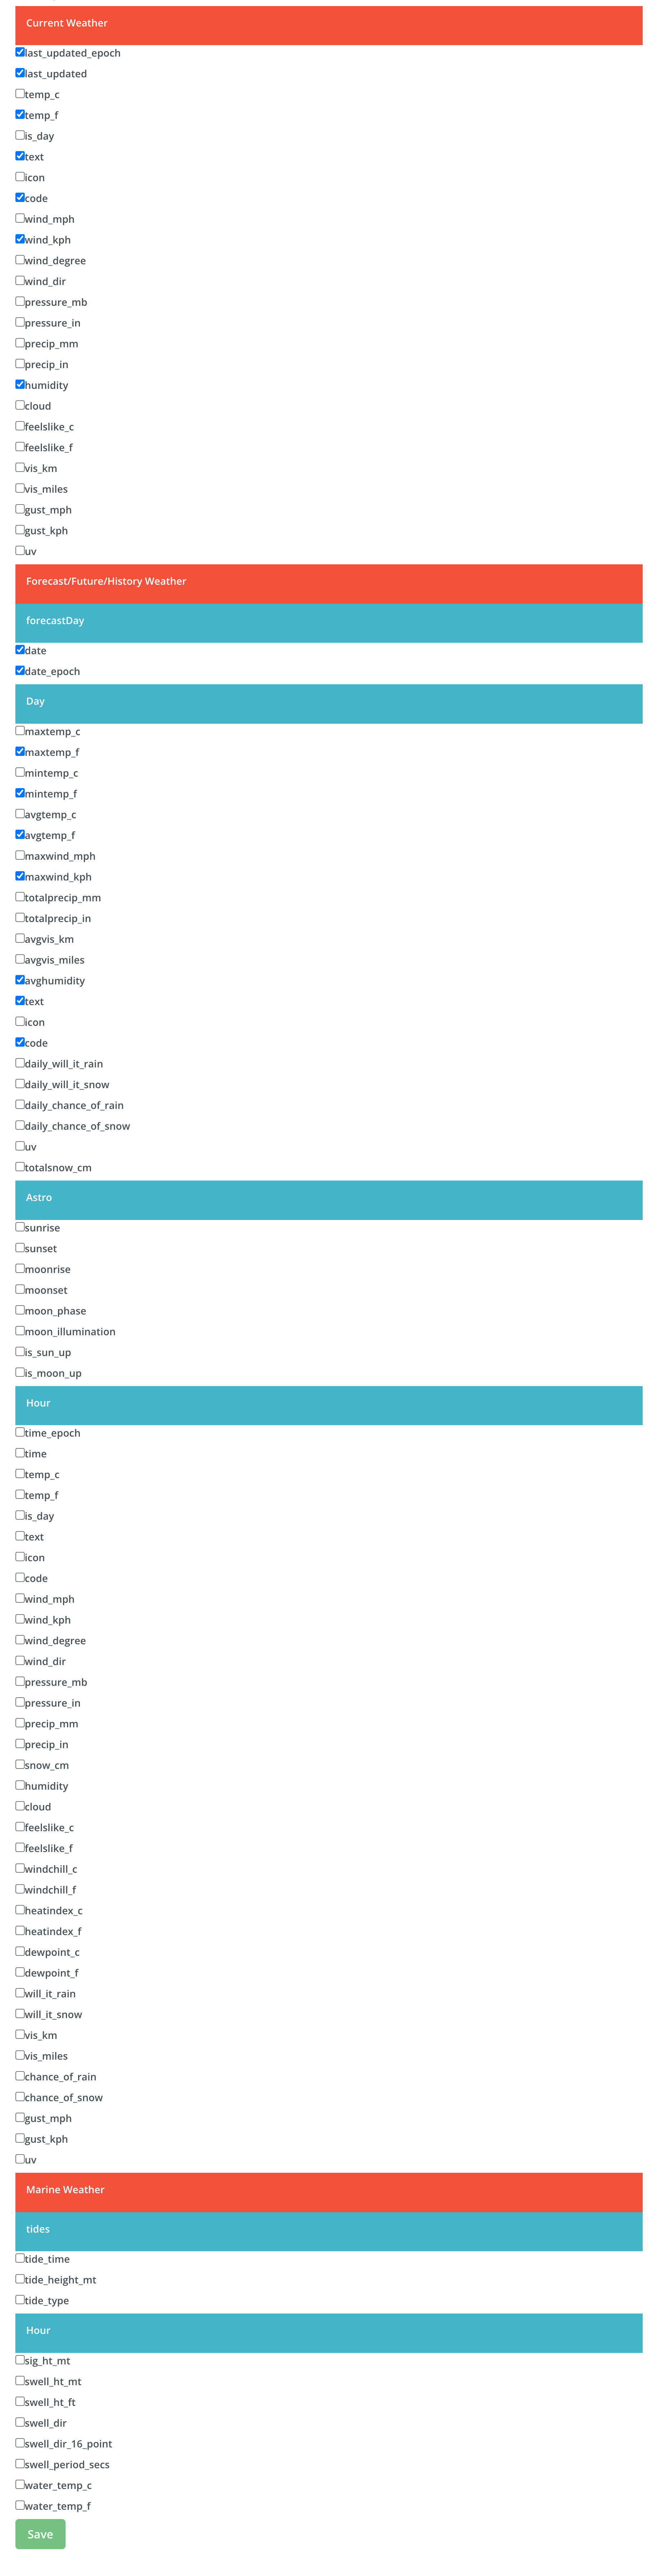
In case you have chosen the WeatherAPI source, this option will appear. Insert your WeatherAPI API key which you can find on this page here. - Additional Configuration for WeatherAPI
In case you have chosen the WeatherAPI source, you can follow these settings to make each weather data request faster by modifying the WeatherAPI API Response Fields settings. You can change it on this page, and then adjust the settings as shown in the image below.
- Default Temperature Unit
On this option you can choose default temperature for weather forecast which is Celsius or Fahrenheit. - Weather Cache Expired
On this option you can determine expiration time for the weather forecast data cache.
You will need to refersh the page to see the result of your changes.
If you want to purge the current cache, you just need to choose Disable Cache on the Weather Cache Expired option. Then you can setup the Weather Cache Expired option again right after you refresh the page.
3. Setup Weather on Top Bar Header
To setup weather on Top Bar Header, you can access the weather setting by simply go to JNews Dashboard → Customize Style → JNews : Header Option → Header – Weather Setting
- Top Bar Weather Position
On this option you can determine the weather element position on top bar header. - Weather Location
On this option you will need to insert city name only or city name and country code. (ex: london or london, uk) - Weather Auto Detect Location
Turn on this option if you want to automatically detect weather location of your site’s visitor. - Top Bar Weather Item
On this option you can determine behavior of the weather forecast’s next day info. You can also hide them. - Weather Item Content
On this option you can determine the content of weather forecast info.
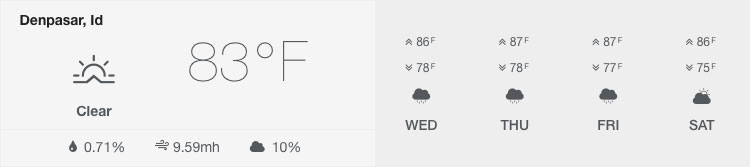
The following attached image is preview of the weather forecast on top bar header.

4. Setup Weather Widget
To setup weather on Widget, simply go to WordPress Dashboard → Appearance → Widgets
Then you can insert JNews : Weather widget into certain widget area. Inside widget options, you will find the following list options below :
- Title
Insert title text for the weather widget. - Weather Location
Insert city name only or city name and country code. (ex: london or london, uk) - Location Name
Insert location name for weather widget. Leave it blank if you want to use the default location that based on weather location field. - Date Format
You can set date format of the weather widget, for more detail about this format, please refer toDeveloper Codec. Leave it blank if you don’t want to show them. - Detail Weather Forecast
On this option you can choose show or hide detail information about weather forecast of the current day. - Next Days Weather Forecast
On this option you can determine behavior of weather forecast’s next day info. You can also hide them. - Number of Weather Item
On this option you can determine the number of weather item that you want to show. This option will not work if you hide next days weather forecast info. - Image Background
On this option you can insert an image for background of the weather widget. If you leave blank this option, the default style will be used automatically.
The following attached images are weather preview on widget with and without background.
5. Setup Weather Shortcode
You can insert weather element into single post or page using Weather Shortcode. If you’re using Visual Composer, you can also insert weather shortcode by using Text Block element, then you can use weather shortcode fully.
In this part we will guide you how to use weather shortcode. You can follow the instructions below:
- First, edit certain post on your website where weather forecast needs to be inserted.
- If you have selected a post, then put the cursor on the post content section where you want to place the weather forecast and click Weather button.
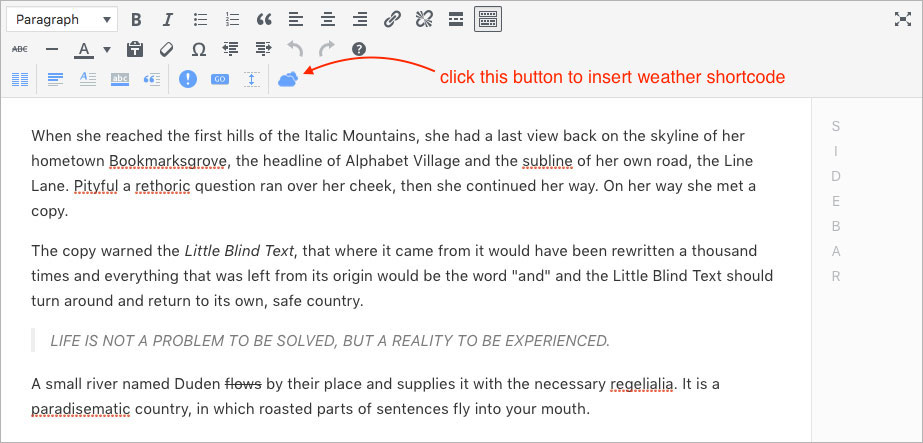
- After Weather panel option appears, you will find the following options list below :
- Weather Location
Insert city name only or city name and country code. (ex: london or london, uk) - Auto Detect Location
Check this option if you want to automatically detect weather location of your site’s visitor. - Next Days Weather Forecast
On this option you can determine behaviour of weather forecast next day info. You also can hide them. - Number of Weather Item
On this option you can determine the number of weather item that you want to show. This option will not work if you hide next days weather forecast info.
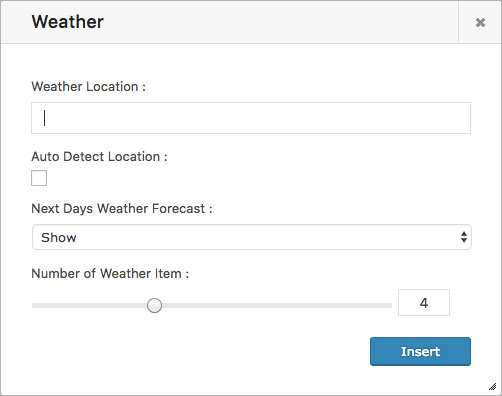
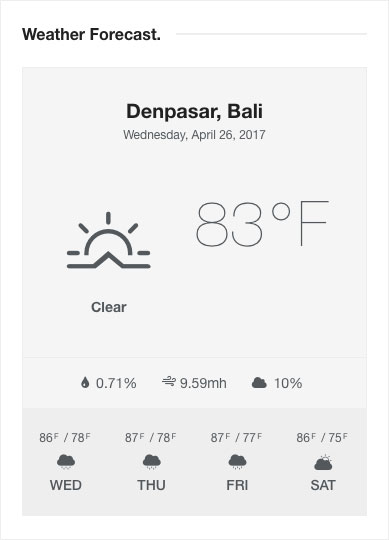
Don’t forget to hit Insert button when all is well-set. - Weather Location
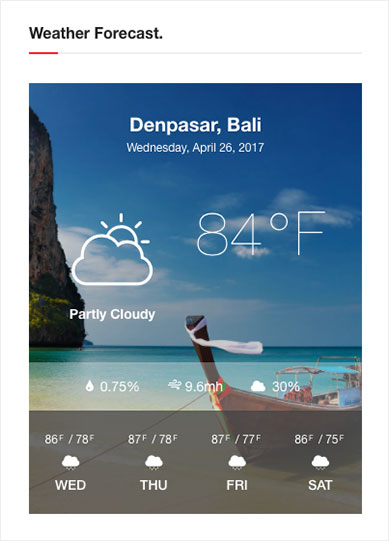
The following attached image is the weather shortcode preview on a website.