Some of the users may not be aware that WordPress actually comes with a handy built-in gallery feature. However, with JNews you can even have more beautiful gallery with unique design. We have improved the default WordPress gallery with more practical gallery feature.
Not only that, we also bring fullscreen expand feature for the gallery with an advertisement slot. In this part, we will guide you how to easily implement JNews Gallery to set up a beautiful gallery so that your photos look even better.
JNews Gallery Plugin
To enable JNews Gallery on your website, you just need to install JNews – Gallery plugin. You can easily install and activate this plugin from Plugin Dashboard by go to JNews Dashboard → Plugin

General Gallery Setting
Right after you’ve done with the plugin activation, next you can setup general plugin settings to fit with your website’s need. You can access general gallery setting by simply hit the Option or go to JNews Dashboard → Customize Style → JNews : Image & Gallery Option → Gallery Shortcode
- JNews Gallery Default Option
In this part you will need to setup several options. These options will be default options for JNews Gallery.
- Turn All Gallery to JNews Gallery
Enabling this option will turn all default slider into JNews Gallery. - Use Slider Zoom with Description
Turn on this option if you want to show image caption when gallery zoomed. - Show Ads Wrapper
Turn on this option if you want to show ads when gallery is zoomed. - Preview Slider Loader Style
On this option you can choose loader style that you want to use for general gallery.
- Turn All Gallery to JNews Gallery
We also provide ad space on gallery preview. You can setup it by go to JNews Dashboard → Customize Style → JNews : Advertisement Option → Preview Slider Ads
- Preview Slider Ads
In this part you will need to setup several advertisement options. These options will be the default options for advertisement of JNews Gallery.
- Advertisement type
On this option you can choose which type of advertisement you want to use for general gallery.
Please note, the following option below will appears based on what kind of advertisement you’ve chosen for this option. - Advertisement Image Image Ads.
On this option you can insert an image as advertisement. We will recommend you to upload 300×250 px image size for best result. - Advertisement Link Image Ads.
On this option you can insert url link where this advertisement image will be heading. - Alternate Text Image Ads.
On this option you can insert alternate text for image alt attribute. - Publisher ID Google Ads.
On this option you can insert data-ad-client or google_ad_client content. - Ads Slot ID Google Ads.
On this option you can insert data-ad-slot or google_ad_slot content. - Desktop Ads Size Google Ads.
On this option you can choose ad size to show on desktop, we recommended you to use auto instead. - Ads Code Script Ads.
On this option you can insert script code of your advertisement. - Advertisement Code Shortcode Ads.
On this option you can insert shortcode of your advertisement.
- Advertisement type
The gallery option setting on above is a global setting. It means, when you change this setting, all of your gallery setting will follow it. But you can override each of this setting on your single gallery with JNews Gallery Setting. We will explain how to setup it later in this article.
Create Gallery
Right after you’ve done with the plugin activation and doing setup general option for gallery, you can create a gallery with JNews Gallery on single post or page.
In this part we will guide you how easy to create a beautiful gallery with JNews Gallery feature easily. You can follow the instructions below :
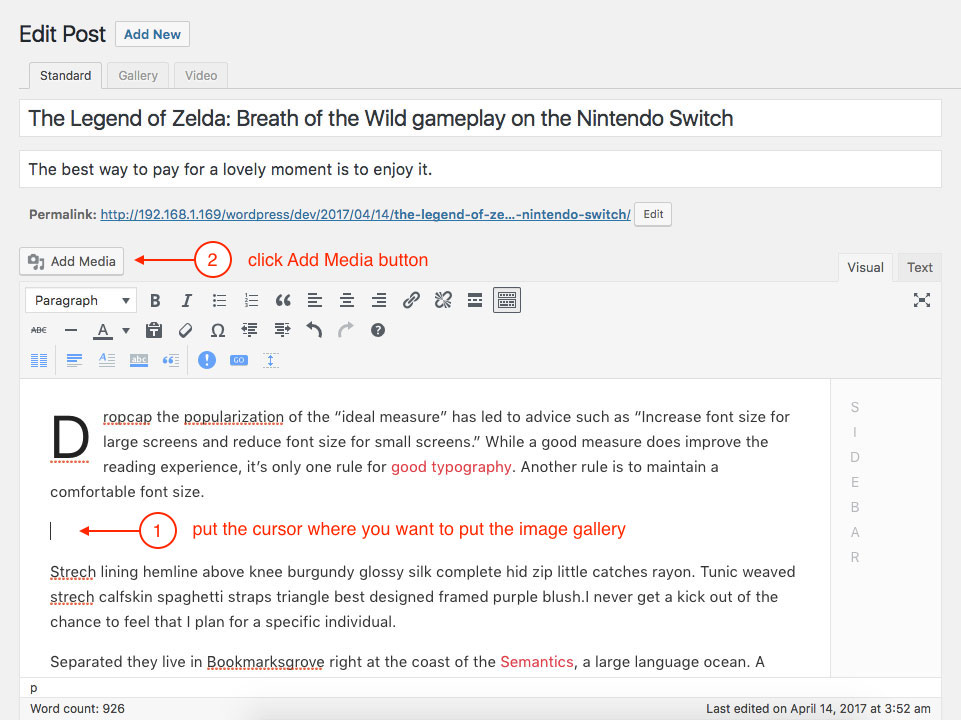
- First, go to edit certain post on your website that you want to insert a gallery inside the post content.
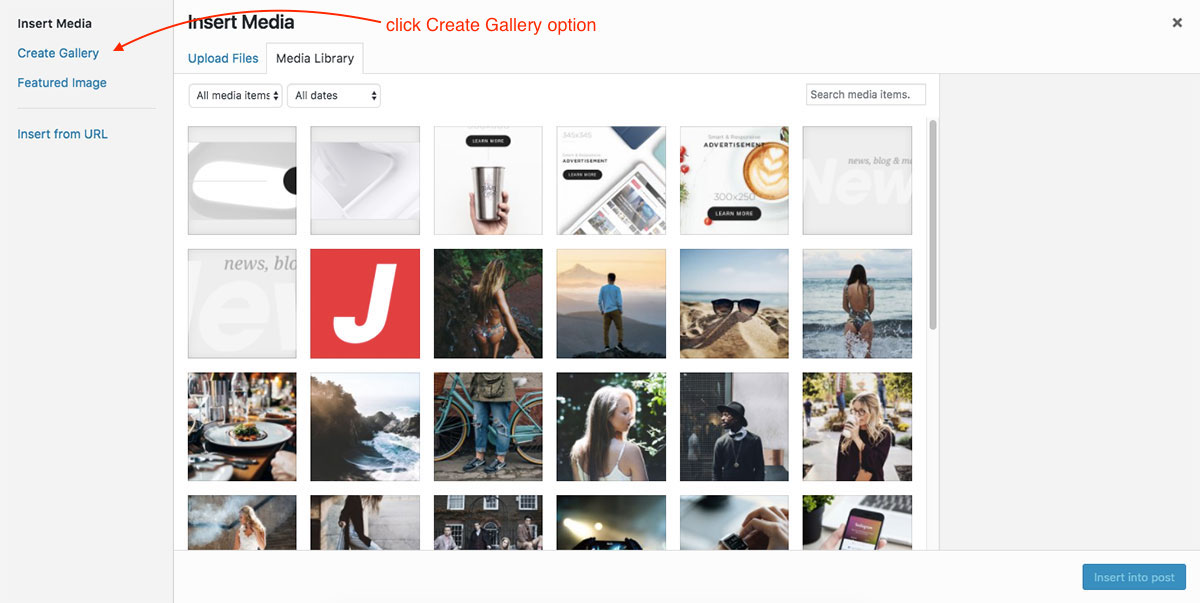
- If you’ve been select a post, then put the cursor on the post content section where you want to place the gallery and click Add Media button.
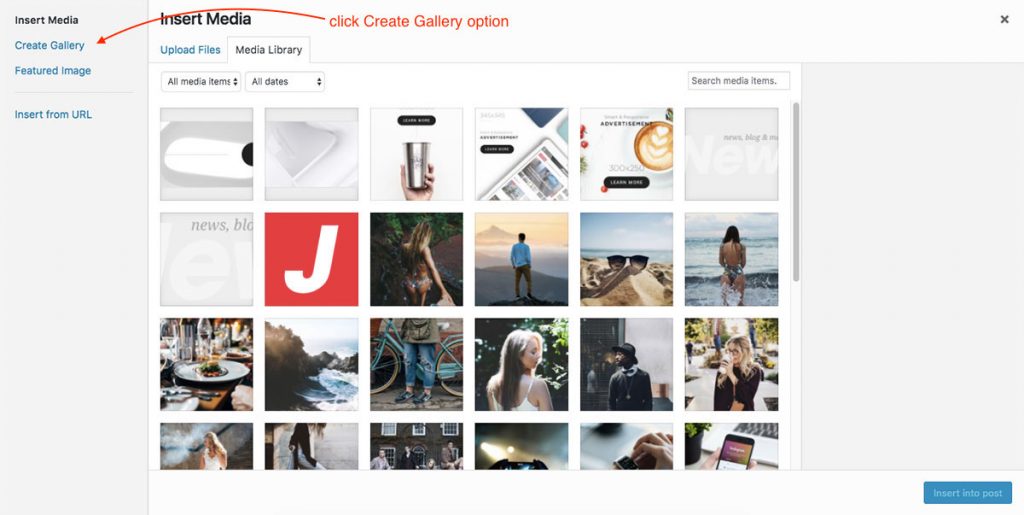
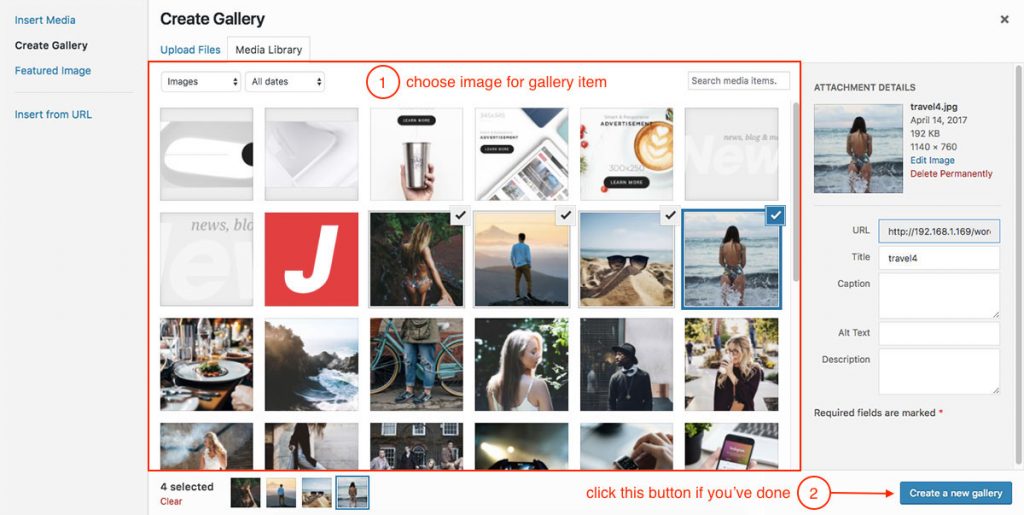
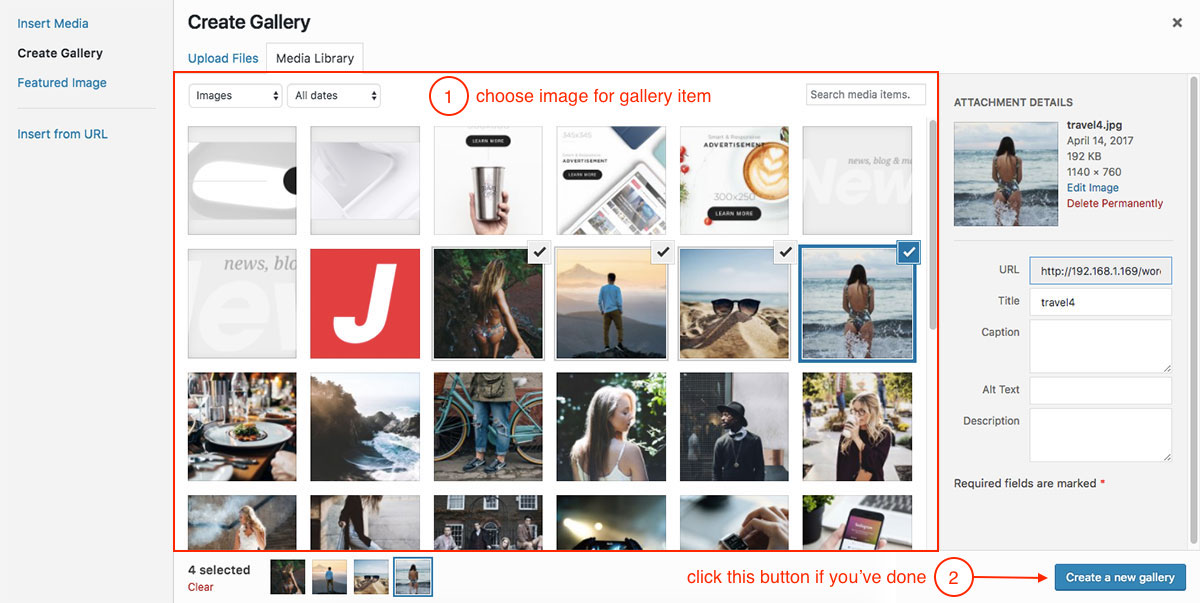
- After Insert Media panel appear, click Create Gallery option on the left panel.
- Then Create Gallery panel will appear and you can choose multiple image that you want to use as image gallery items. If you’ve done then click Create a new gallery button on the right bottom panel.
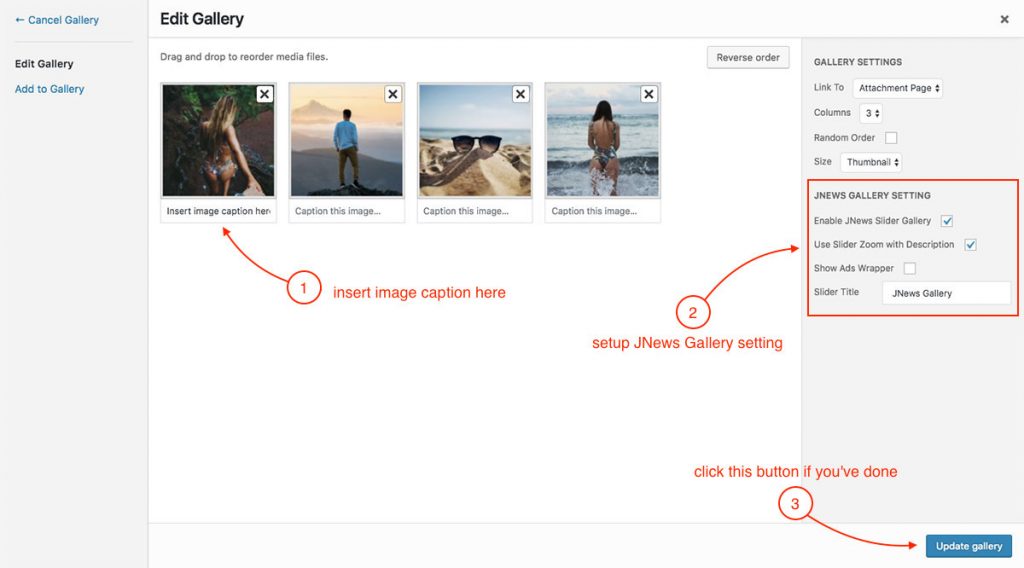
- Next Edit Gallery panel will appear. On this panel you will need to a couple things. You can insert caption on each image gallery item and also you will notice that there is JNews Gallery Setting section on the right panel. Here’re the following options that you will need to setup on the JNews Gallery Setting :
- Enable JNews Slider Gallery
Turn on this option to enable JNews Gallery. - Use Slider Zoom with Description
Check this option if you want to show image caption when gallery is zoomed. - Show Ads Wrapper
Check this option if you want to show ads when gallery is zoomed. - Slider Title
Insert text for gallery title.
- Enable JNews Slider Gallery

Gallery Preview
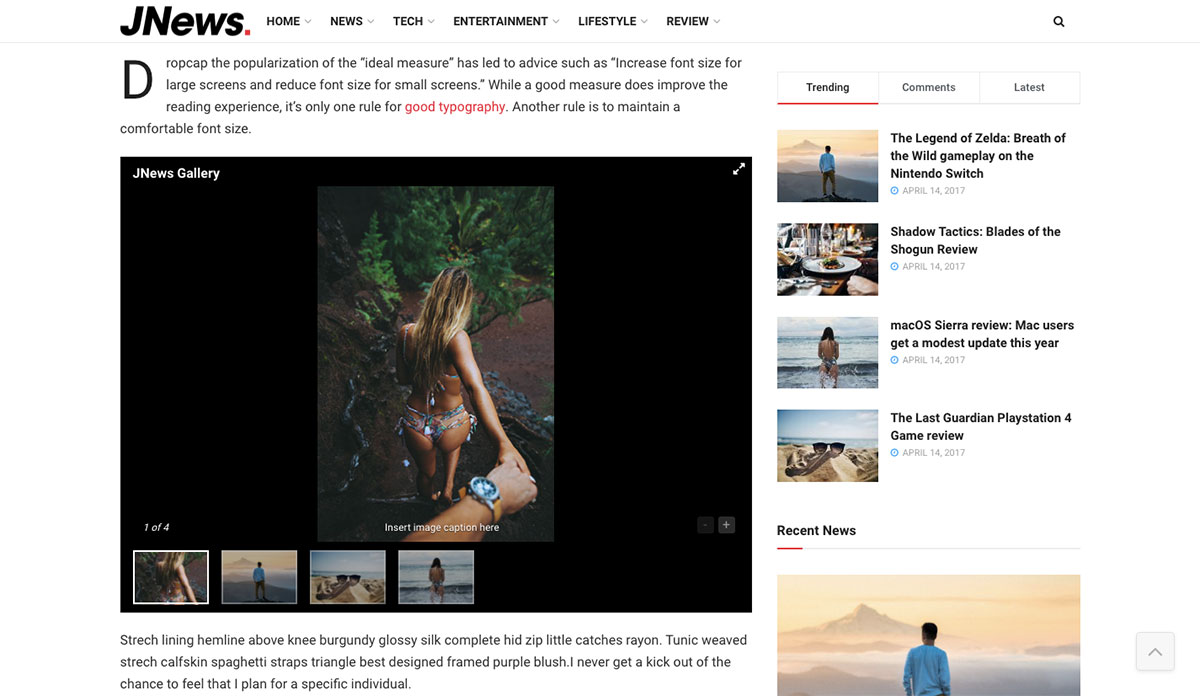
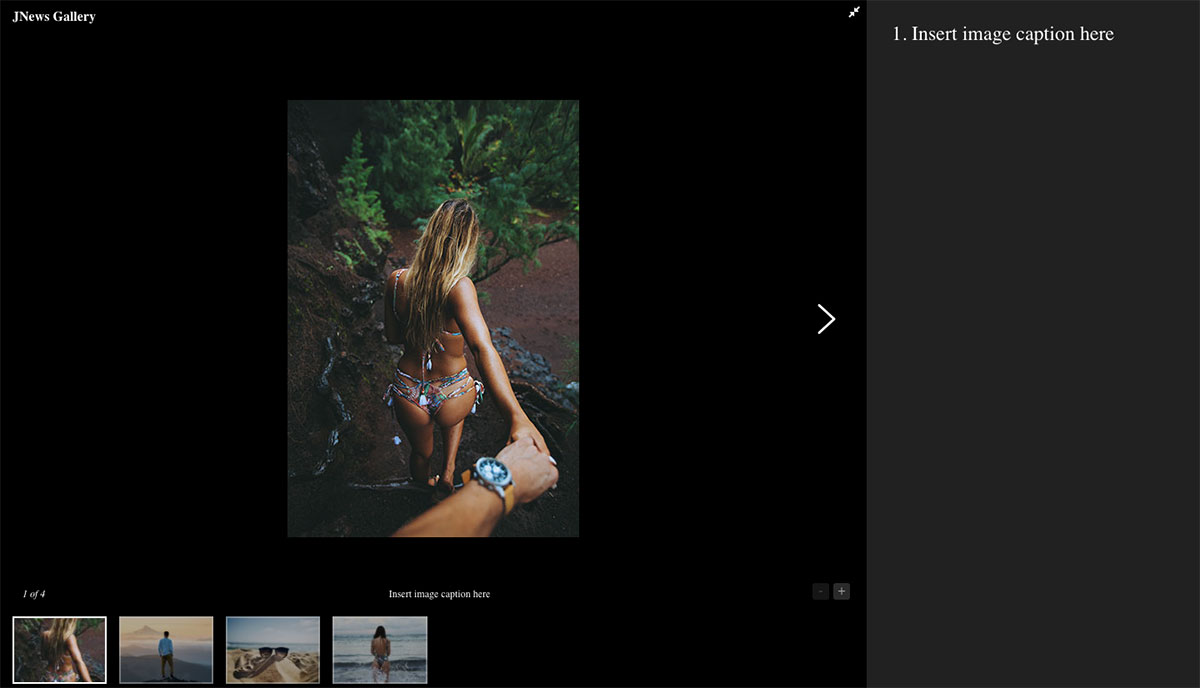
The attached images below are the the examples of the gallery preview.