Paywall is a premium feature from JNews Blocks used for creating subscription or payment based content for your website. Your reader needs to buy a subscription or unlock package in order to read your post content.
Integrated with the popular plugin WooCommerce, will give you an easy way to setup products, managing orders, and payment.
There’re a few things that we’ll explain to you on this section :
- Installation & Requirements
- Create Paywall Product
- Displaying Paywall Product
- Setup Single Post Template
- Setup Account Page
- Setup Payment Method
- Setup Content Restriction
1. Installation & Requirements
To enable and use the Paywall feature, you need to have a JNews Blocks Pro license. After that, you need to activate the following plugins:
- Gutenverse
- Gutenverse Pro
- JNews Blocks
- JNews Blocks Pro
- WooCommerce
Once all of these plugins are activated, make sure you have activated your JNews Blocks Pro license.
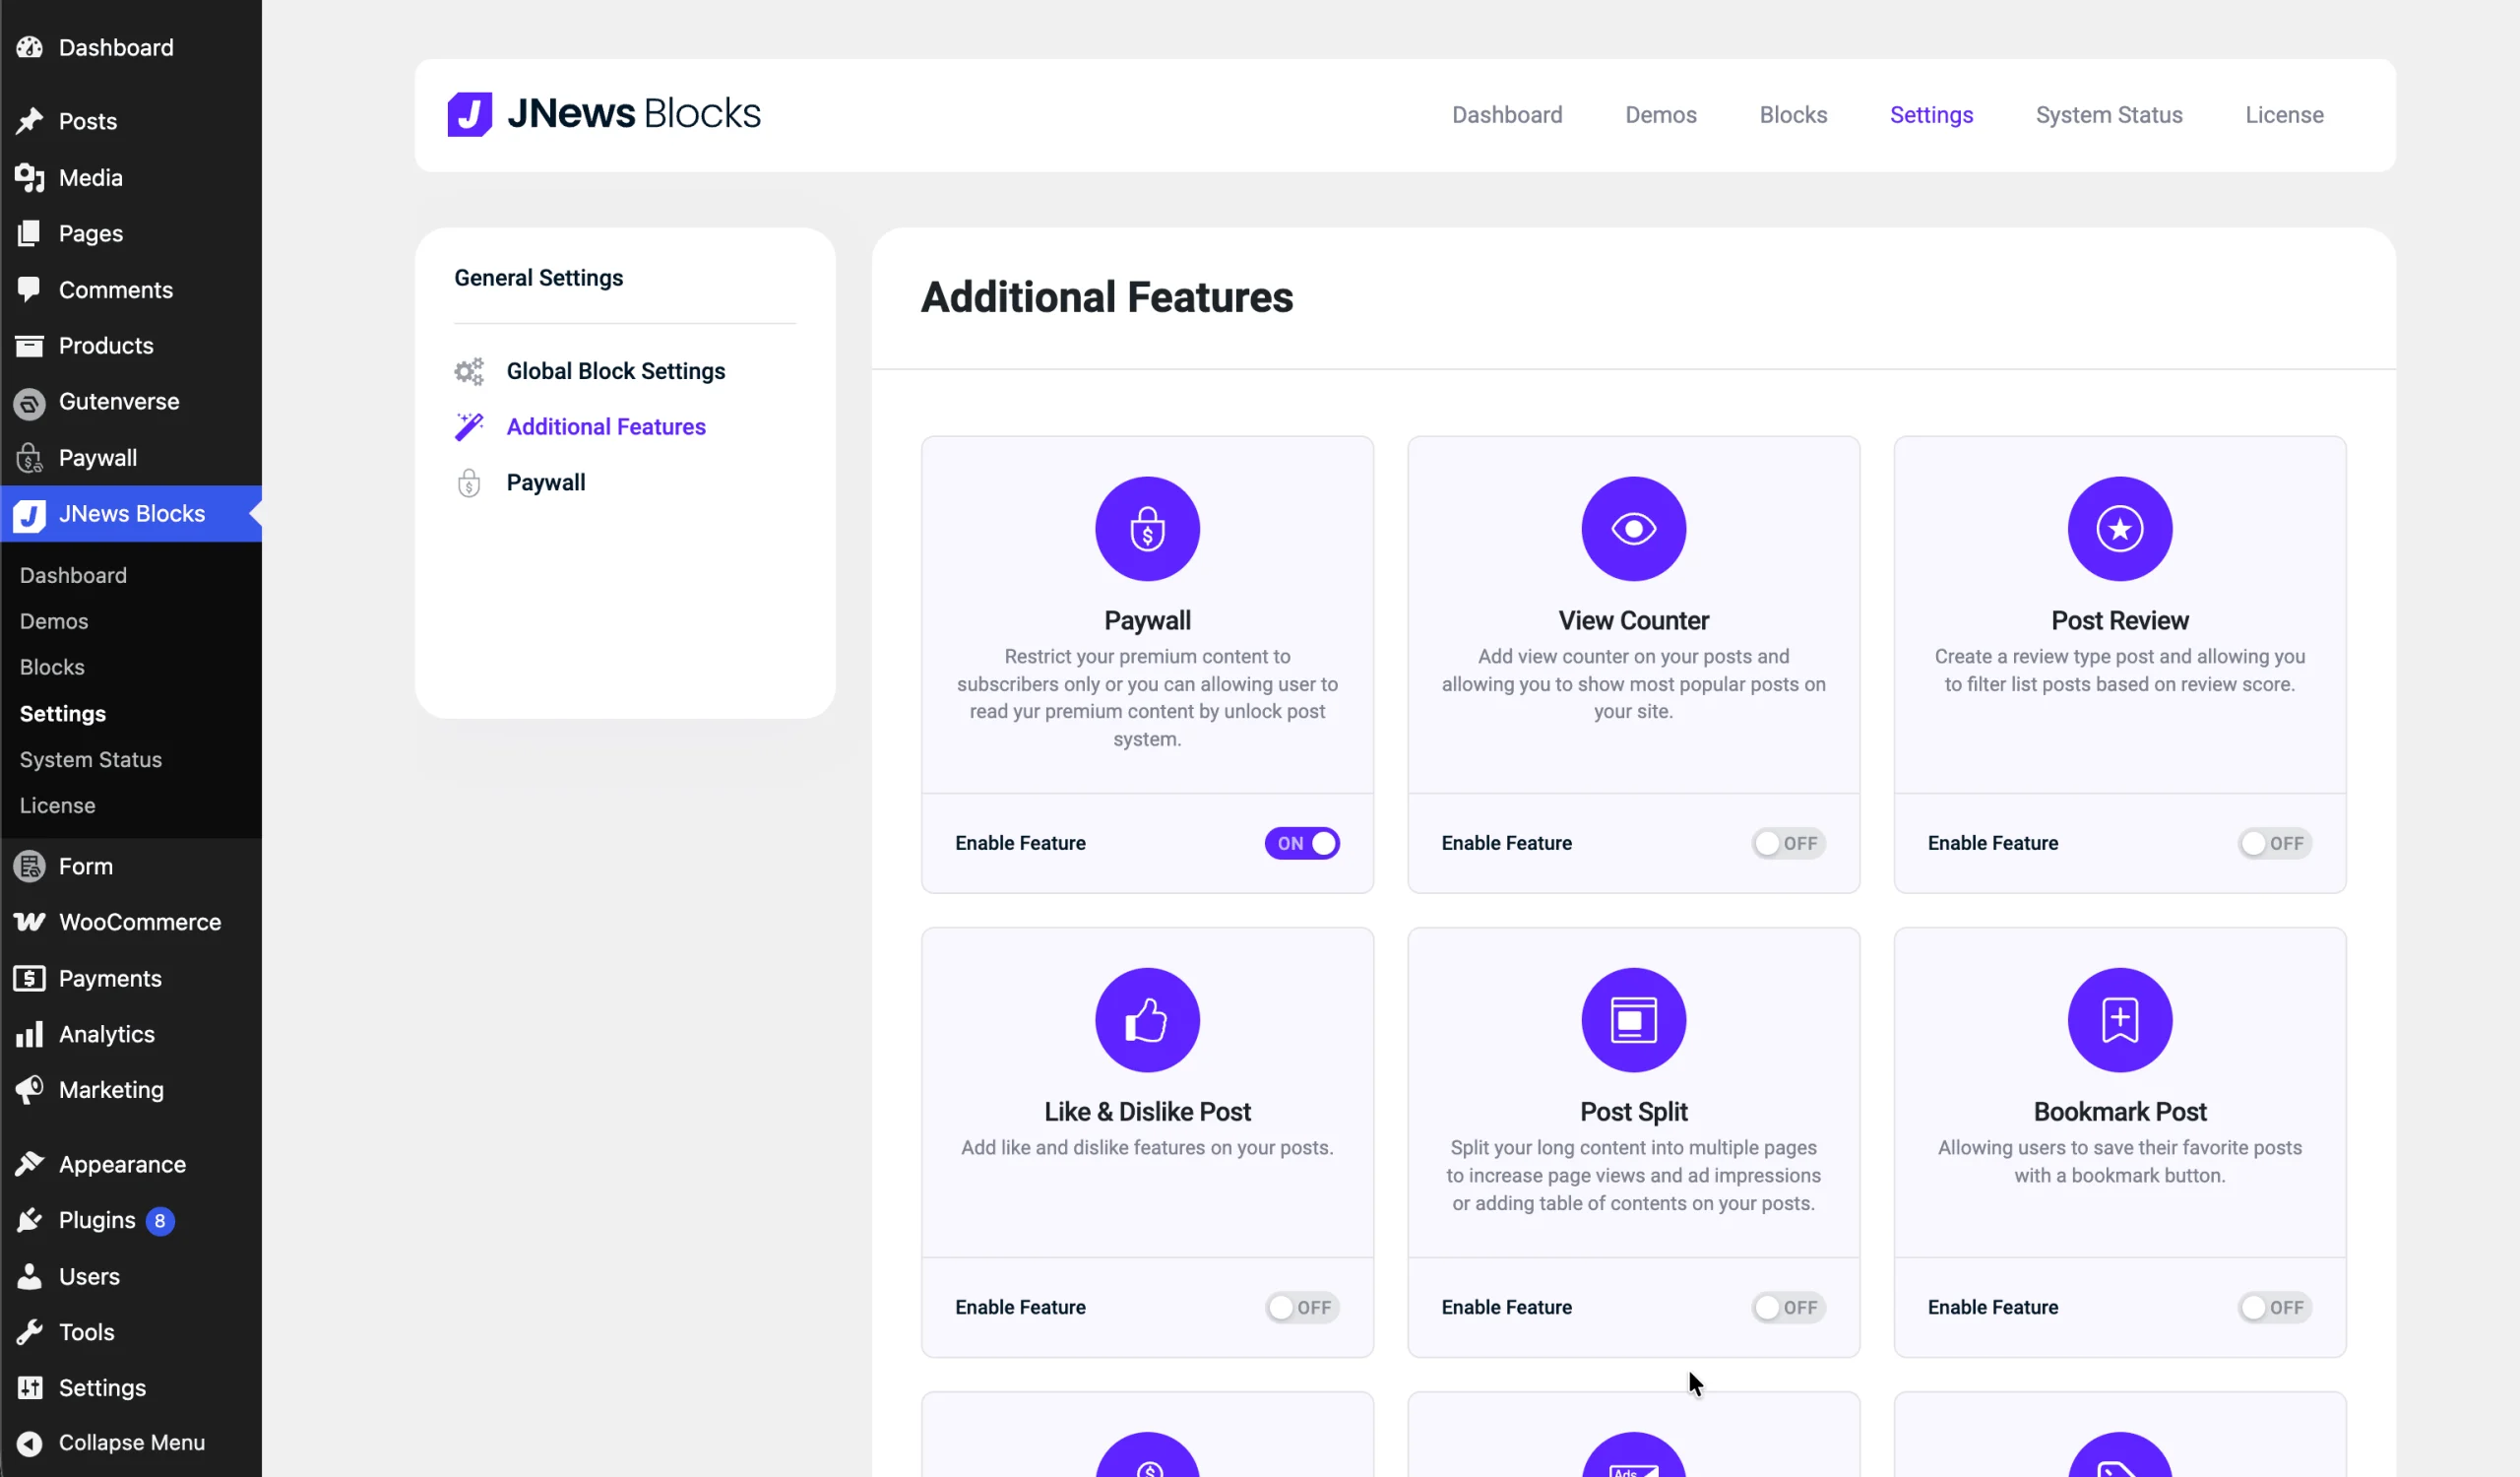
After that, you can go to the JNews Blocks -> Settings -> Additional Features menu and enable the Paywall feature.
2. Create Paywall Product
To create Post Paywall products is the same way as you create other WooComerce products. You need to go to Dashboard -> Products -> Add New Product
Then in the Product Data, you can choose these product types :
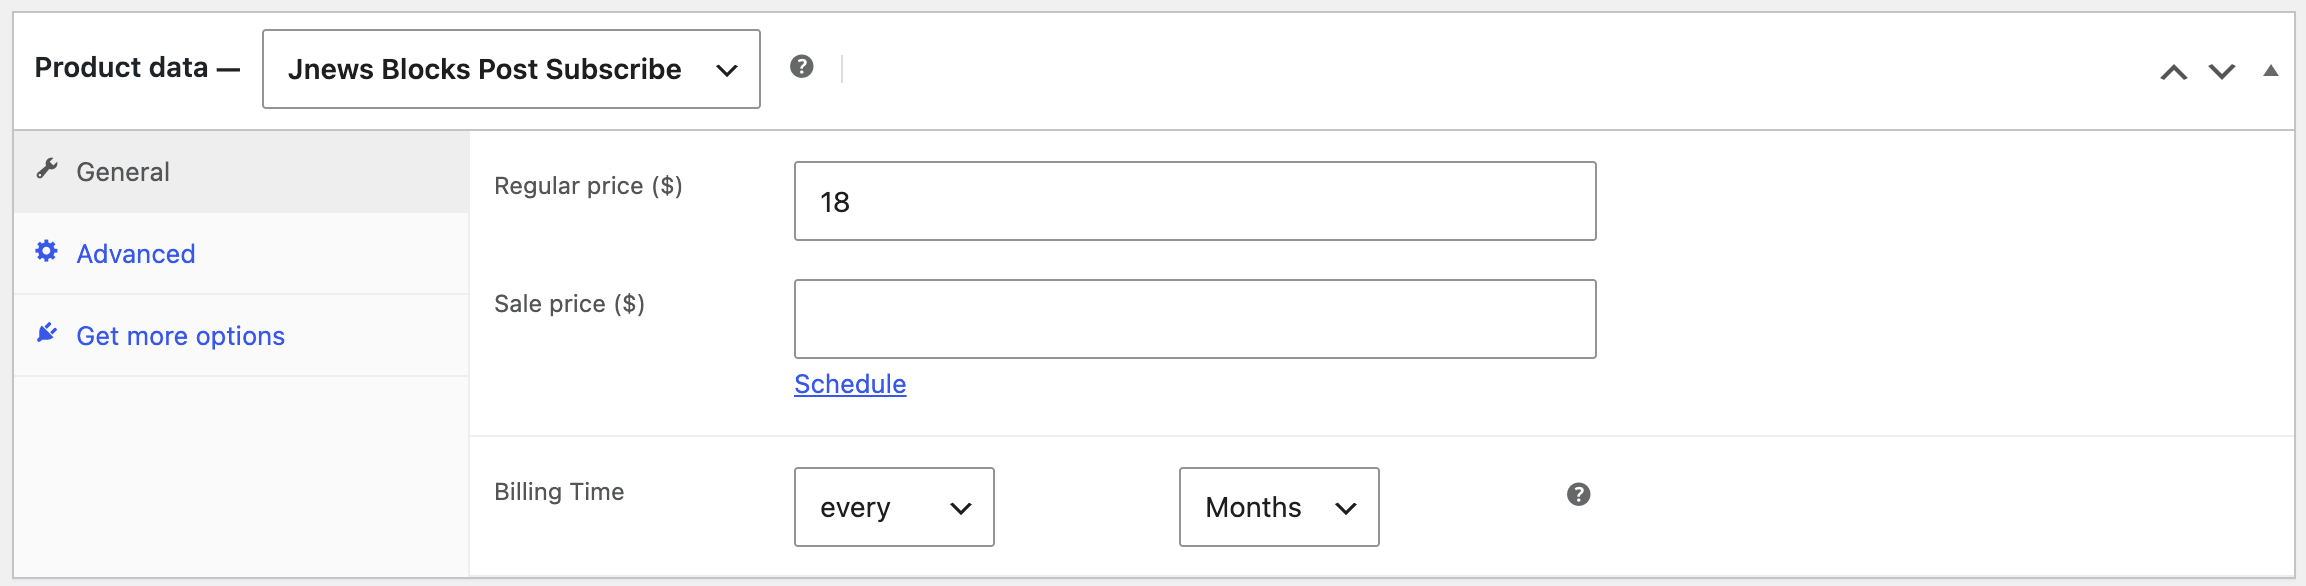
- JNews Blocks Post Subscribe
On this product, you need to set the product Regular Price and Billing Time
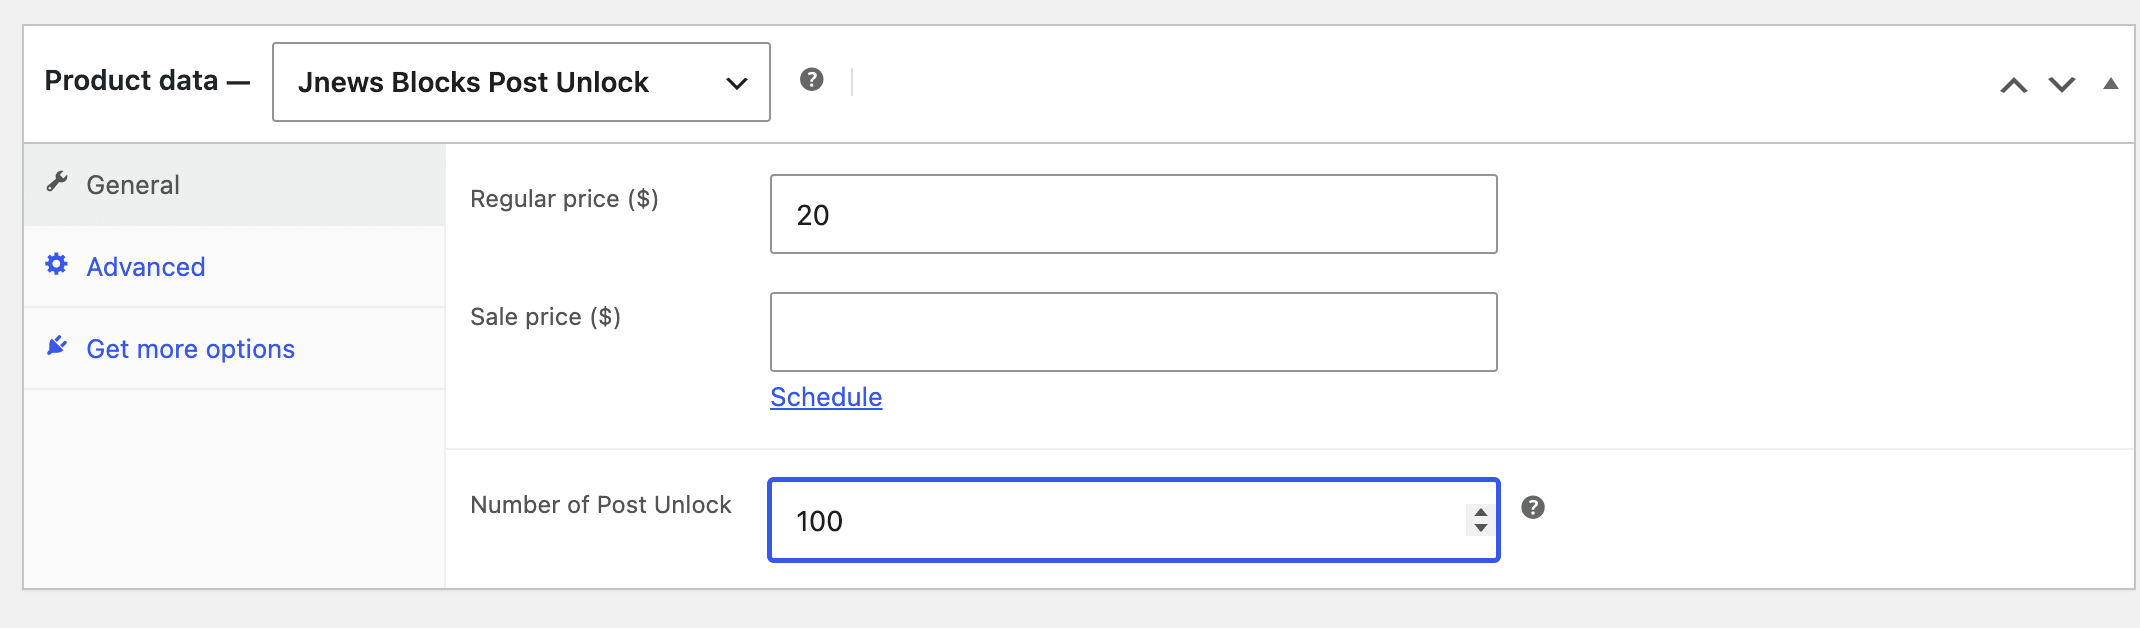
- JNews Blocks Post Unlock
On this product, you need to set the product Regular Price and Number of Post Unlock
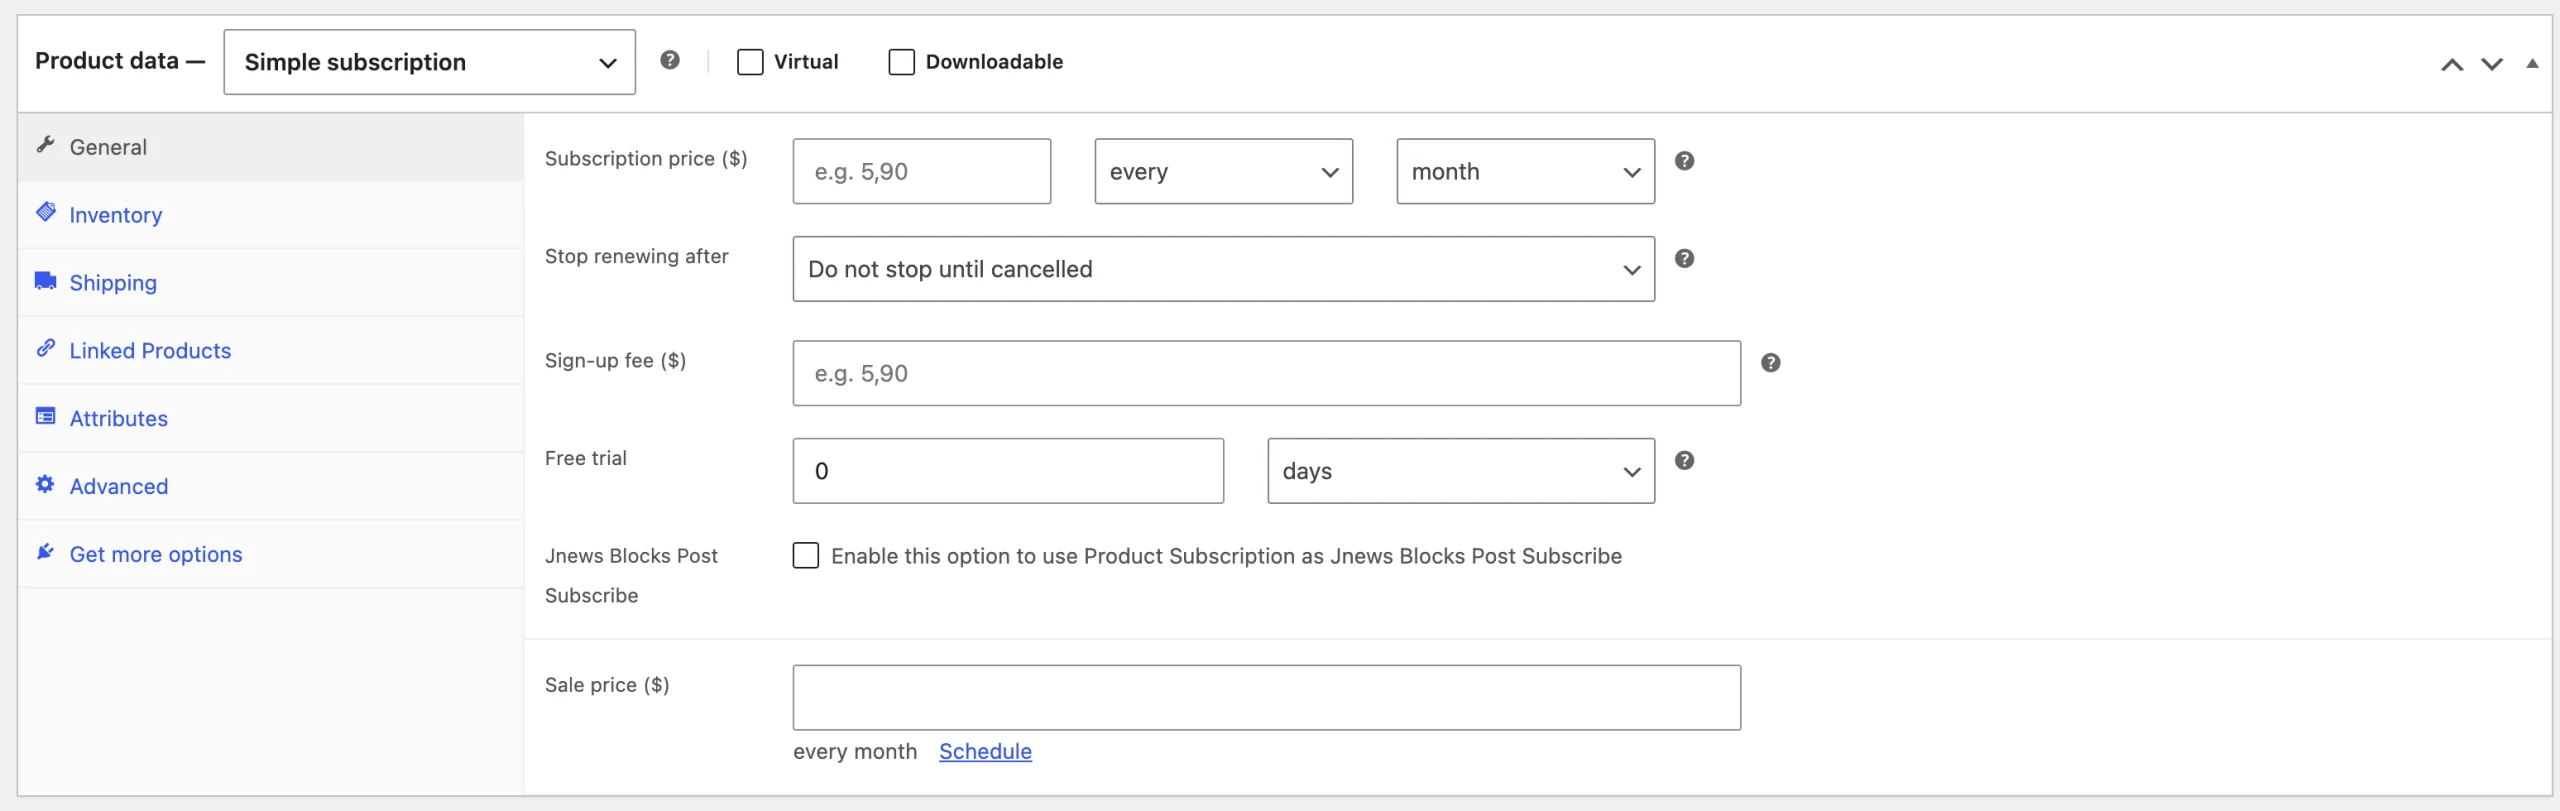
- Simple Subscription ( WooCommerce Subscriptions ) product :
You need to check JNews Blocks Post Subscribe option then set the product Subscription Price and Billing Time
3. Displaying Paywall Product
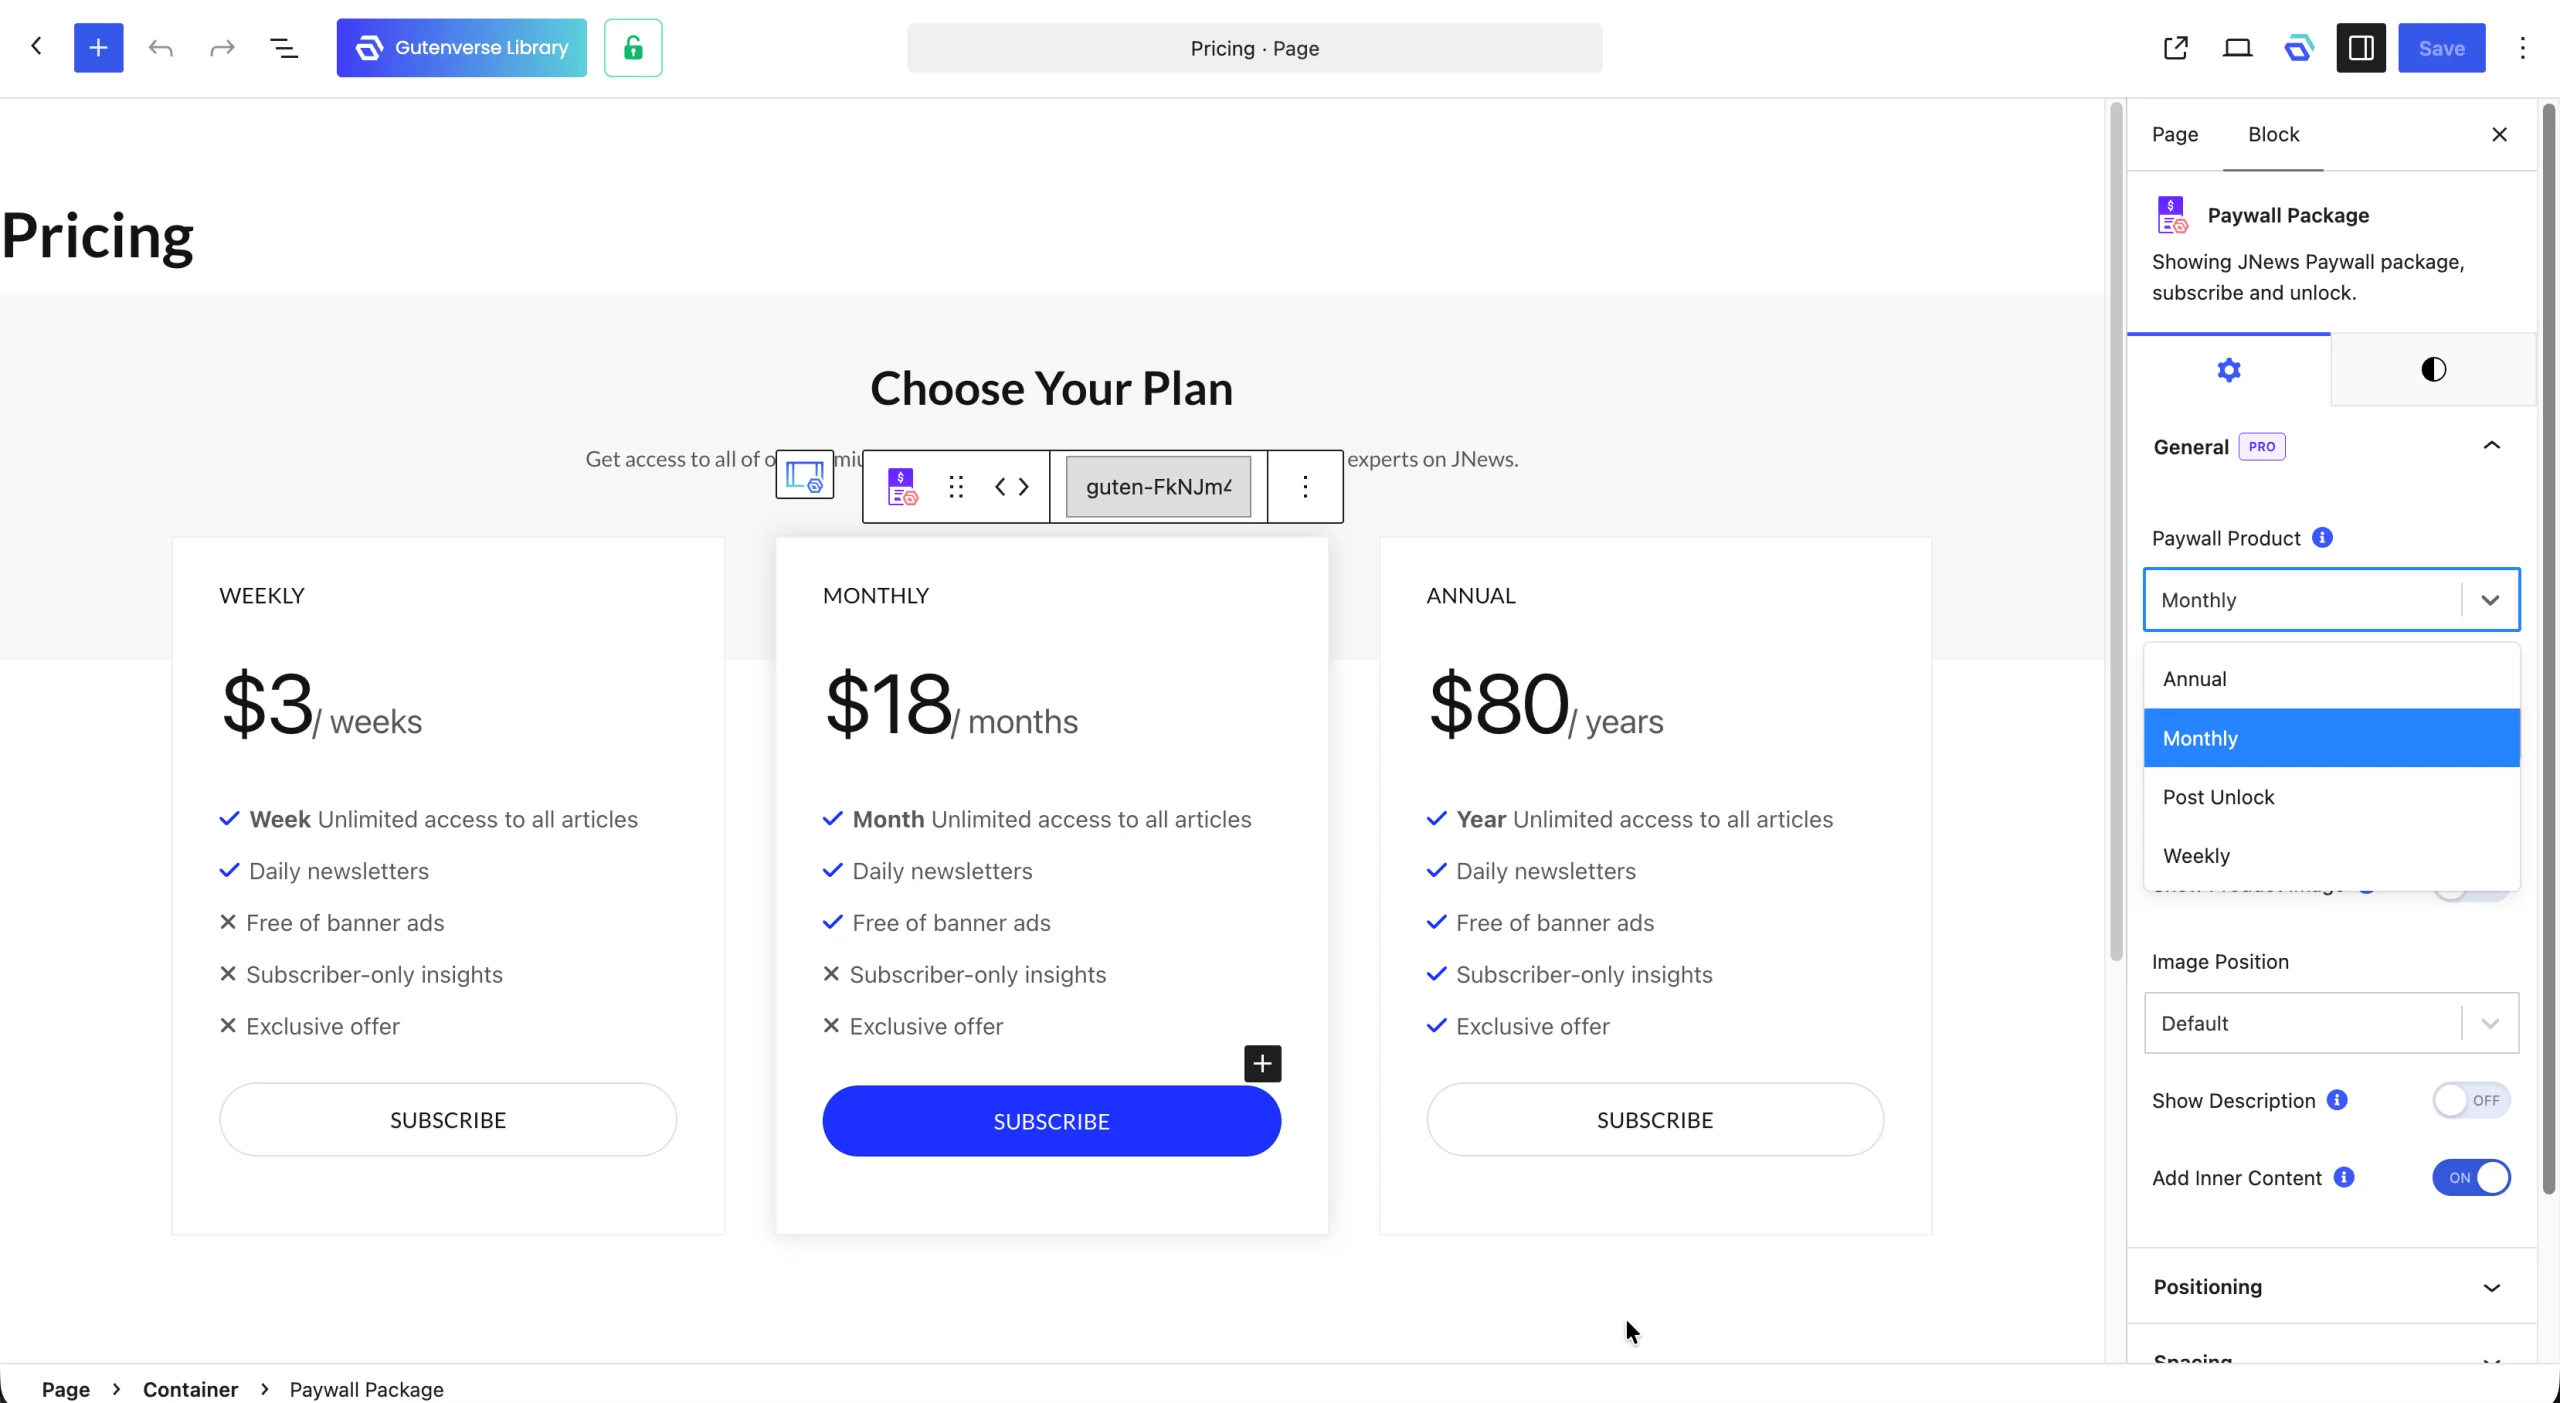
After creating a Paywall products, you need to create a page to display the list of Paywall products so they can be purchased. To do this, you can create a new page on your website, then use the Paywall Package block to display the Paywall products you created earlier. You can select which products to display through the Paywall Product option
4. Setup Single Post Template
To restrict your premium posts so that the content can only be accessed after a visitor subscribes or unlocks the post, you need to apply restrictions through the Single Post Template. To do this, you can edit the Single Post Template you are using, then add the Paywall Restriction block.
In the Paywall Restriction block, you can restrict your content using two methods:
- Normal Restriction
The block will display a notice that the content is only accessible to premium users, along with a button that directs users to purchase a Paywall Product on the specified page. To use Normal Restriction, you need to place the Paywall Restriction block right after the Content or Post Content block so the restriction notice appears immediately after the preview of your premium post content. You can select the page that displays the Paywall products you created earlier through the Subscribe Shop Page and Unlock Shop Page options.
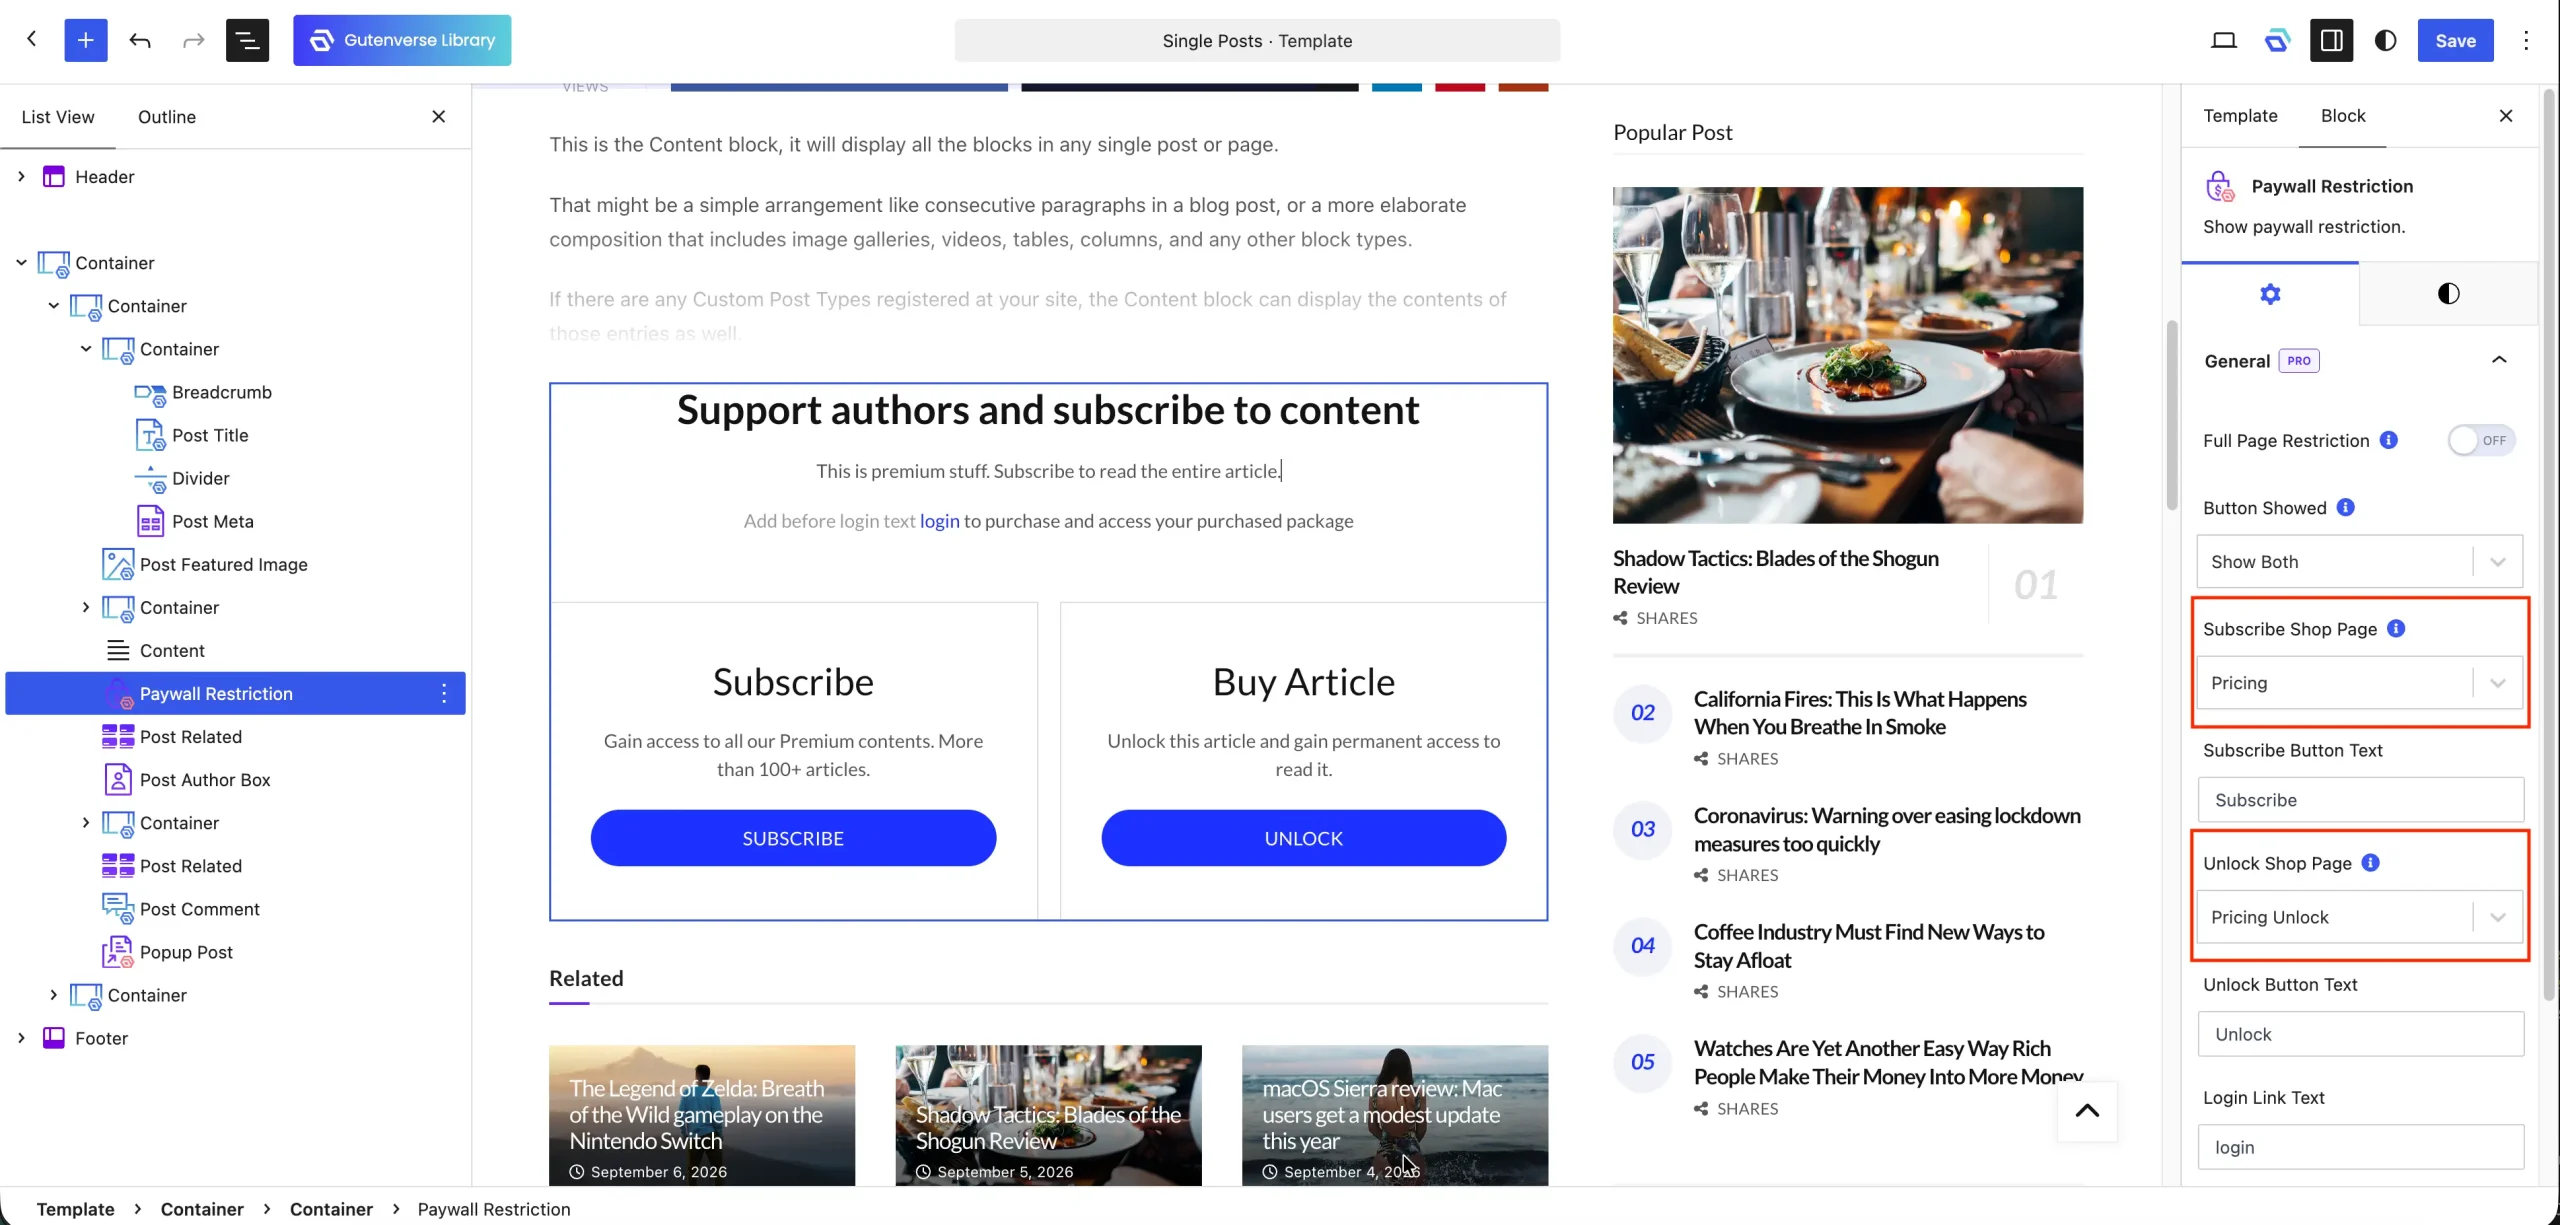
- Full Page Restriction
Full page in the premium post will be hidden, and only the restriction notice will be displayed, directing users to purchase a Paywall Product. To use this method, you need to add the Paywall Restriction block on your single post template and enable the Full Page Restriction option. Unlike Normal Restriction, the Paywall Restriction block can be placed anywhere in your Single Post Template. However, we recommend placing it at the top or bottom for a cleaner layout. You can select the page that displays the Paywall products you created earlier through the Subscribe Shop Page and Unlock Shop Page options.
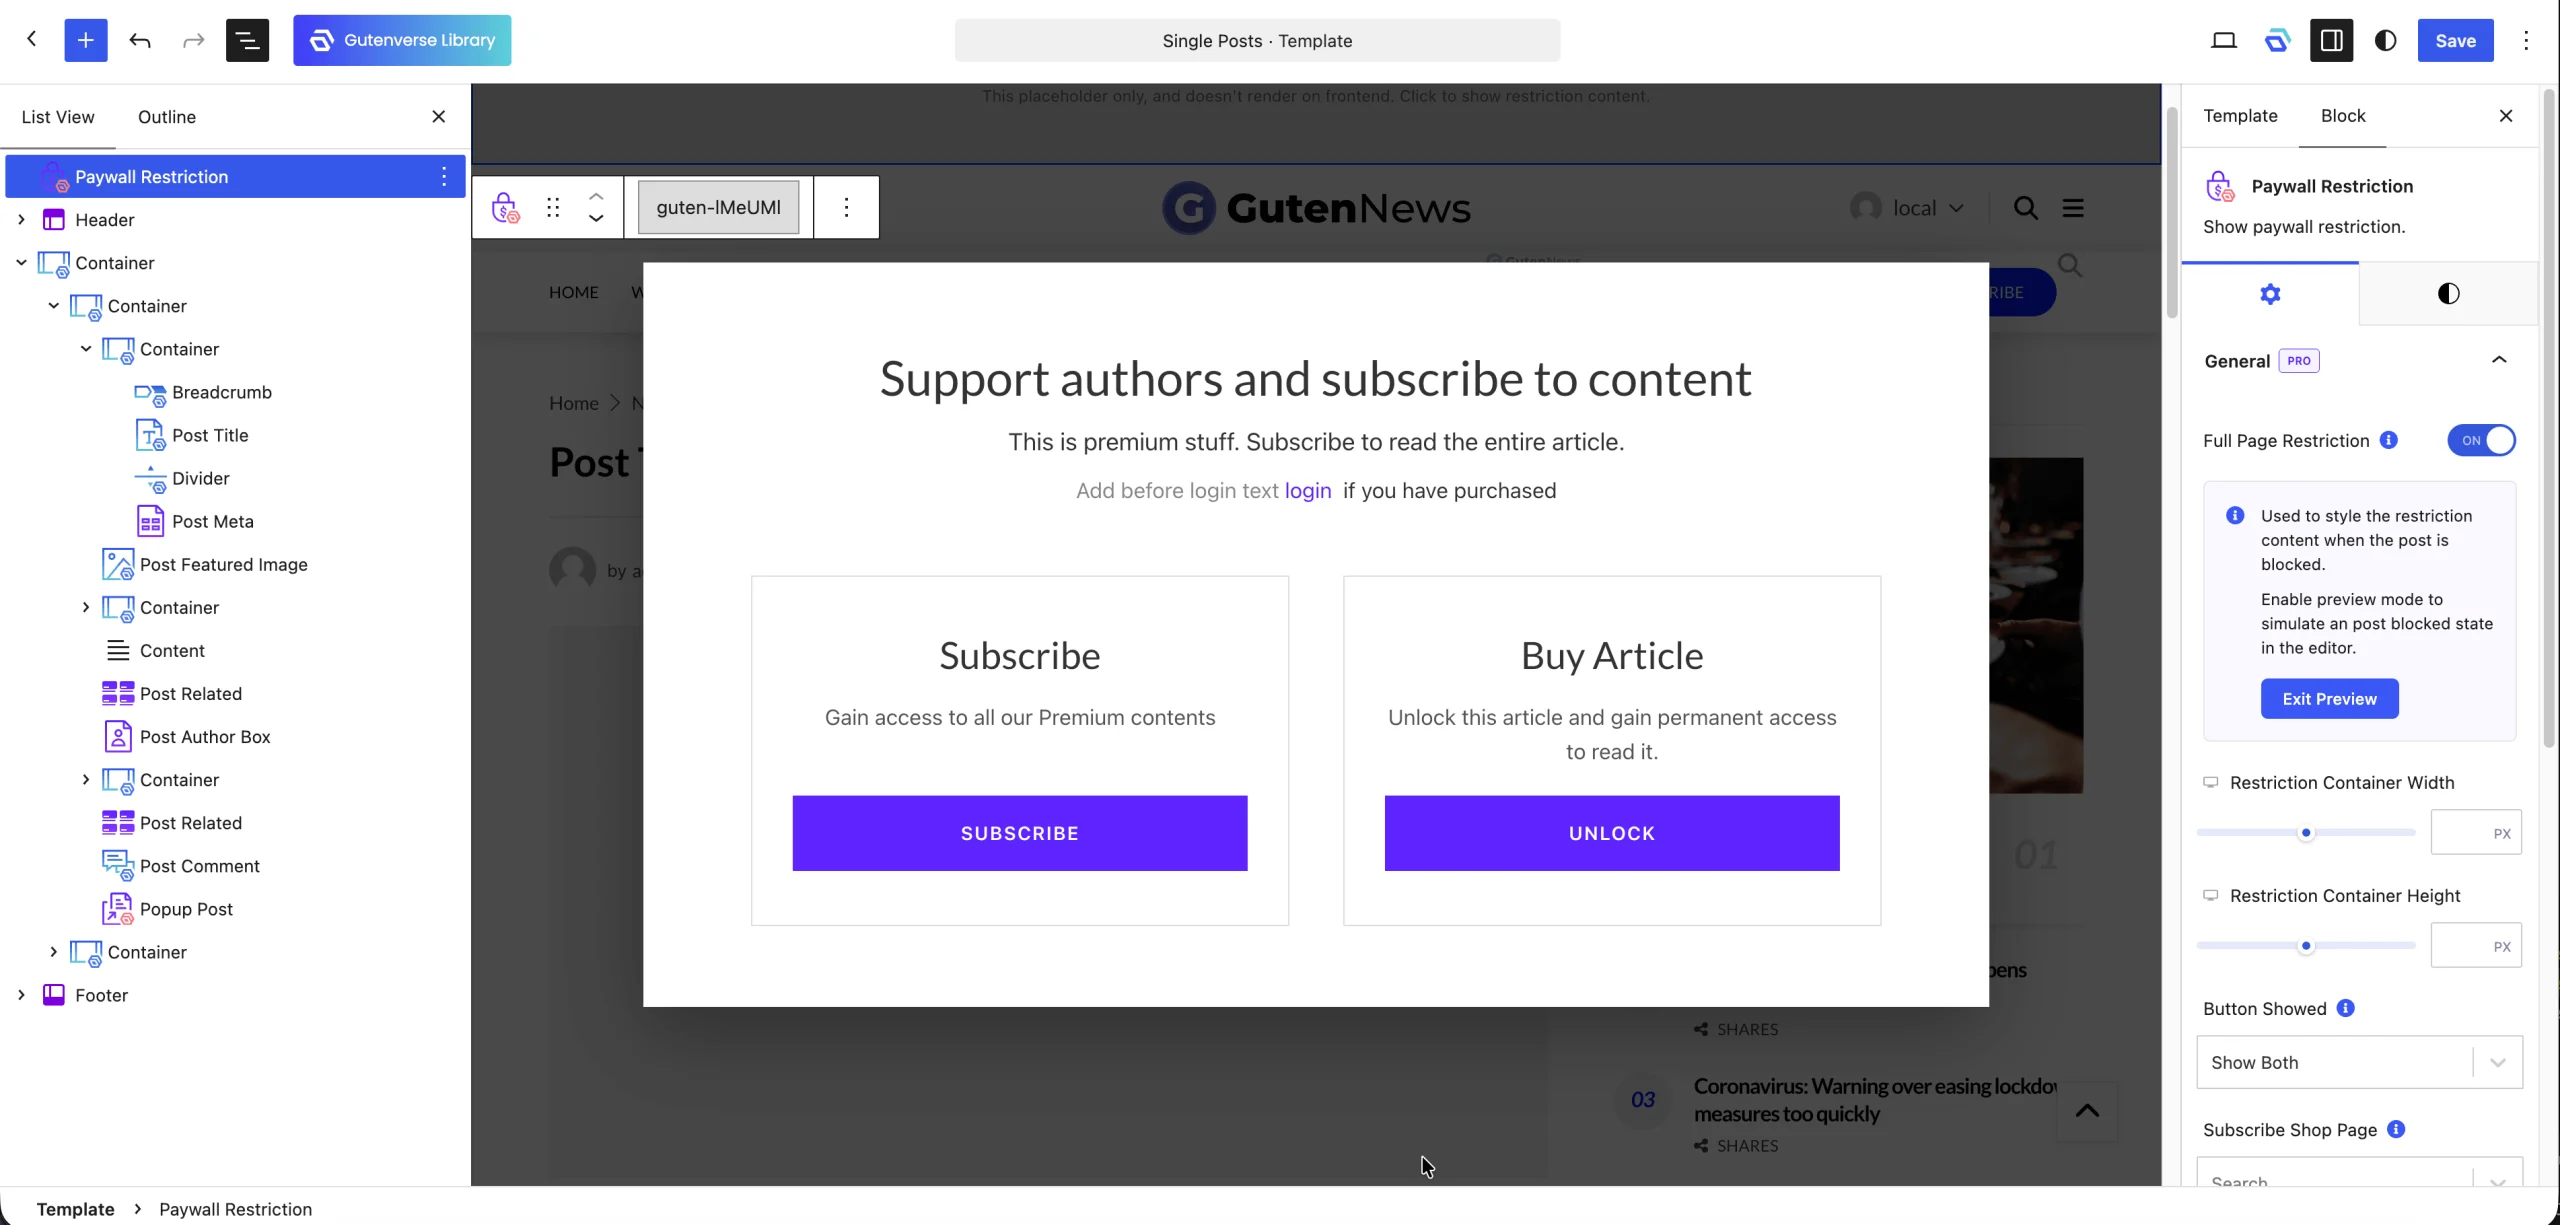
5. Setup Account Page
To display the user’s subscription status or show the list of unlocked posts along with the remaining unlocked post quota, you need to add the Paywall Status block inside the Account Details block on your Account Page. If you are not familiar with how to set up the Account Page, you can refer to this documentation related to the Account Page feature.
Within the Paywall Status block, there is a Paywall Status option that allows you to choose which status to display (Subscription Status / Post Unlock Status). You can adjust this option to match your Account Details menu. There is also a Subscribe Shop Page option to redirect users to your Paywall product page if they have not subscribed yet.
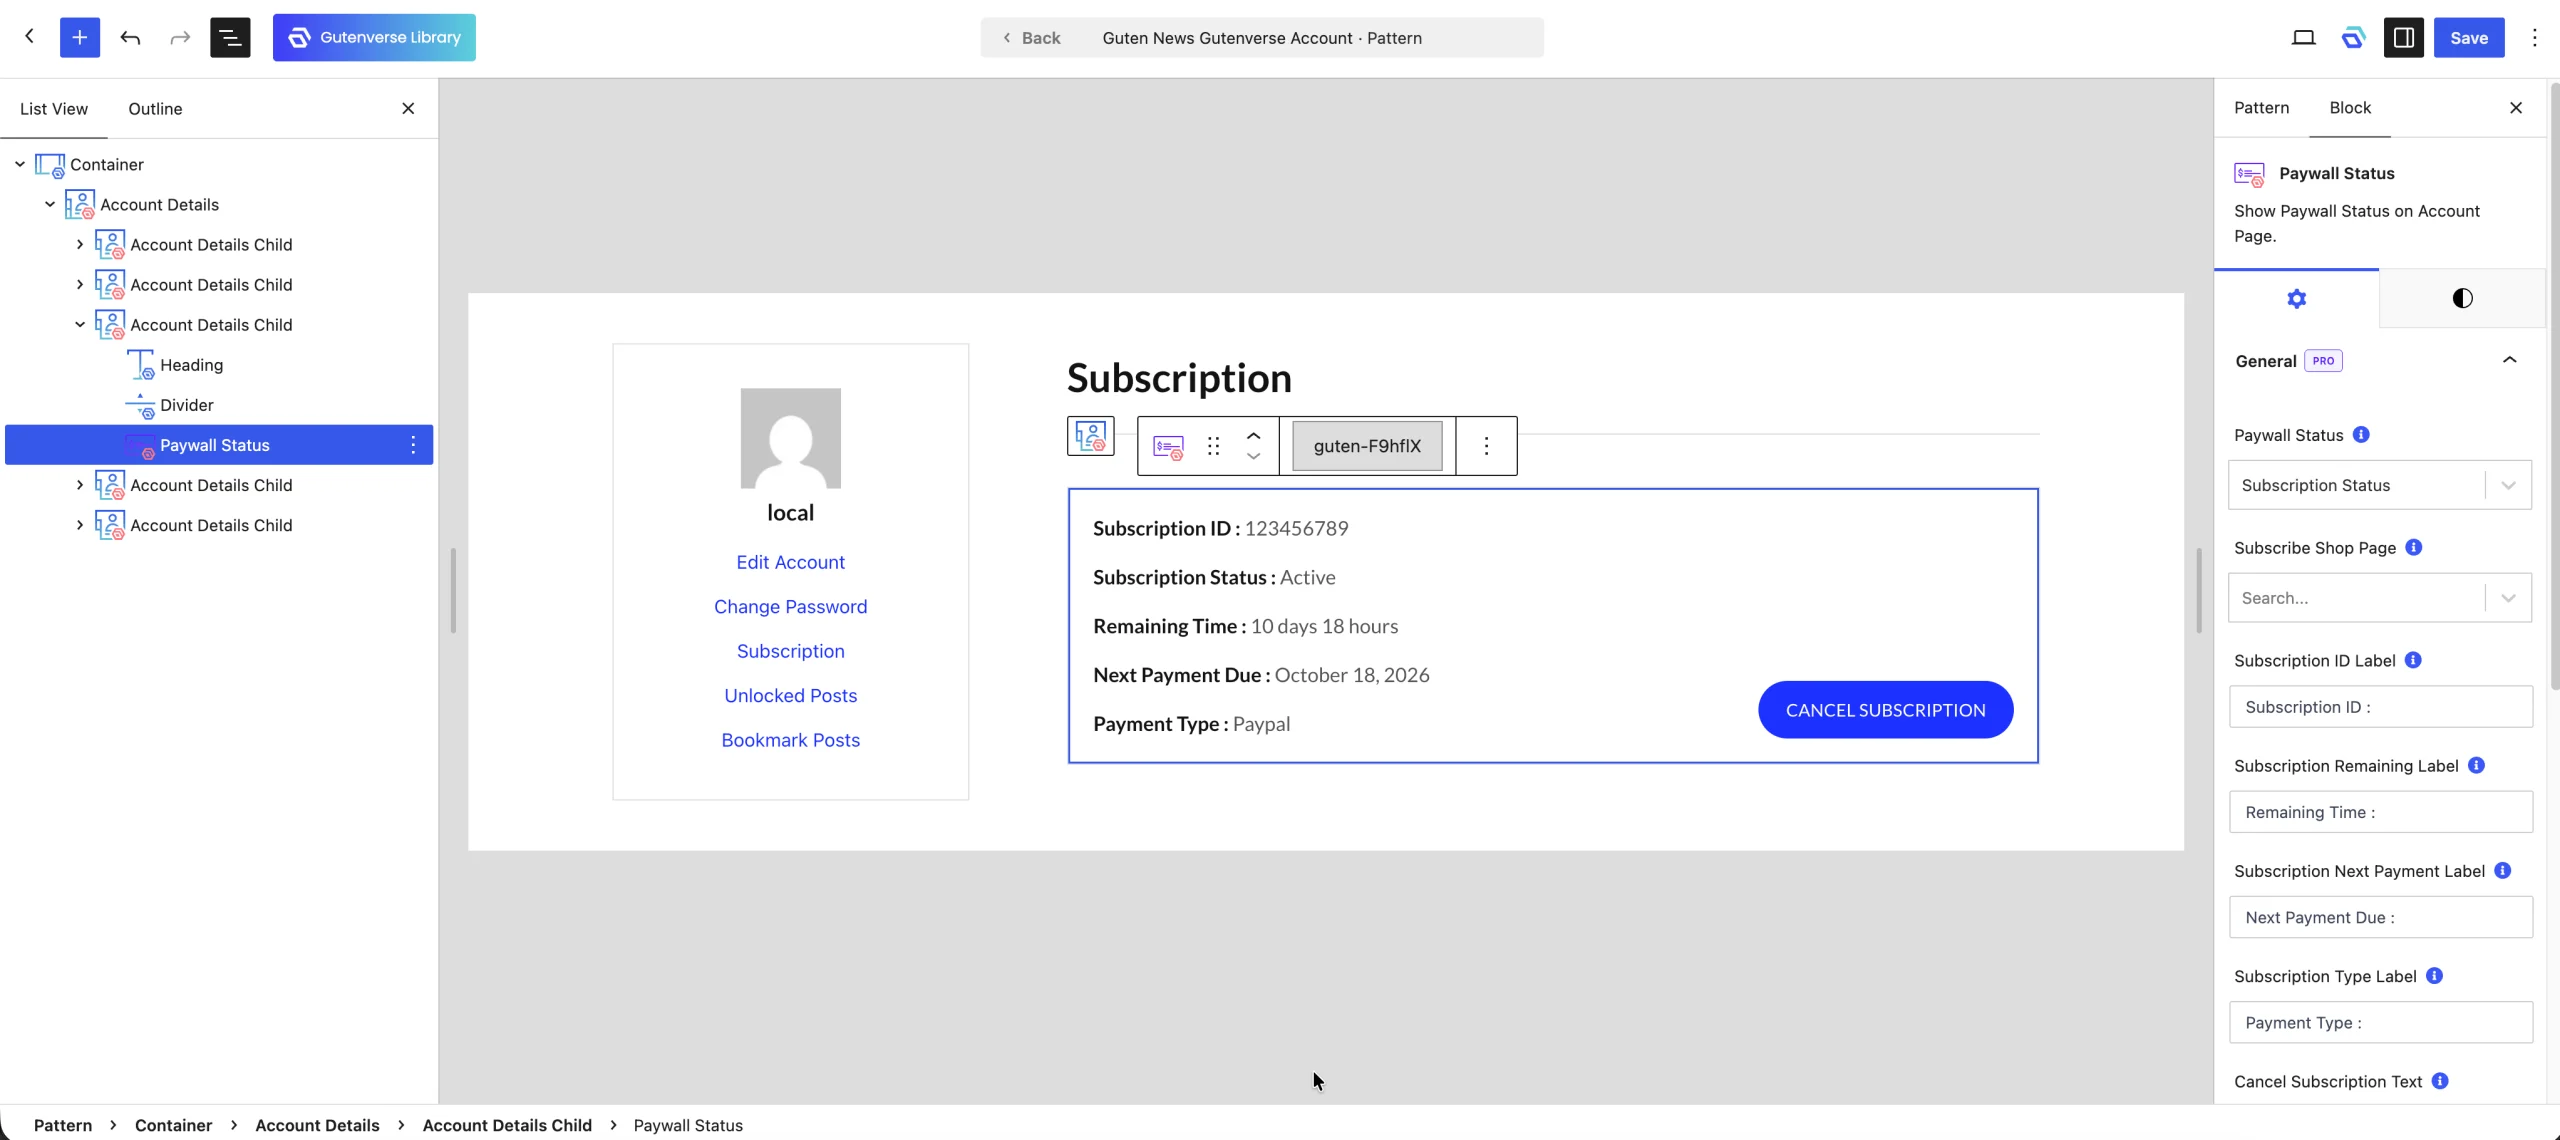
If you offer two types of Paywall products on your website (Subscription & Unlock), you can add two separate menus on your Account Page.
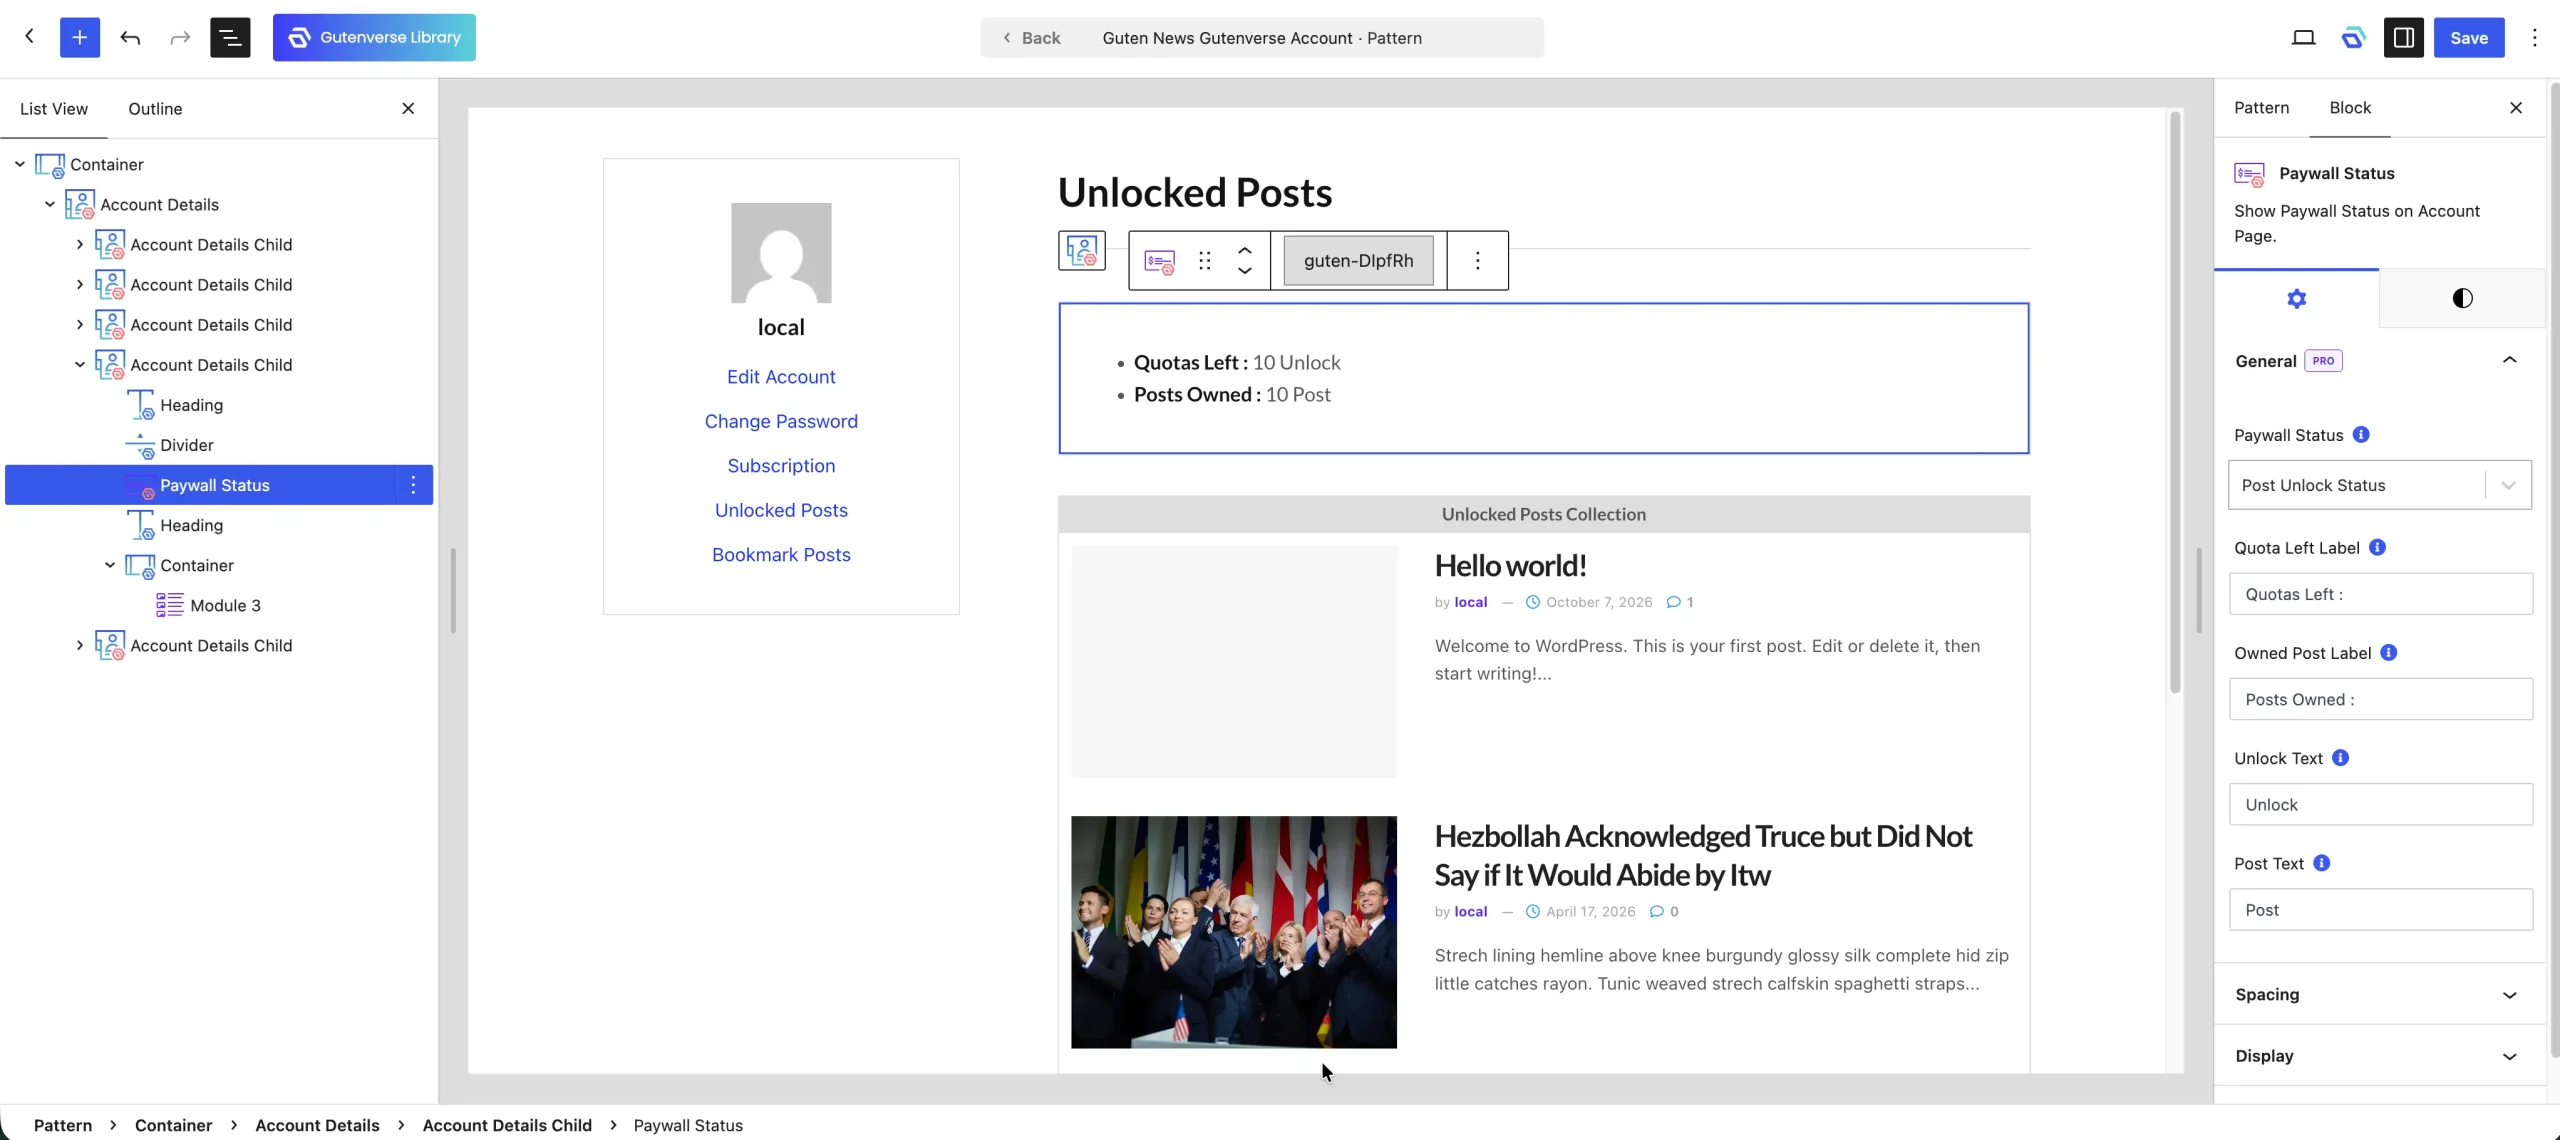
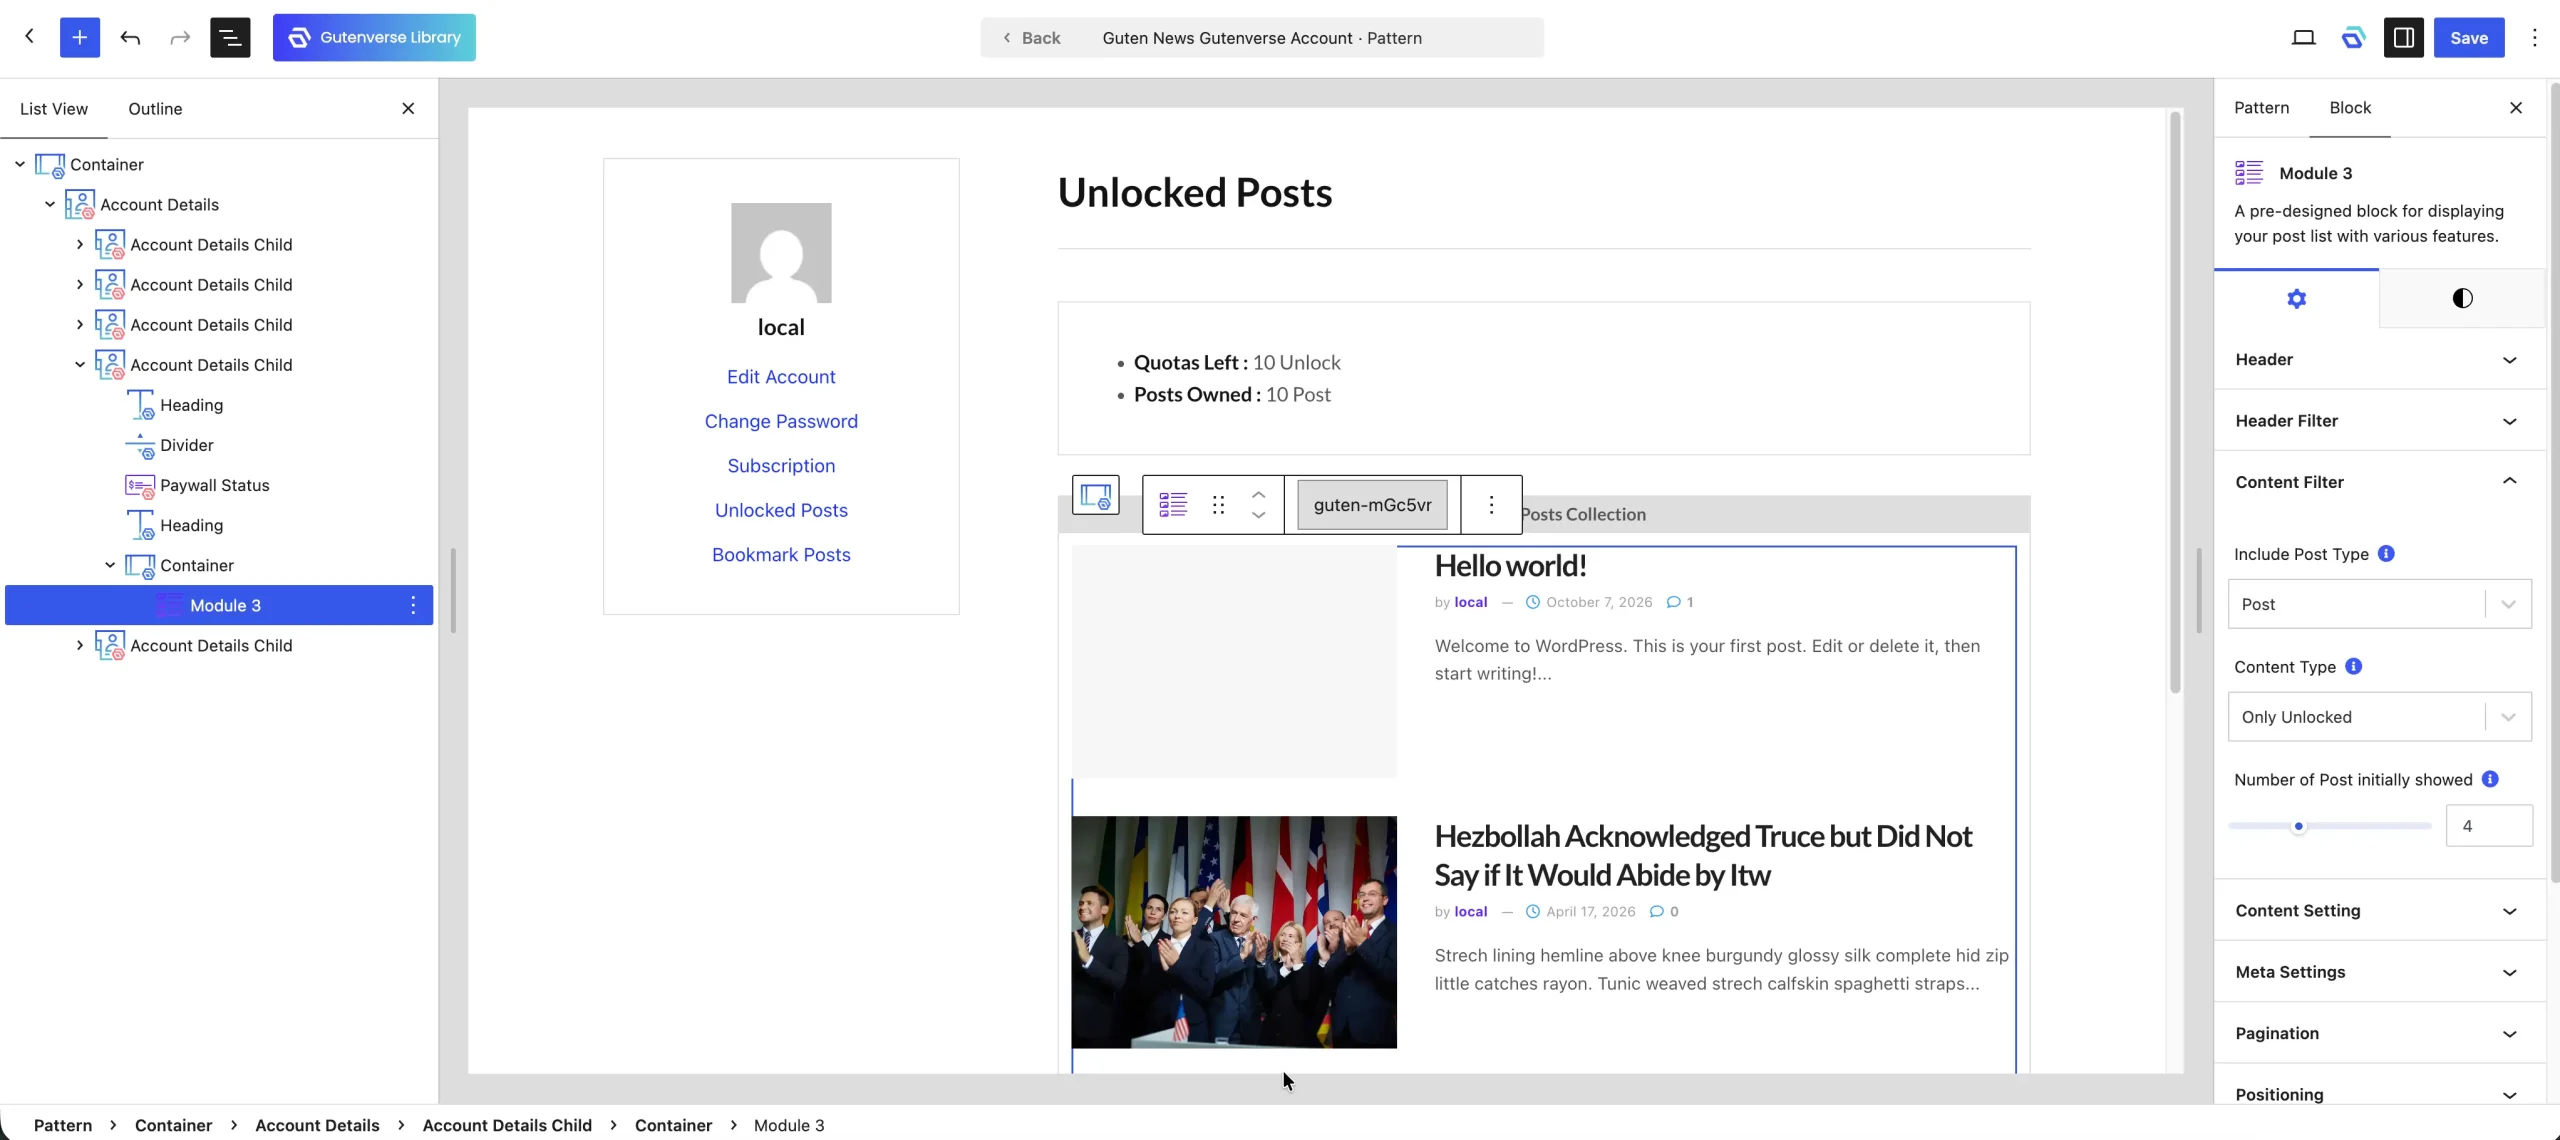
To display the user’s Unlocked Posts list, you can add a Module block inside the Account Details Child block used for the Unlocked Posts page. Then, set Content Filter → Content Type to Only Unlocked.
6. Setup Payment Method
So that your site visitors can purchase Paywall products, you need to set up a payment method. For JNews Blocks Post Unlock products, payments can be made using all payment methods available in WooCommerce. But, for JNews Blocks Post Subscribe products, payments can only be made using the two payment methods we provide (Stripe and PayPal Subscribe). Below is a more detailed explanation of how to use these two payment methods.
1. Stripe
You need to create Stripe account & credentials here.
To set up a payment method using Stripe, you can go to the WooCommerce -> Settings -> Payments -> Stripe menu.
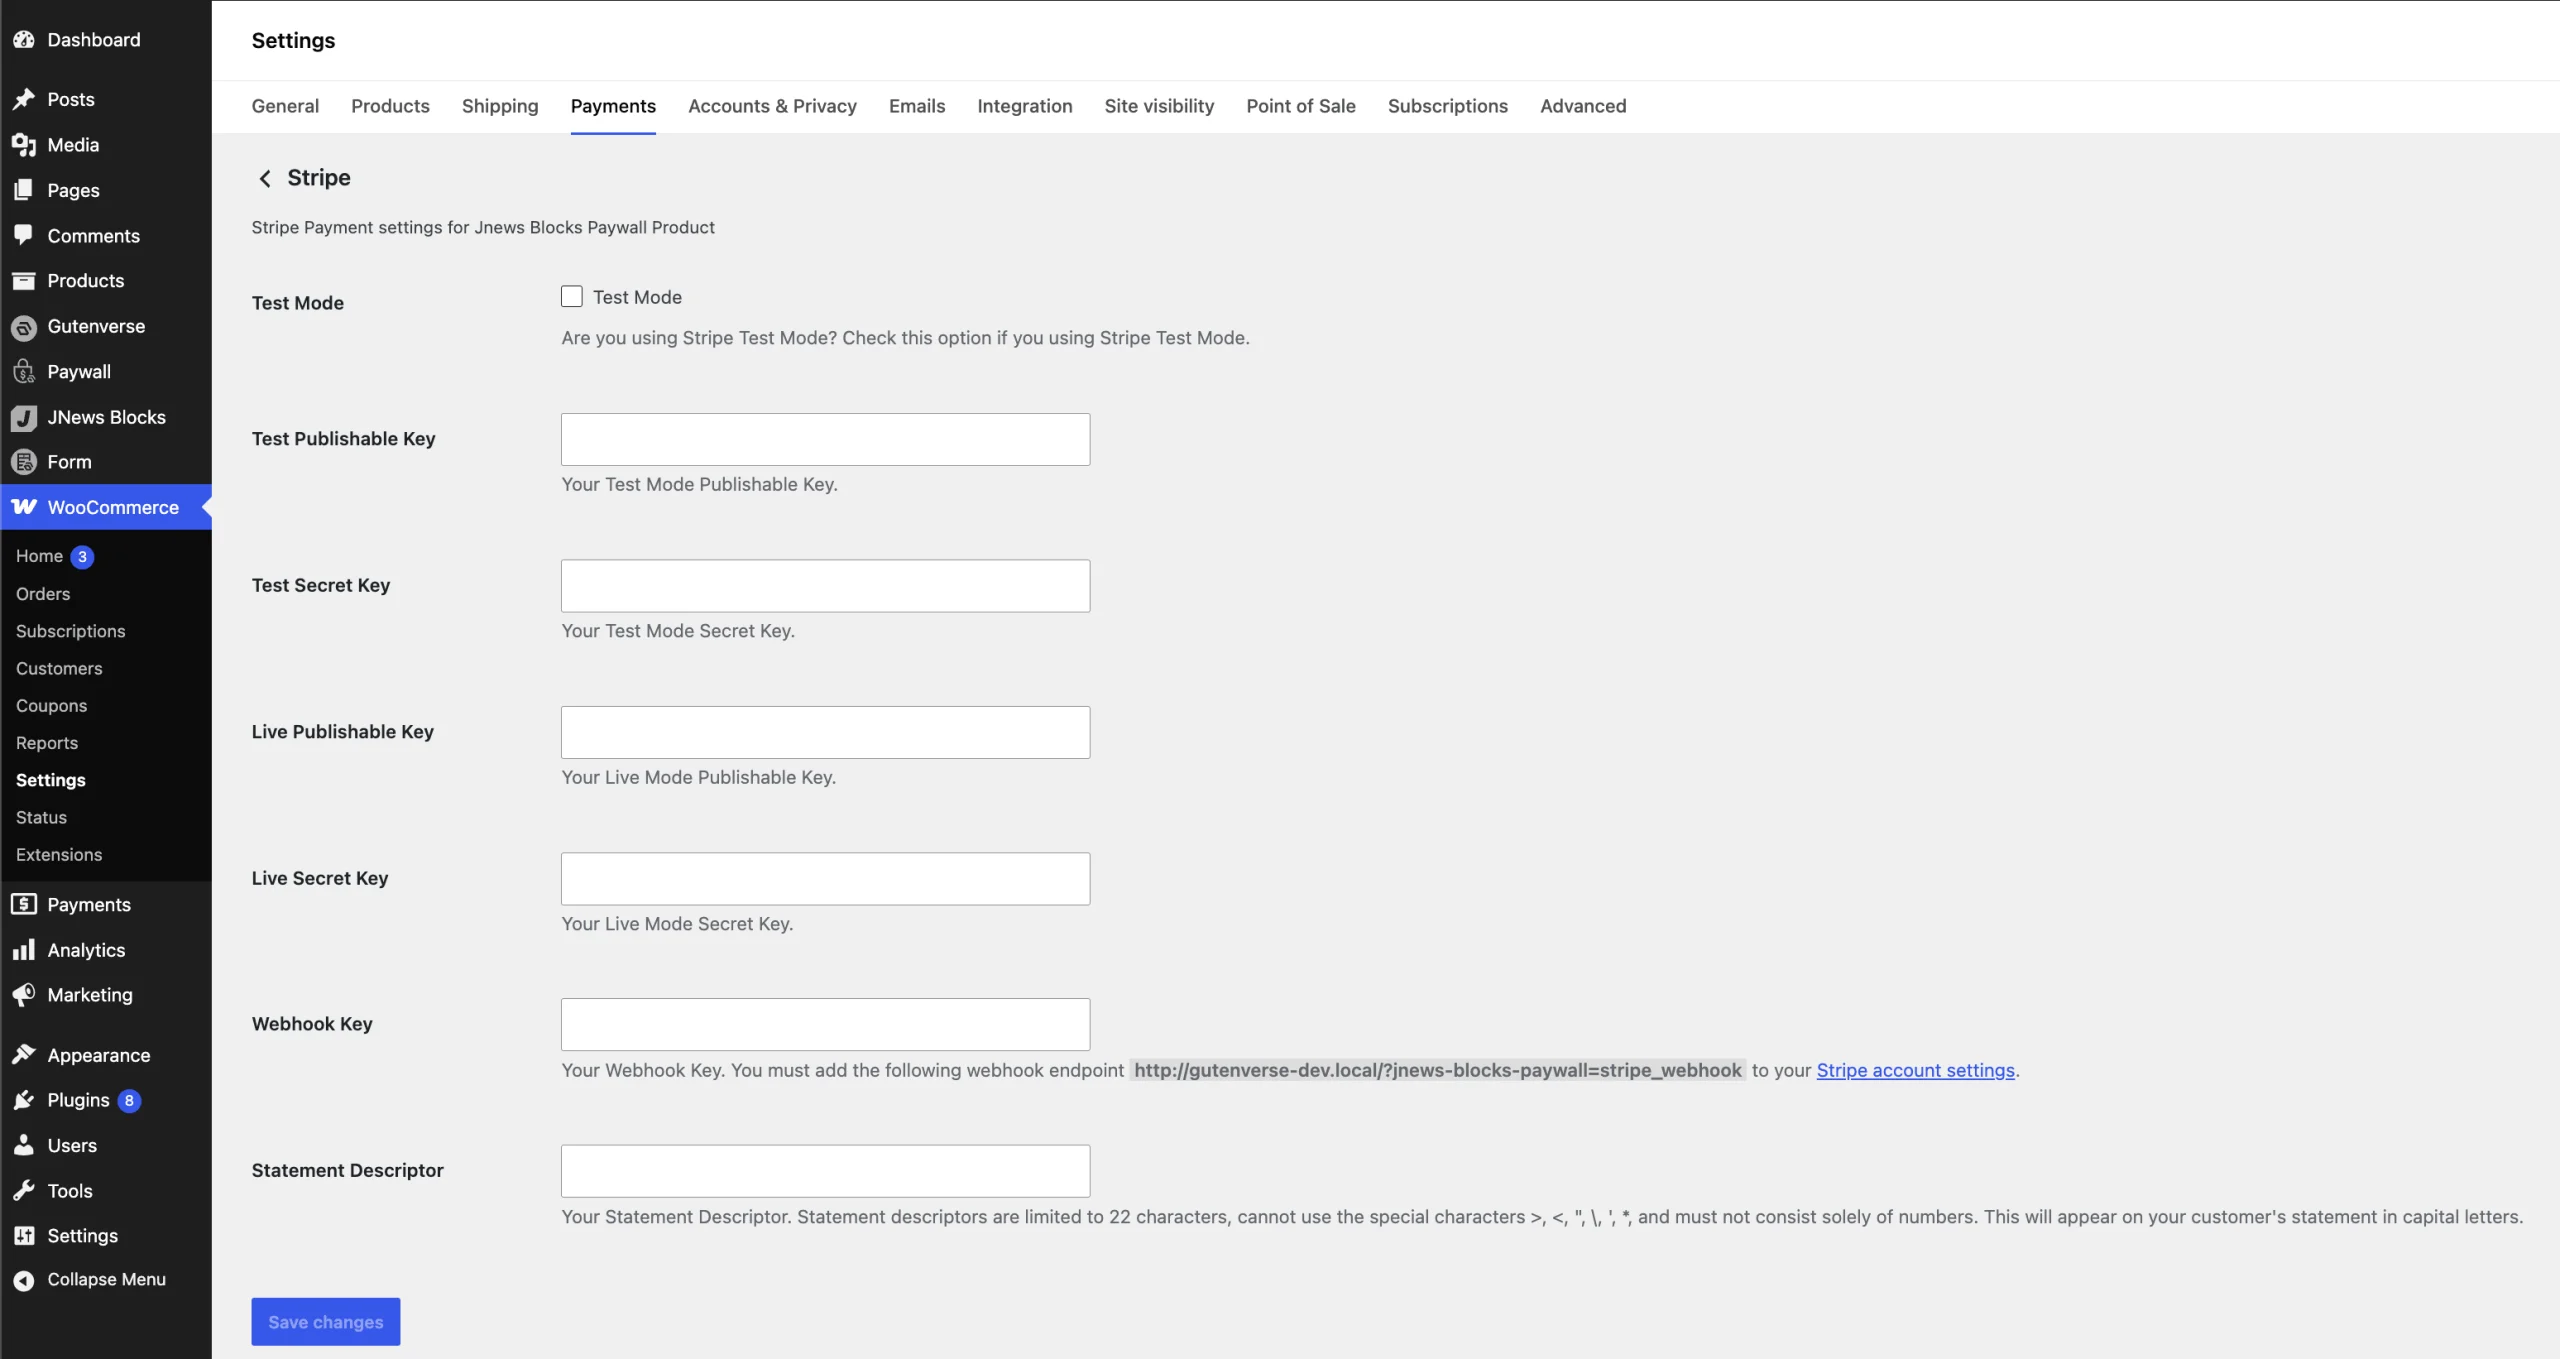
Below is a detailed explanation of the options available in the Stripe payment method:
- Enable Test Mode
Turn on this option if you want to use Test Mode / Sandbox Mode. - Test Publishable Key
Insert your Test Publishable Key if you use Test Mode / Sandbox Mode. - Test Secret Key
Insert your Test Secret Key if you use Test Mode / Sandbox Mode. - Live Publishable Key
Insert your Live Publishable Key if you use Live Mode. - Live Secret Key
Insert your Live Secret Key if you use Live Mode.
You can find the Publishable Key and Secret Key in your Stripe account under the Developers -> API Keys menu.
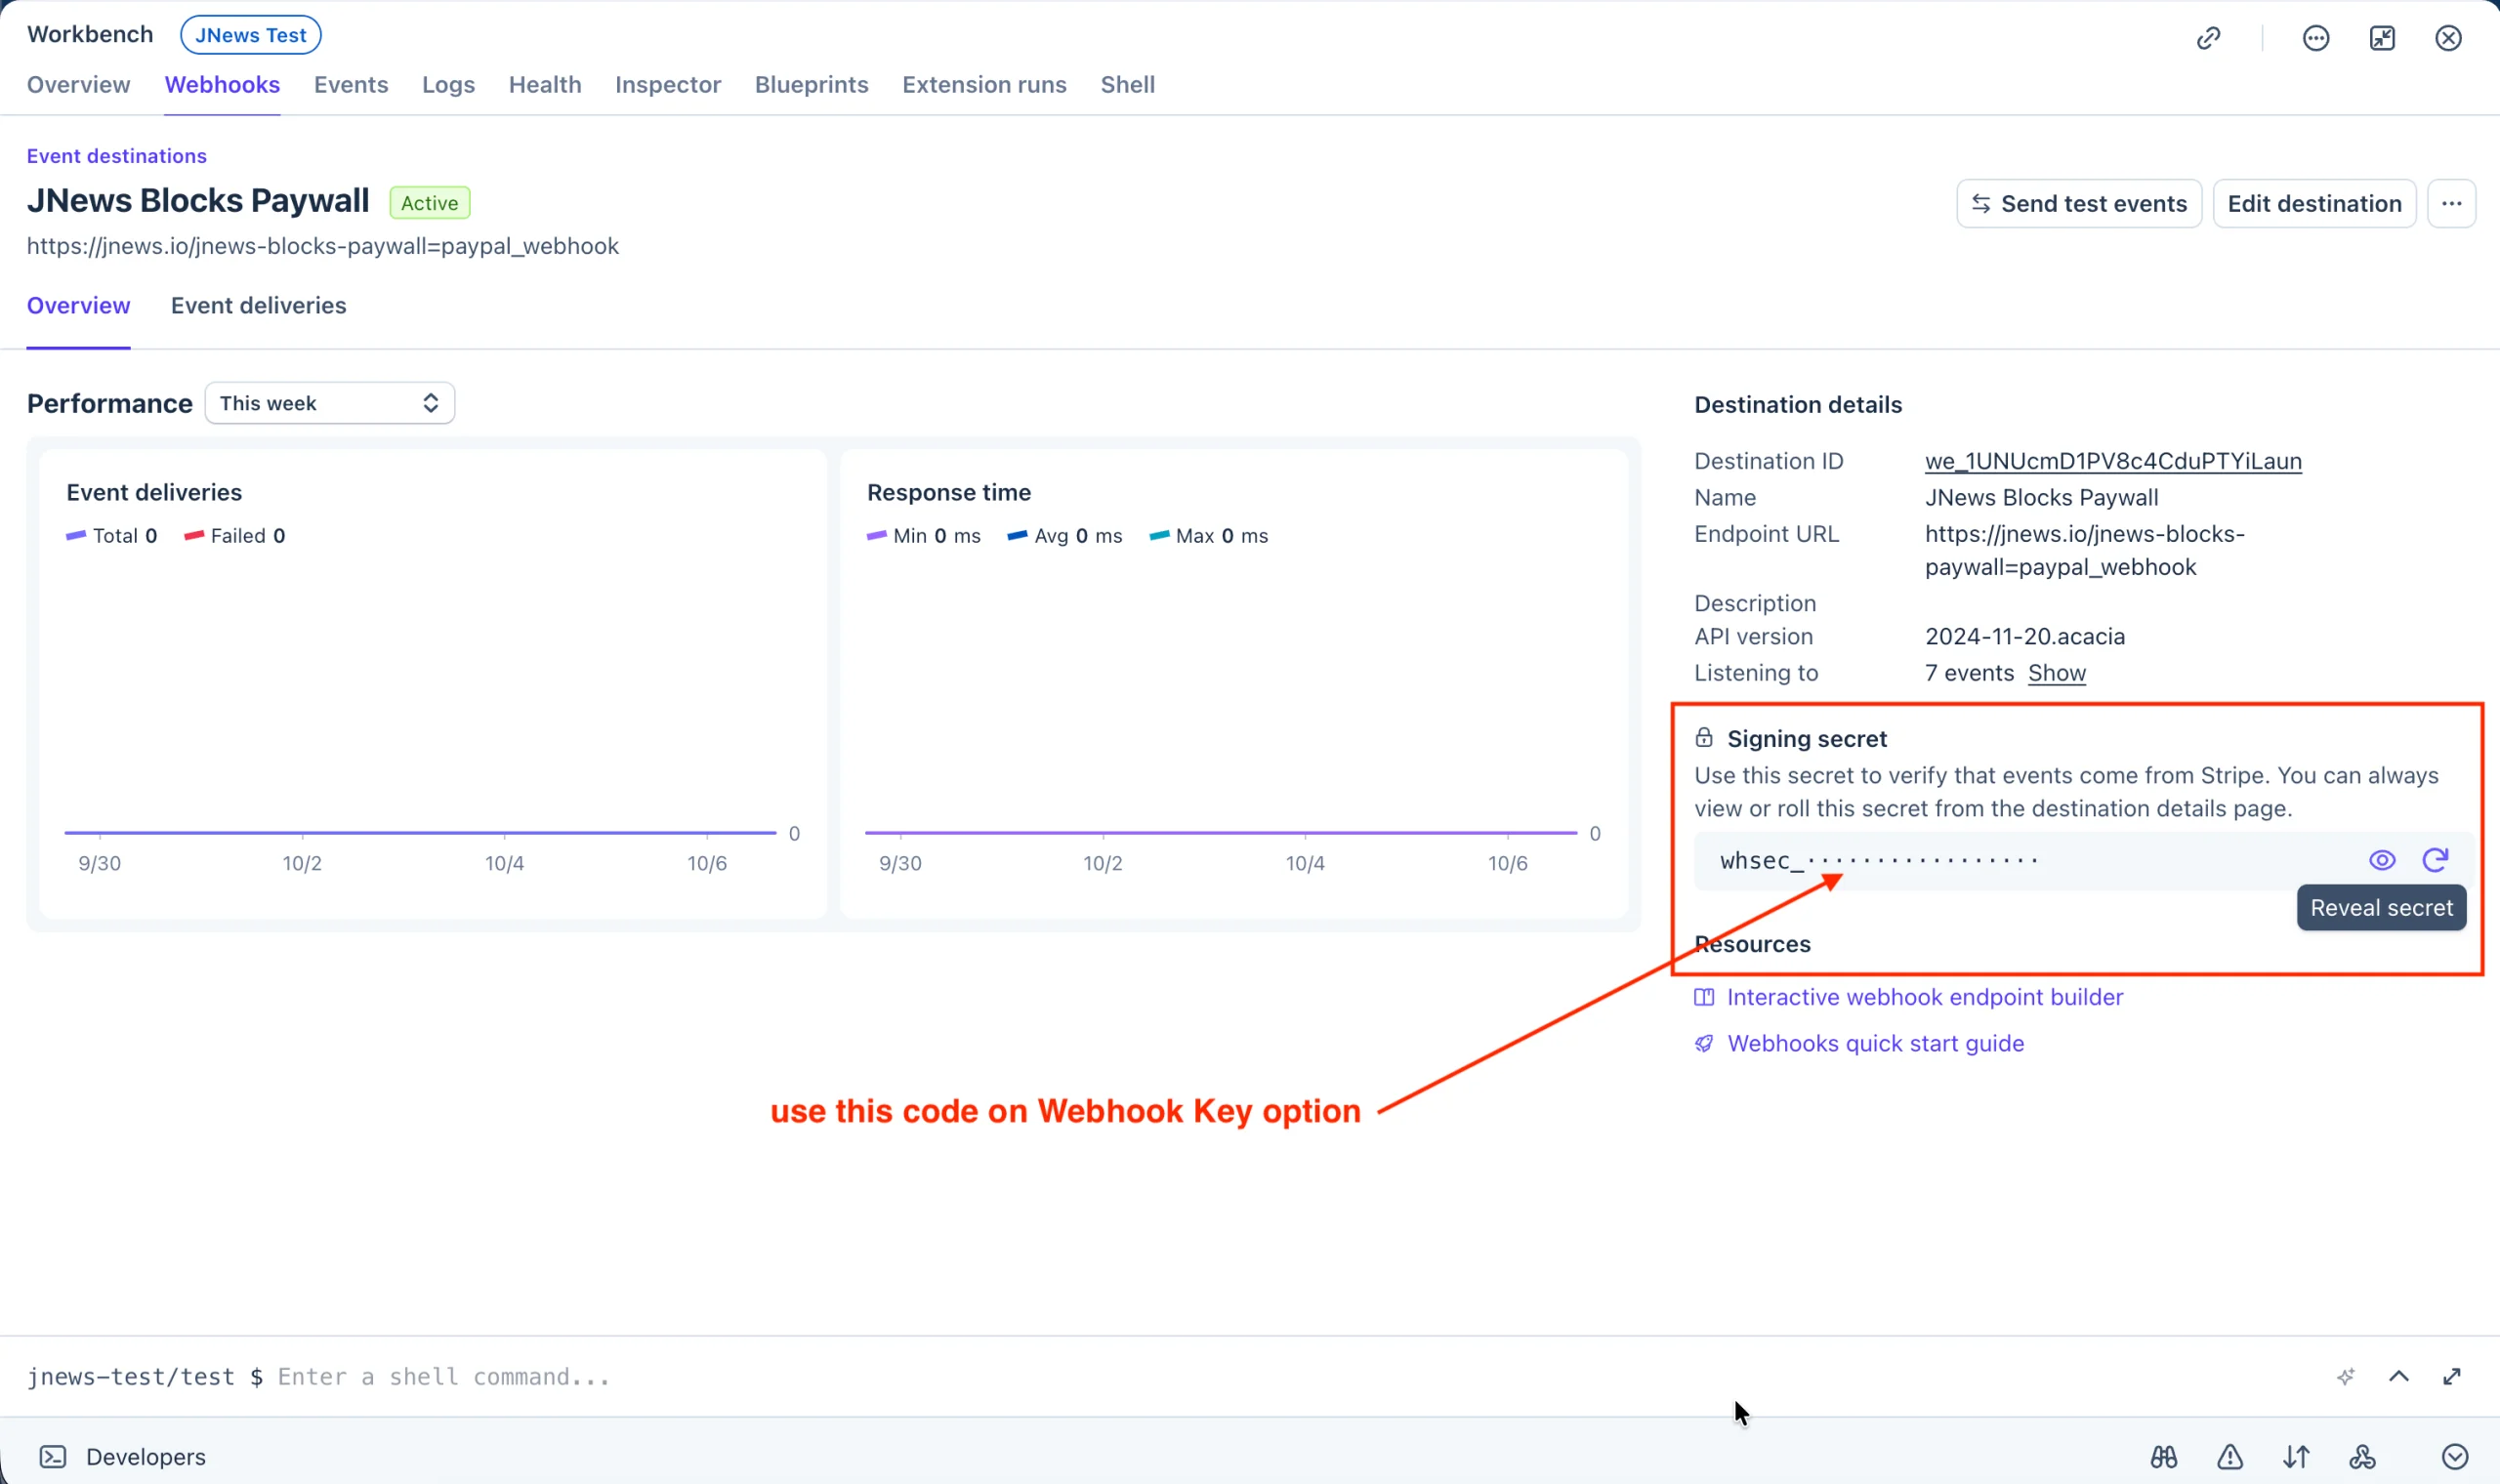
- Webhook Key
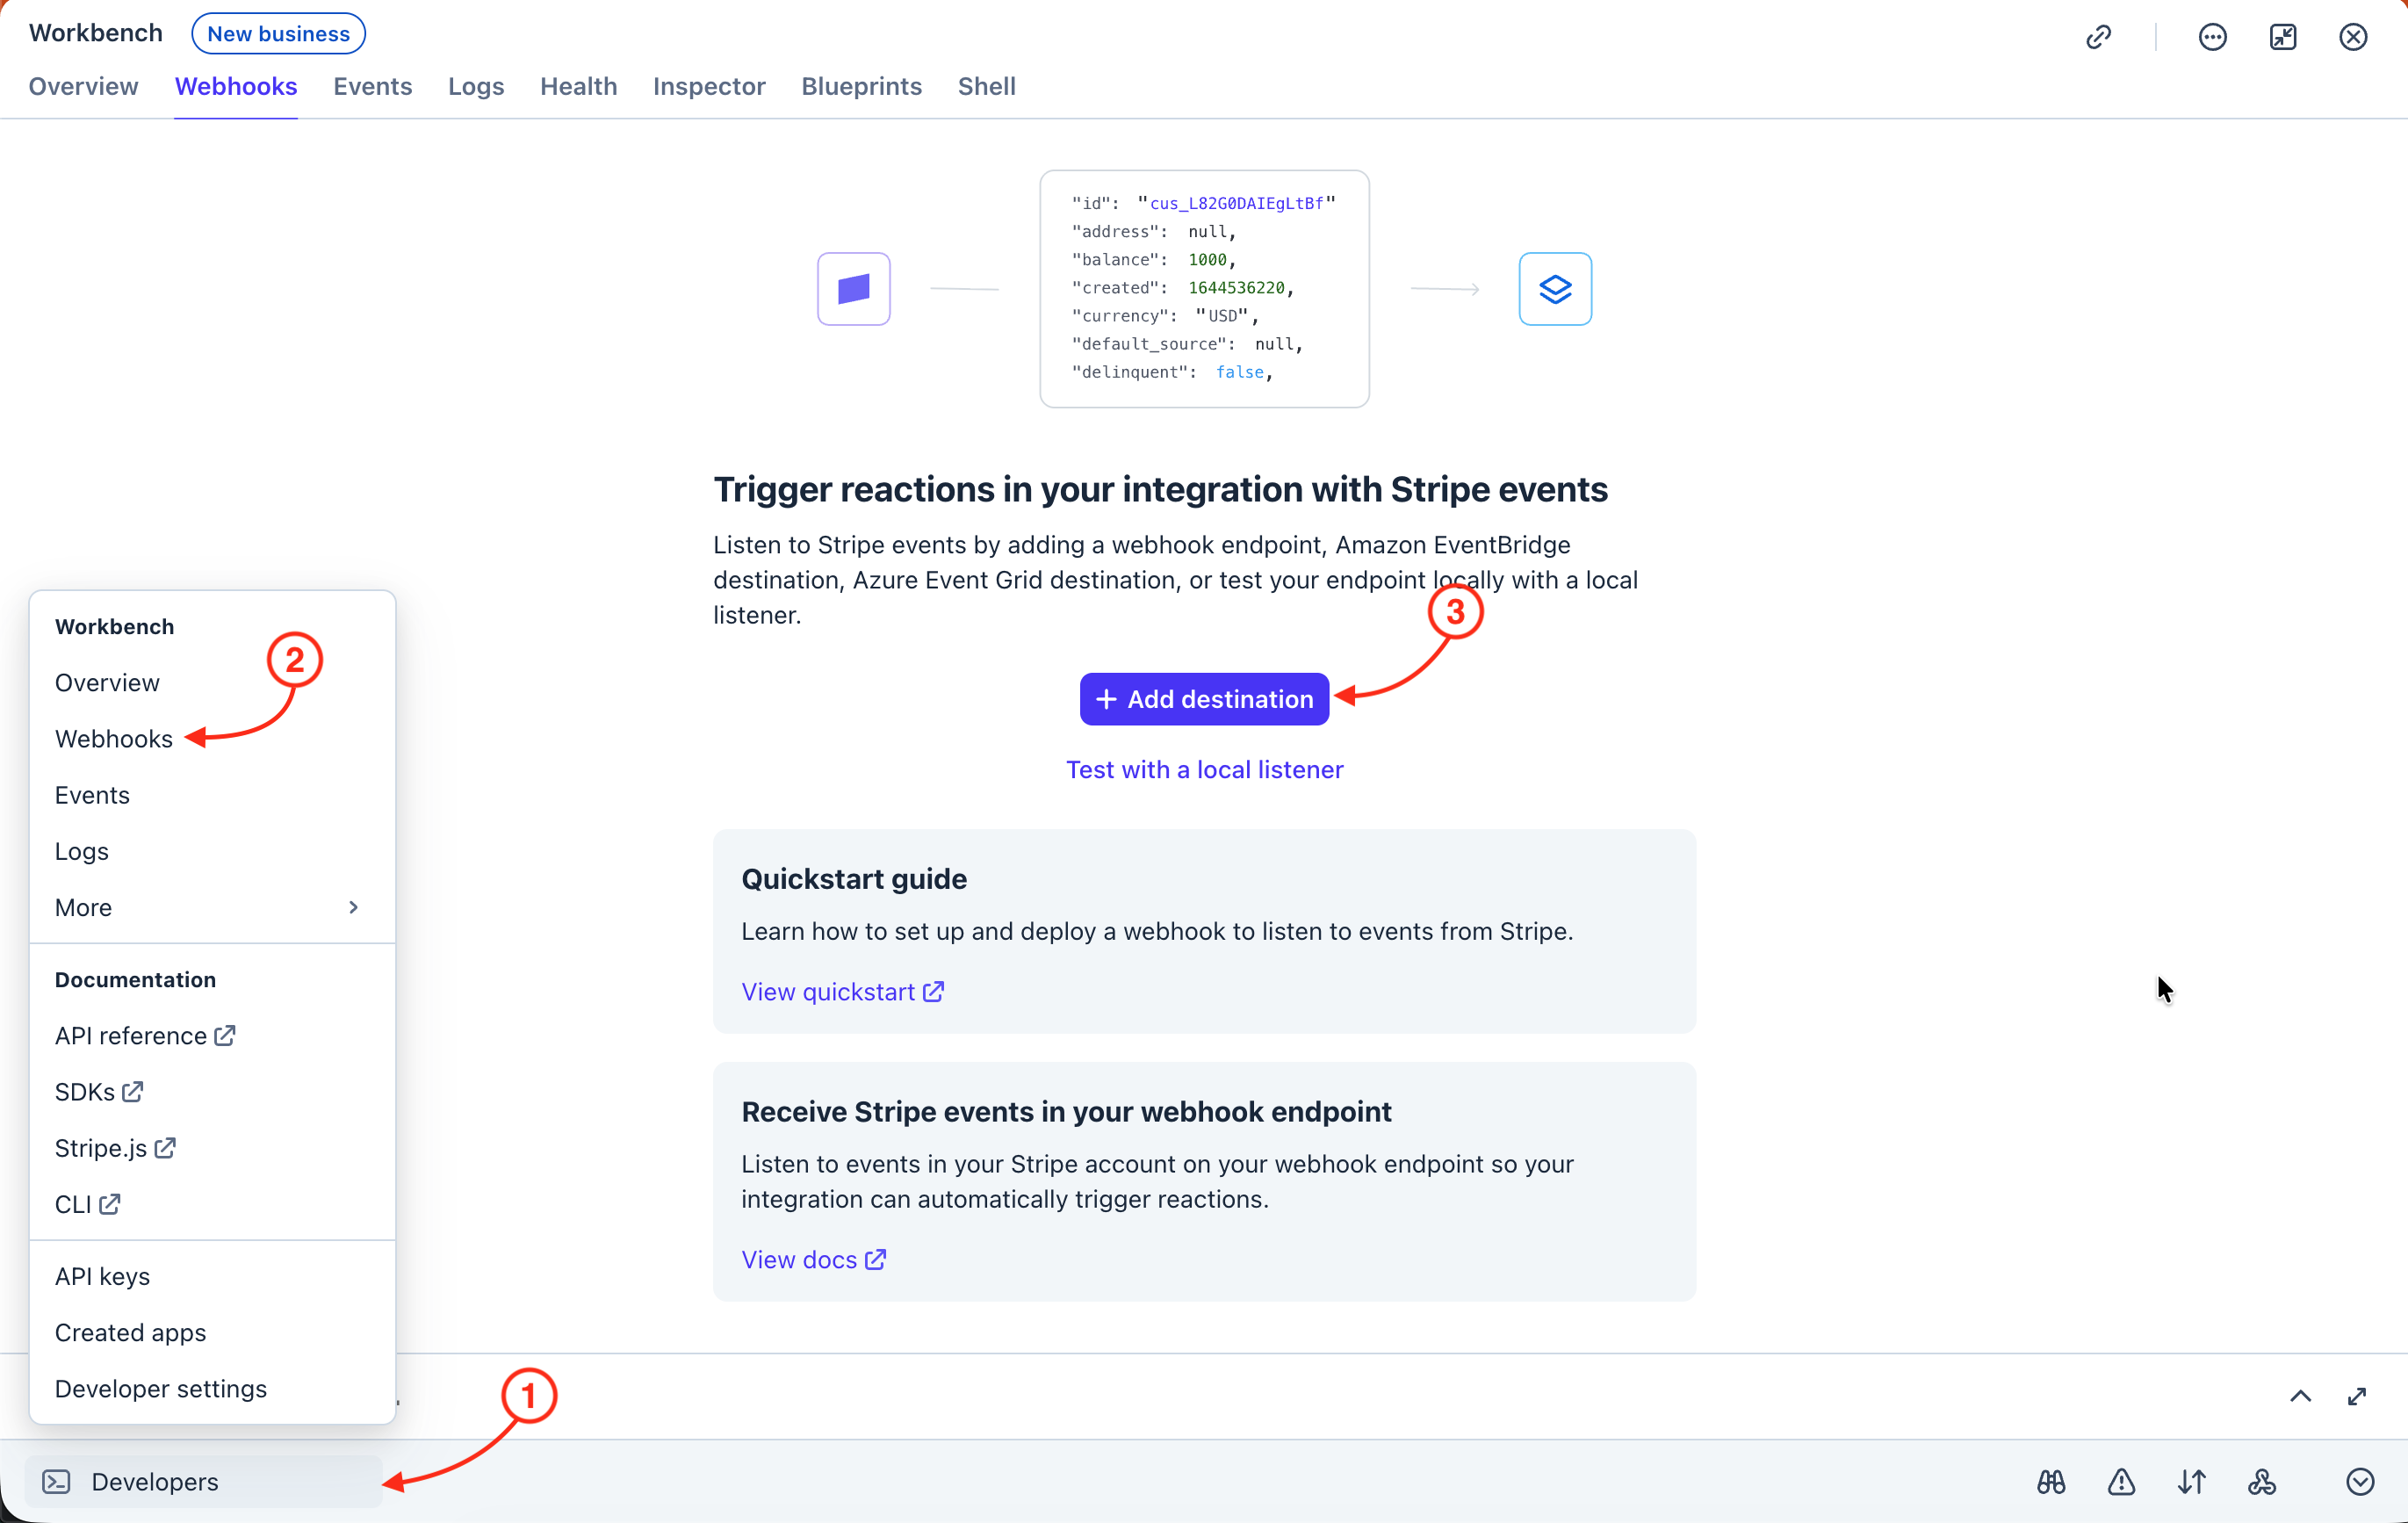
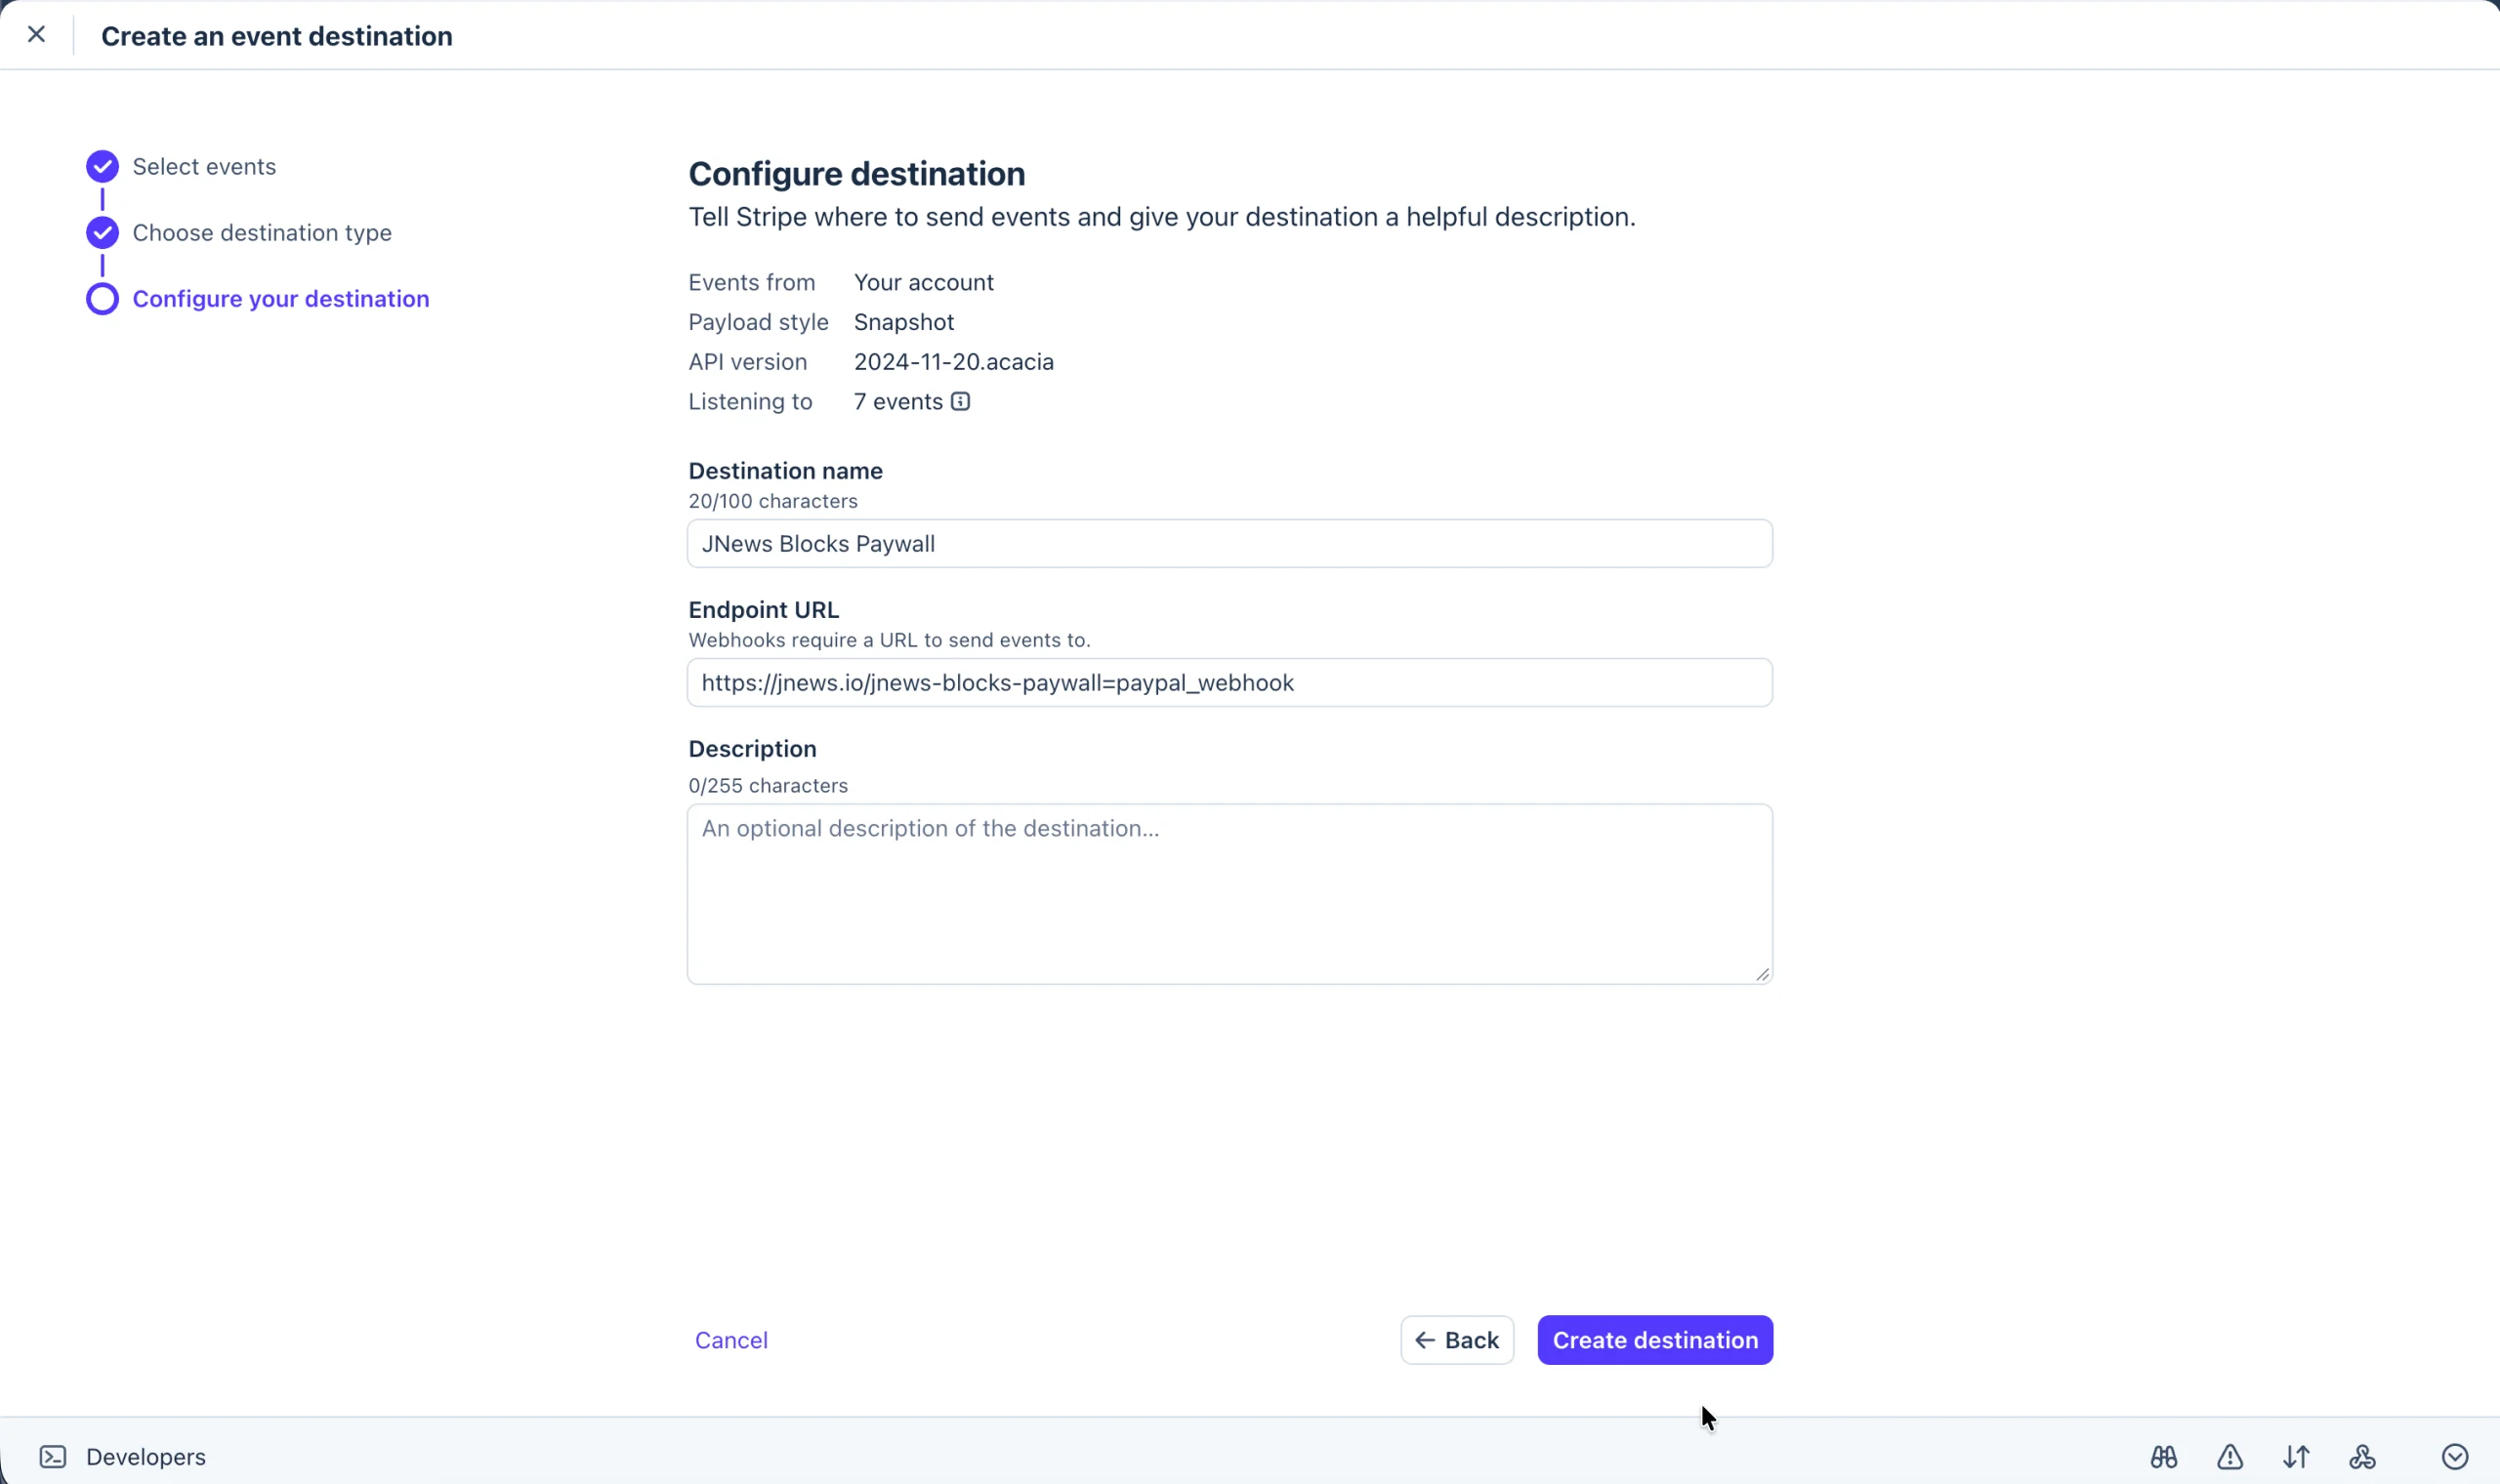
To obtain the Webhook Key, you need to create a Webhook first in your Stripe account. You can go to the Developers > Webhooks menu, then add a new destination.
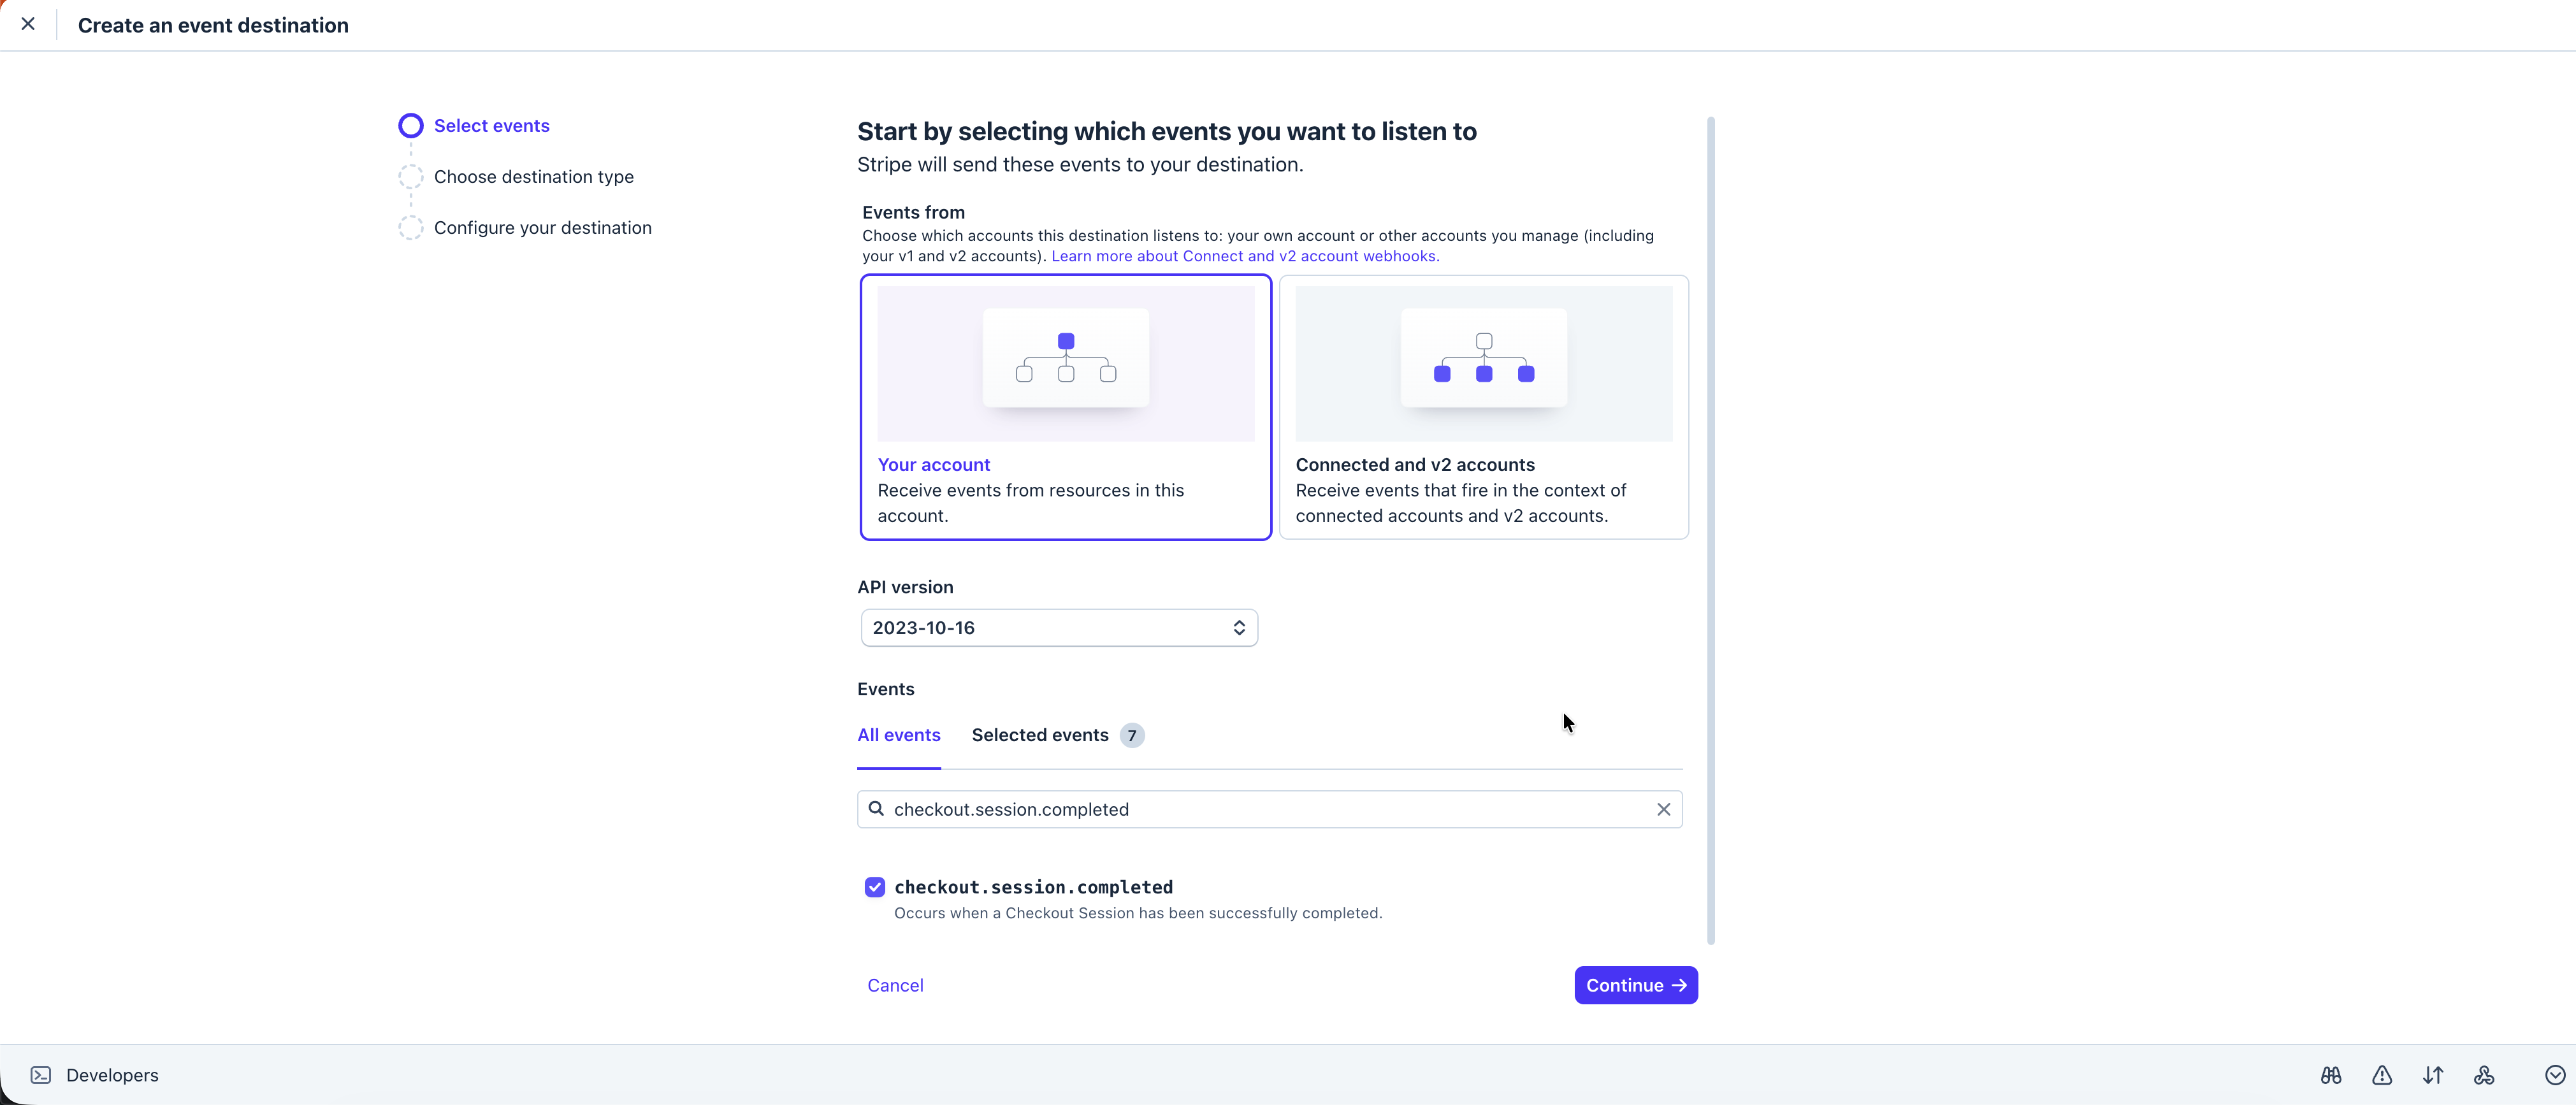
In that Webhook, add the customer.subscription.created, customer.subscription.deleted, customer.subscription.updated, payment_intent.payment_failed, payment_intent.succeeded, charge.refunded and checkout.session.completed events.
After that, in the Endpoint URL option, enter the following URL, or use the URL shown in your WooCommerce Stripe Payment settings.
Once the Webhook is successfully created, you can enter the Signing Secret you generated earlier into the Webhook Key option.
2. Paypal
You need to create Paypal account & credentials here.
To set up a payment method using Stripe, you can go to the WooCommerce -> Settings -> Payments -> Paypal Subscription menu.
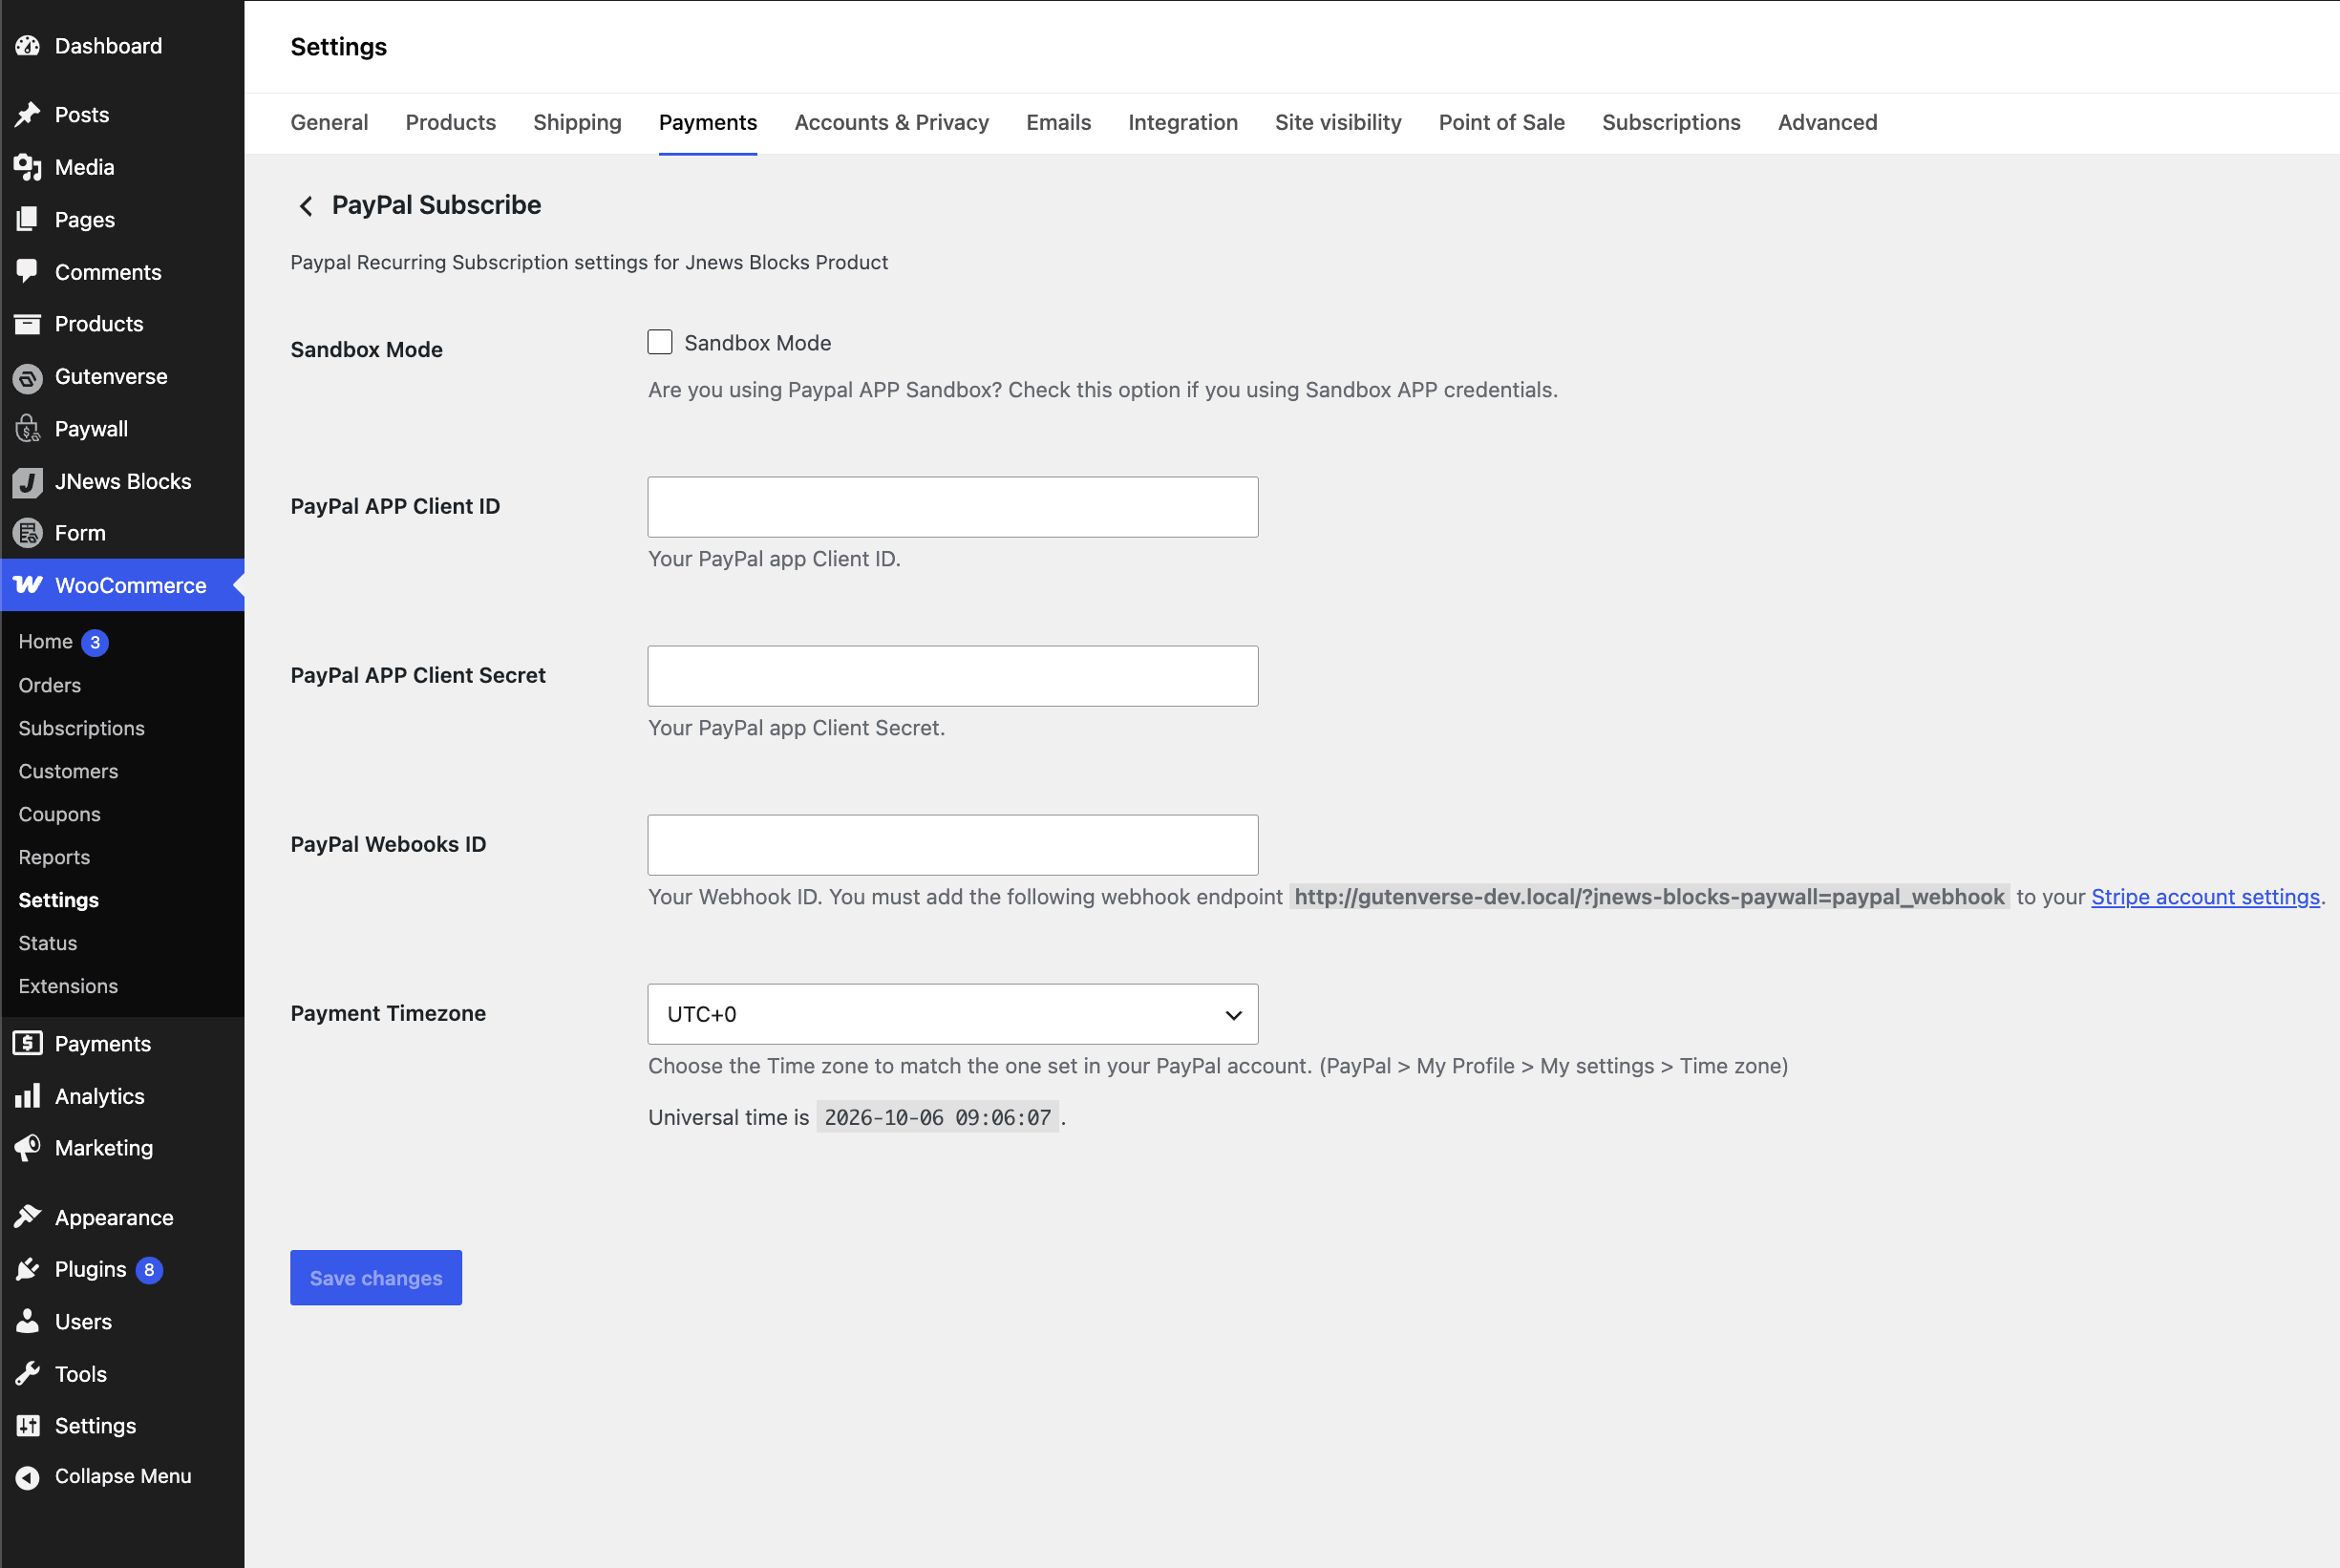
Below is a detailed explanation of the options available in the Stripe payment method:
- Sandbox Mode
Turn on this option if you using Sandbox APP credentials. - PayPal APP Client ID
Insert your PayPal app Client ID. - PayPal APP Client Secret
Insert Your PayPal app Client Secret. - PayPal Webhooks ID
Insert your PayPal WebHooks ID.
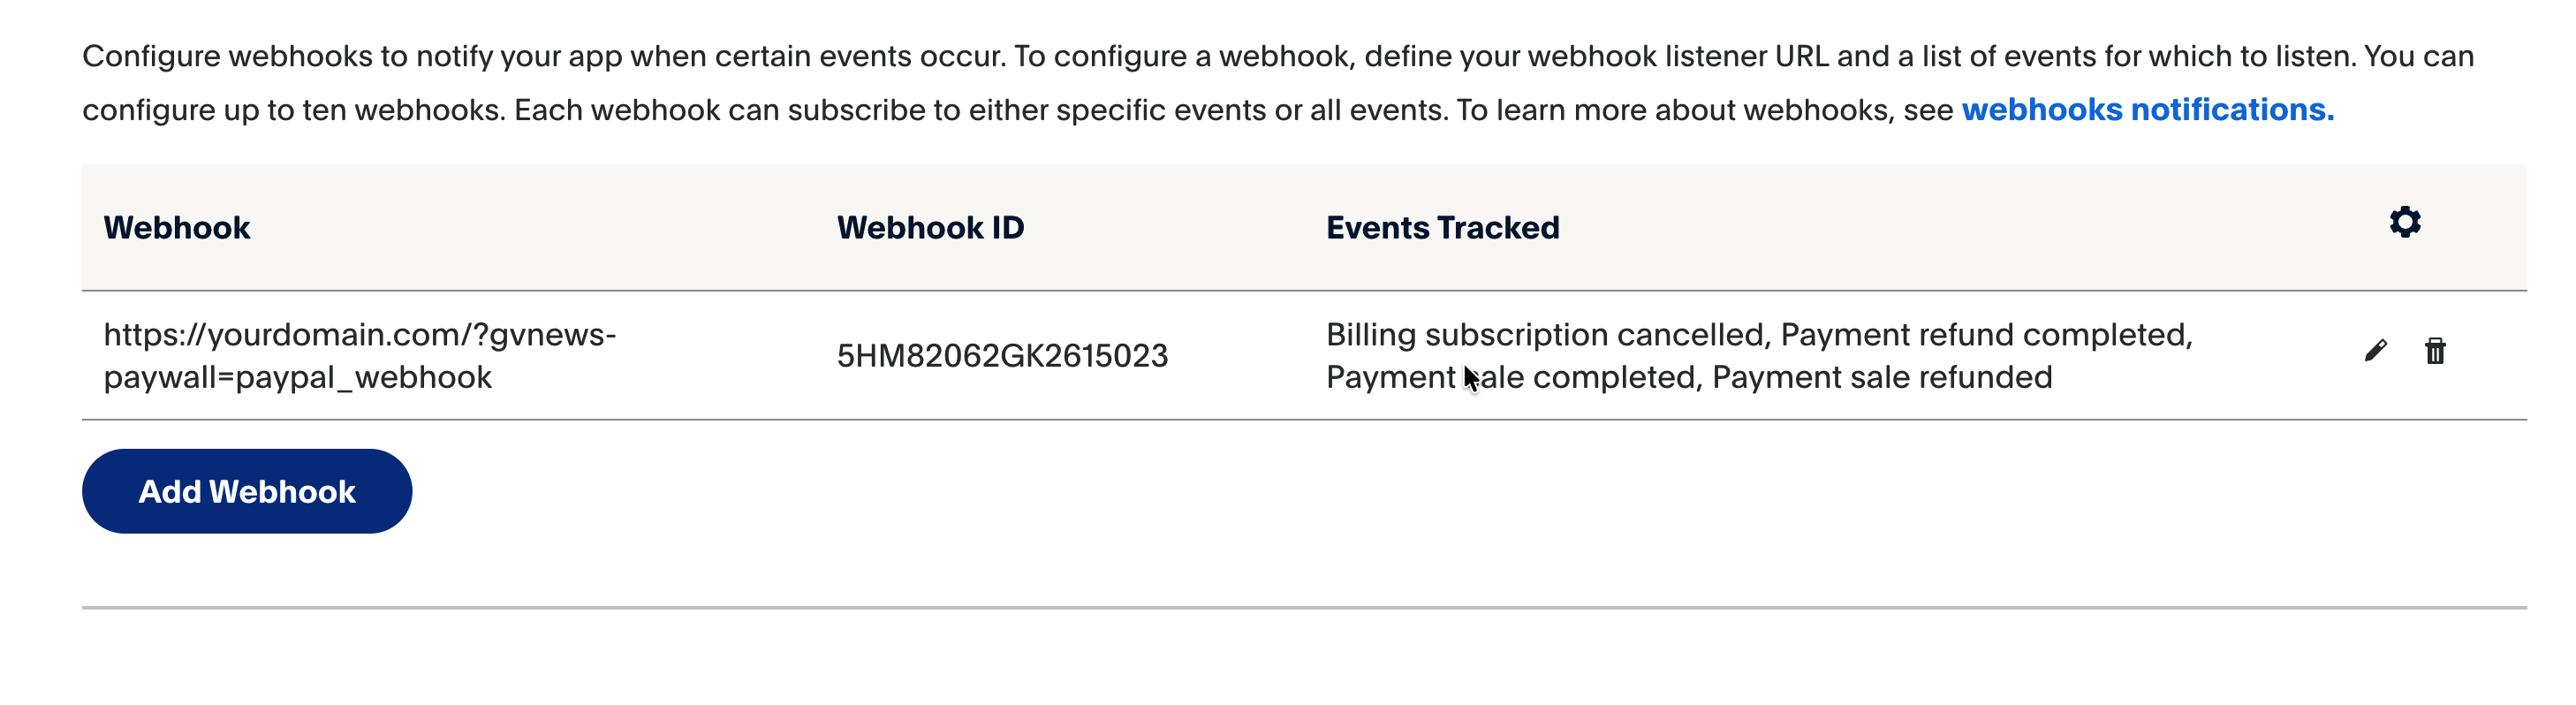
Make sure you already use the http://yourdomain.com/?jnews-blocks-paywall=paypal_webhook as the webhook enpoint and adding the Billing subscription cancelled, Payment refund completed, Payment sale completed, and Payment sale refunded on Events Tracked lists
7. Setup Content Restriction
You can restrict access to your website’s content using JNews Paywall. You can restrict access to all posts, specific posts, or show and hide certain blocks based on the user’s subscription status.
- Block All Posts
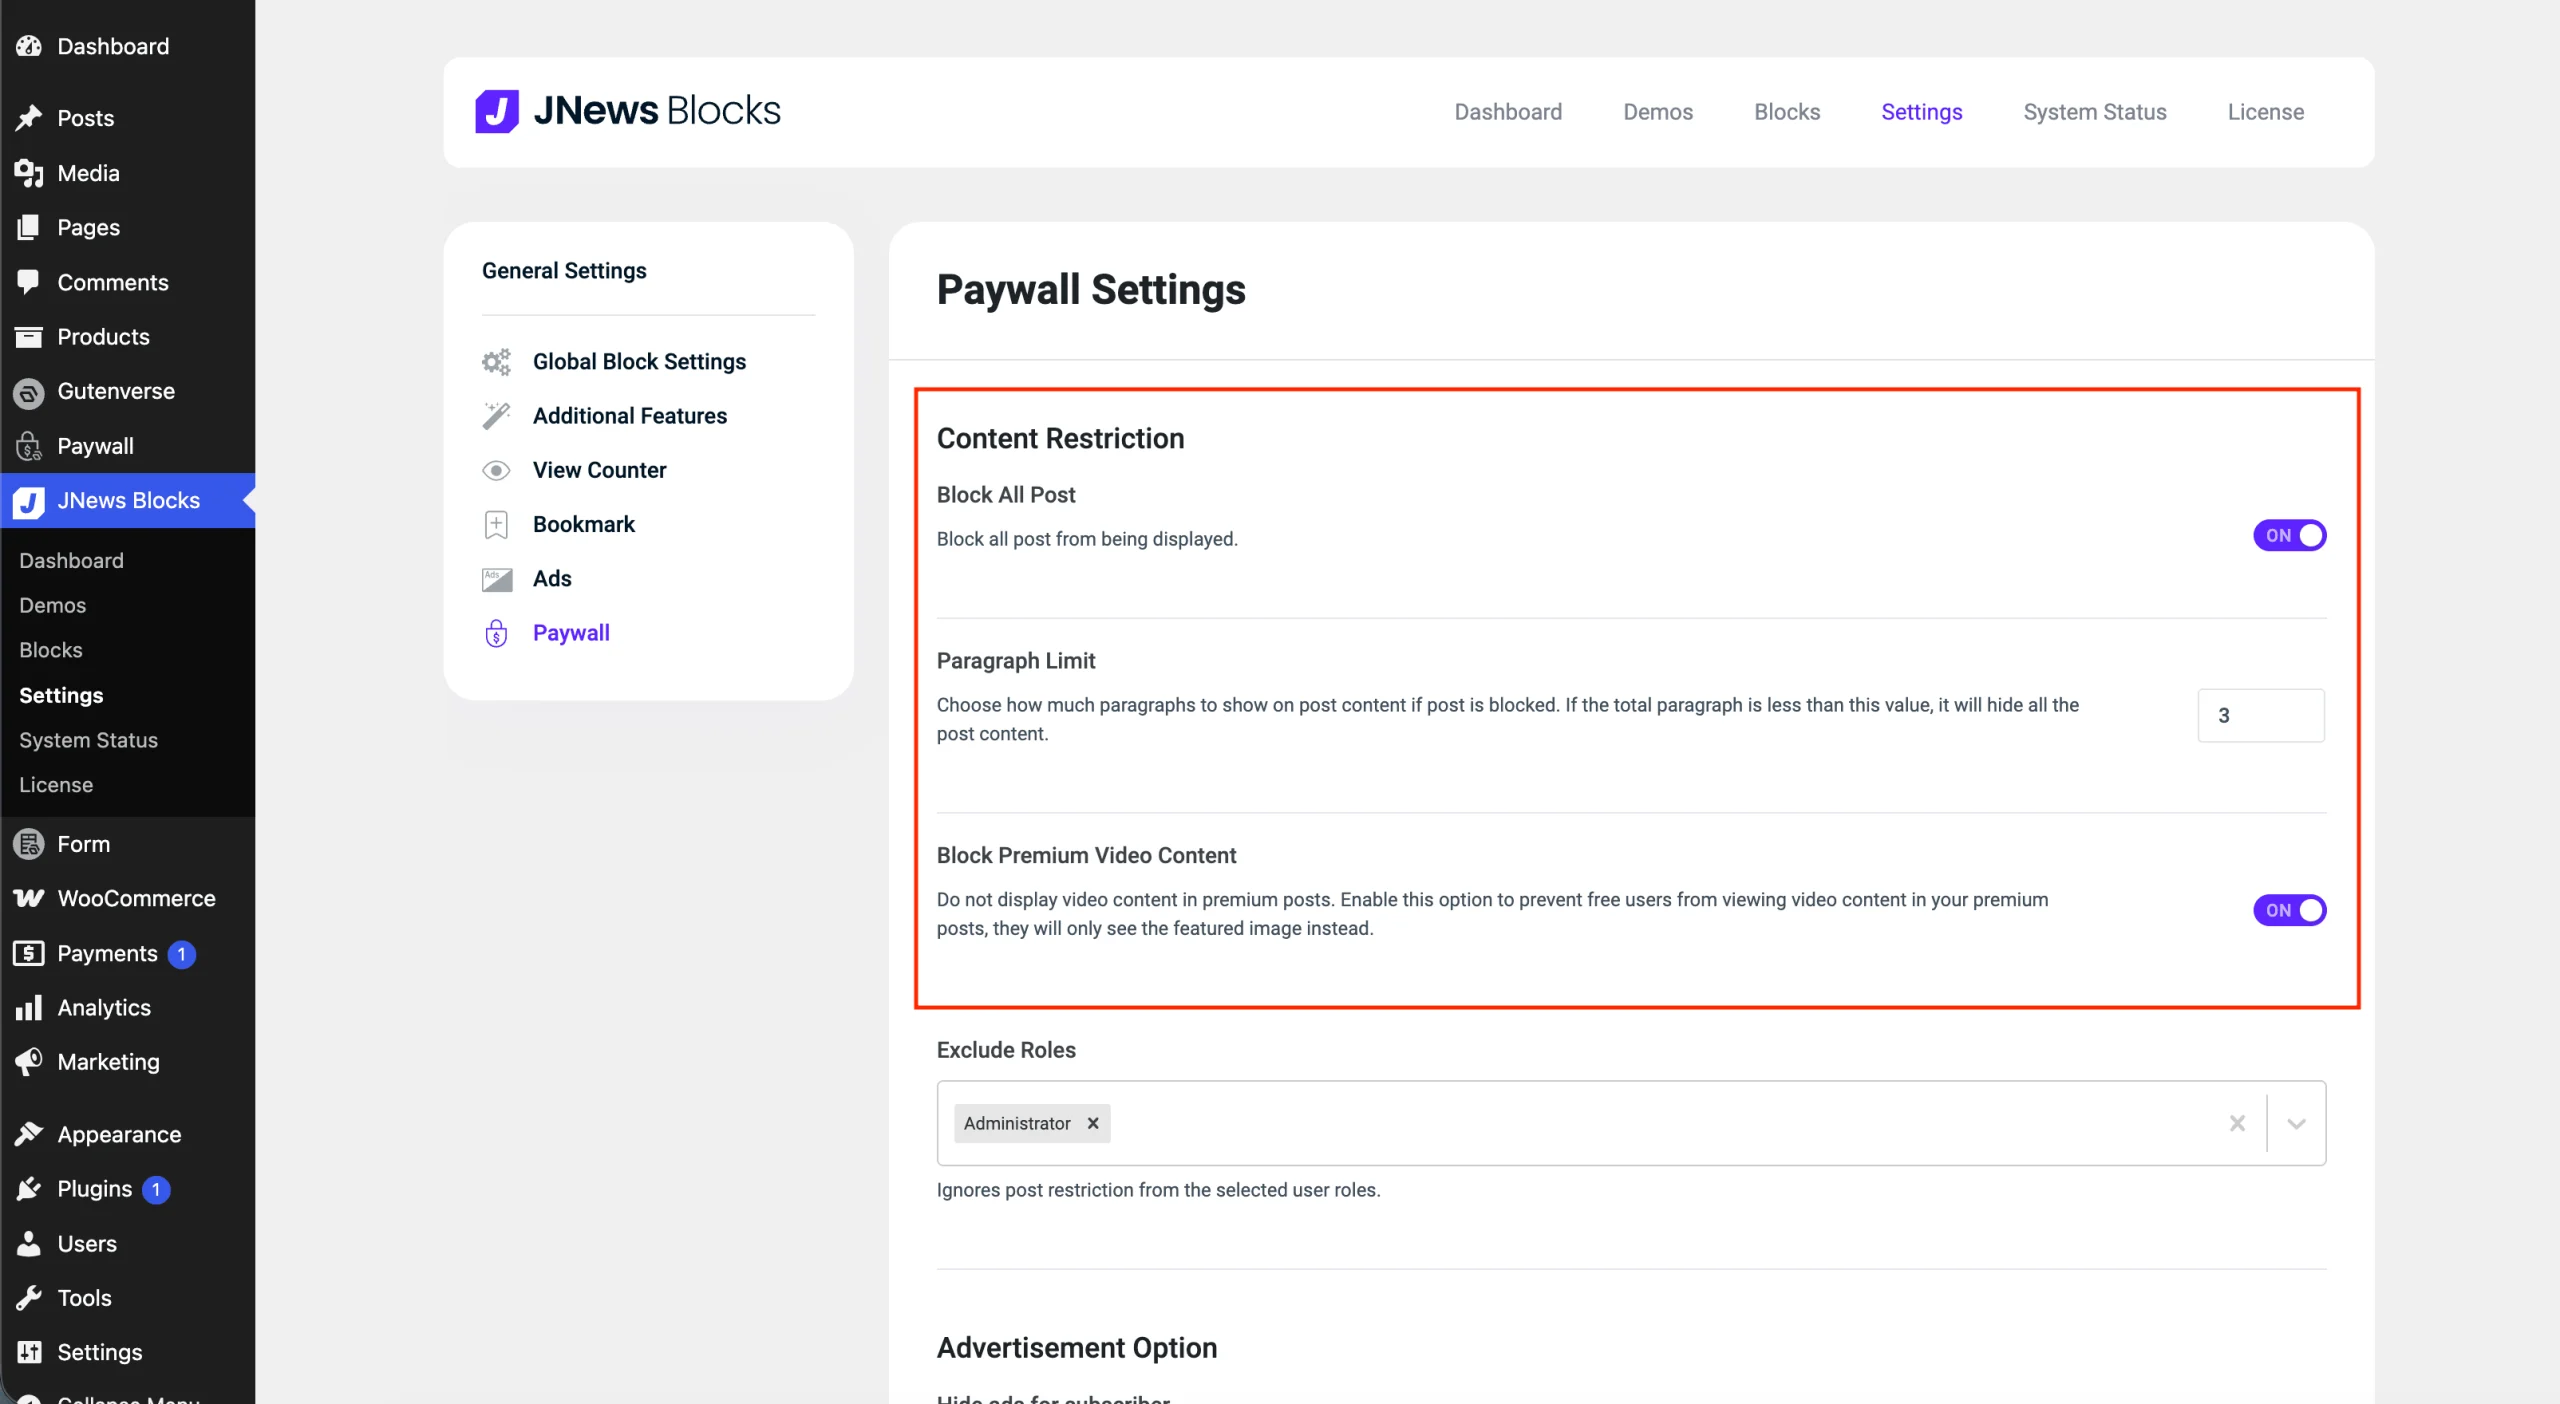
To restrict access to all posts on your website, allowing only subscribed users or users who have unlocked the posts to access them, enable theBlock All Postoption underJNews Blocks > Settings > Paywall > Content Restriction.You can also configure theParagraph LimitandBlock Premium Video Contentoptions in this section.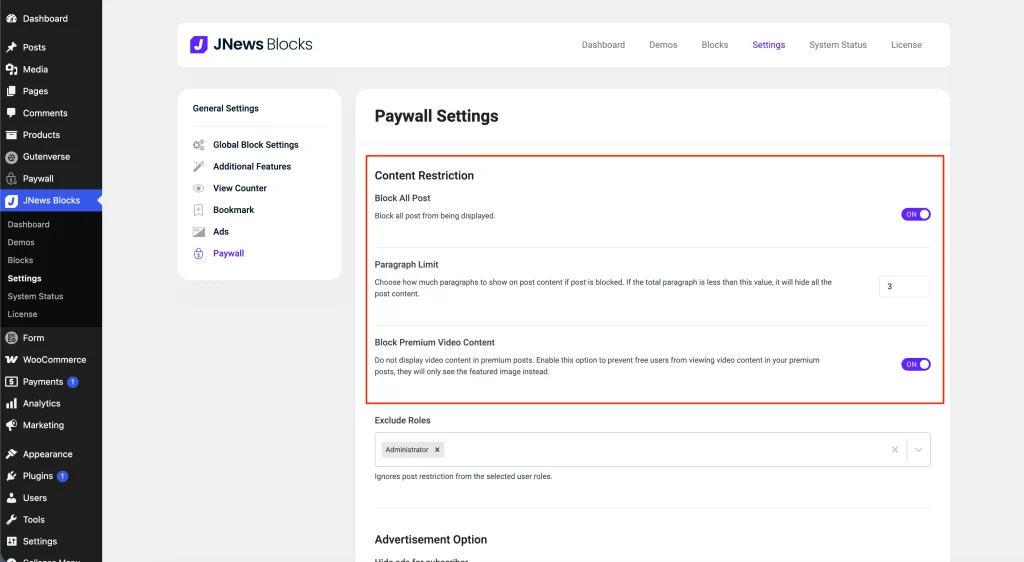 If you have restricted access to all posts but want to make certain posts available for free or change their paragraph limits, you can override these settings individually. To do this, edit the post and navigate to
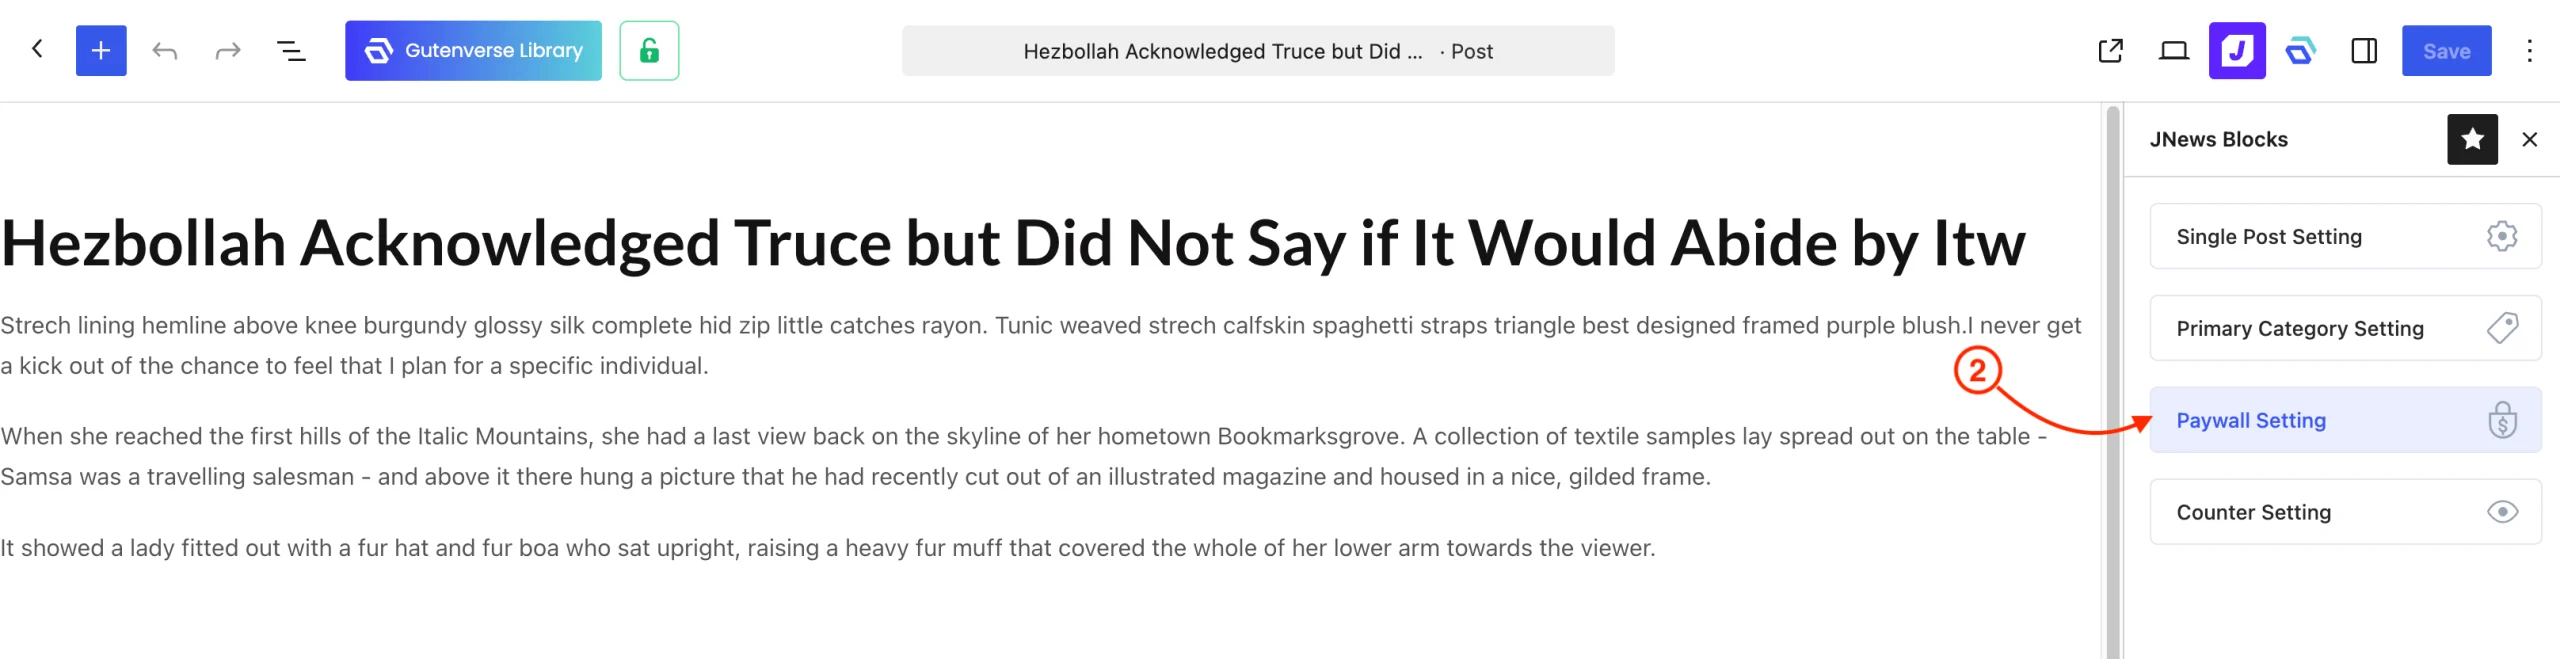
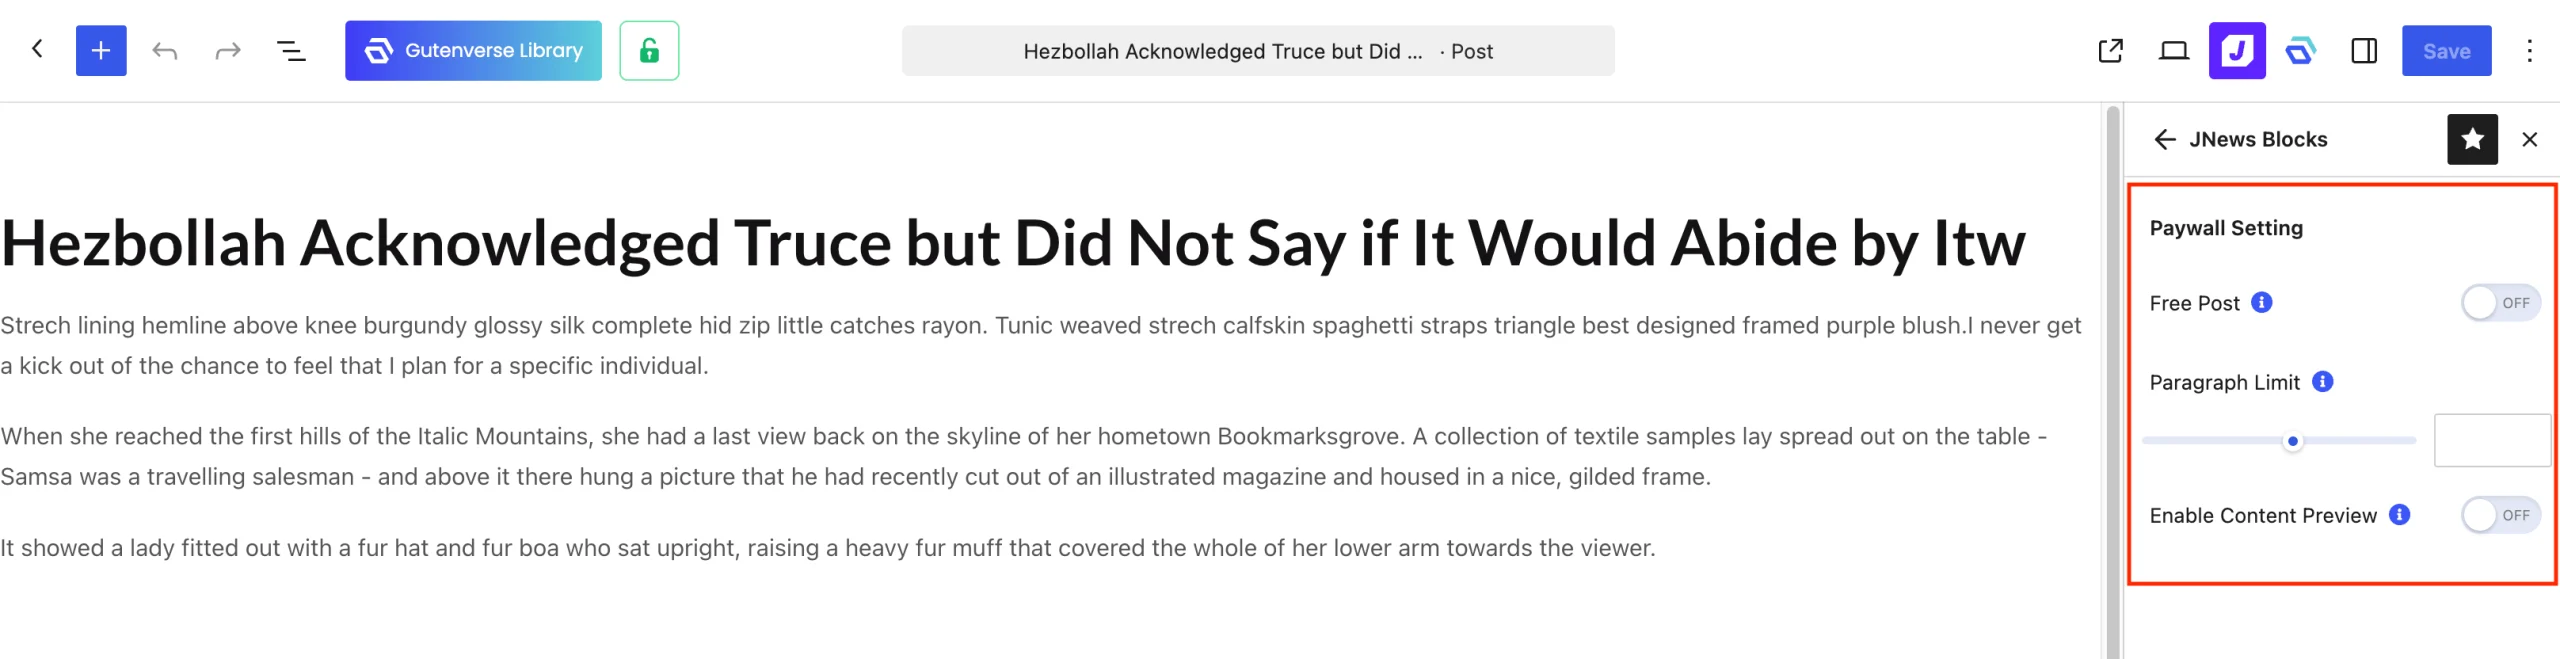
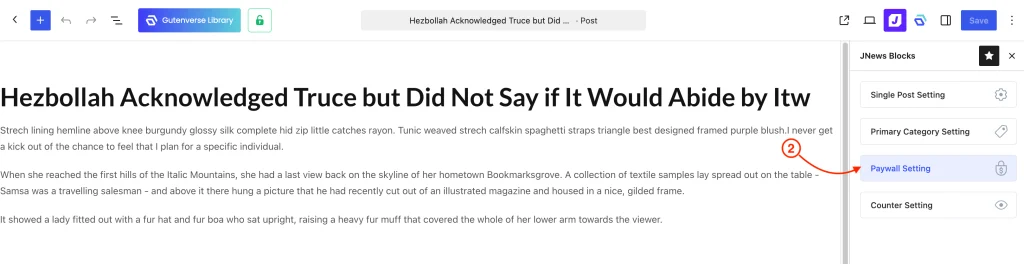
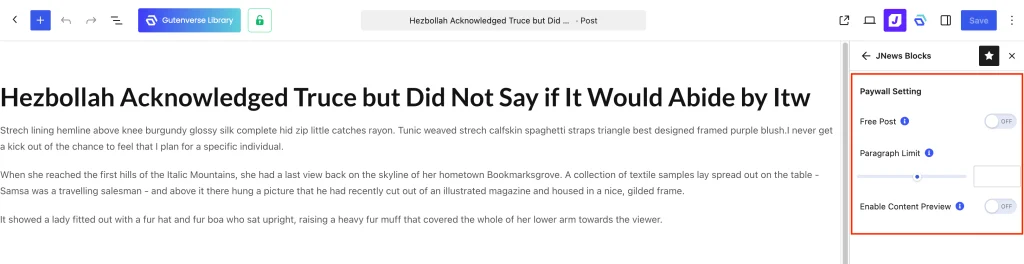
 JNews Metabox > Paywall Settings. Enable theFree Postoption to make the post accessible for free, or adjust the other available settings as needed.
- Restrict Access to Specific Posts
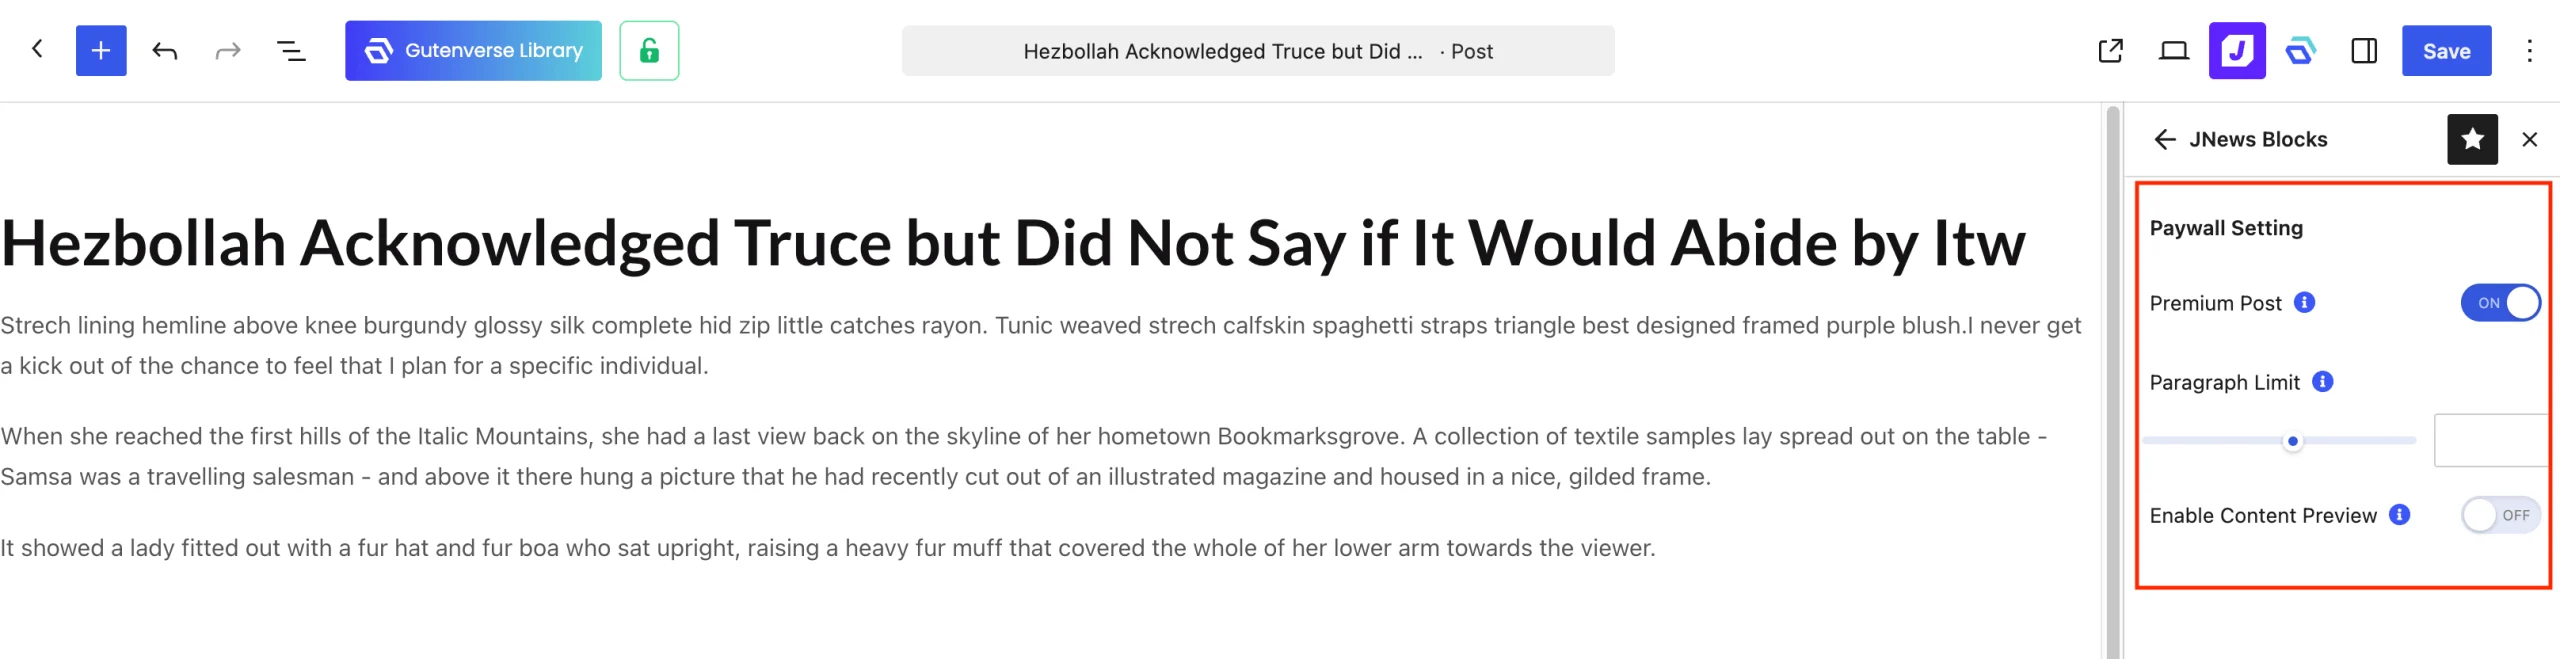
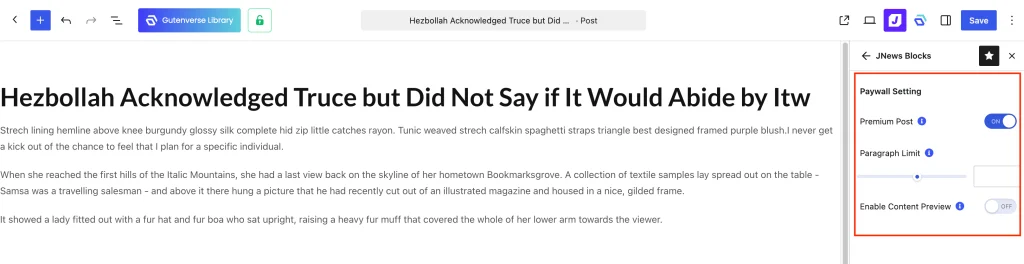
If you only want to restrict access to specific posts, make sure theBlock All Postoption is disabled underJNews Blocks > Settings > Paywall > Content Restriction. To restrict access to an individual post, edit the post and navigate toJNews Metabox > Paywall Settings. Enable thePremium Postoption to restrict access to that post. You can also configure the other available options in this section as needed.
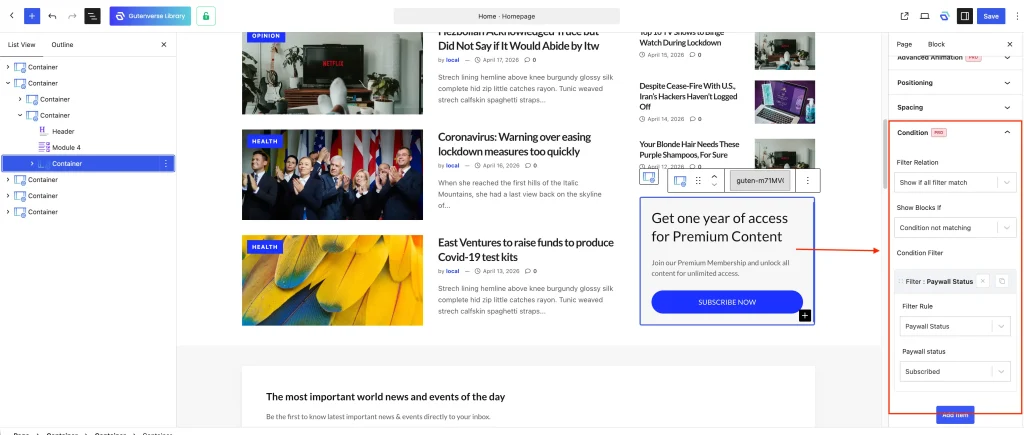
- Show or Hide Blocks Based on Paywall Status
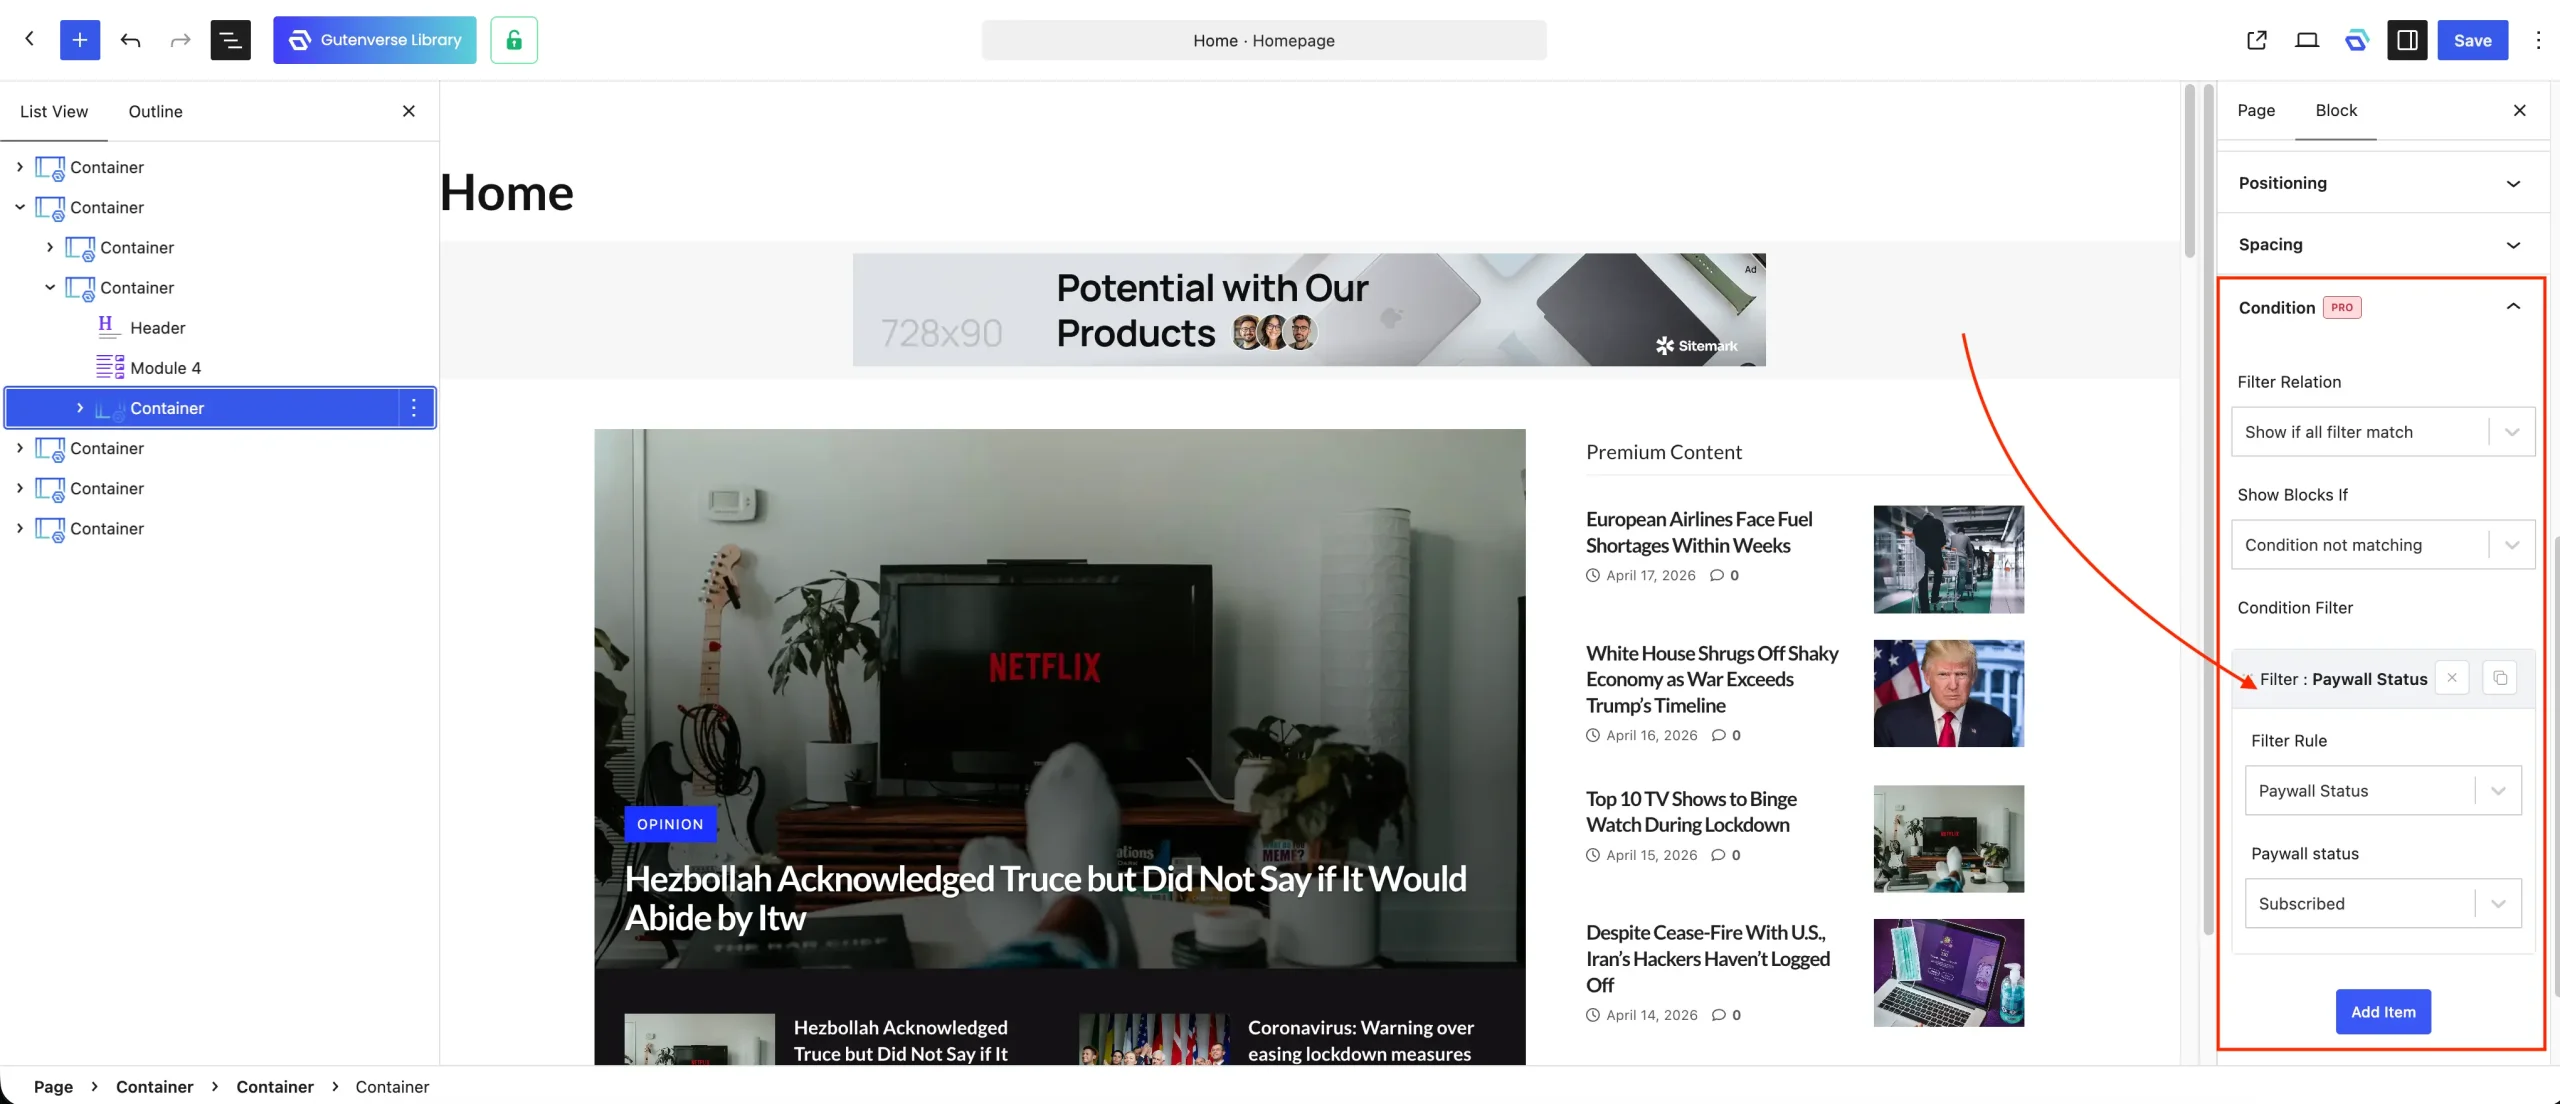
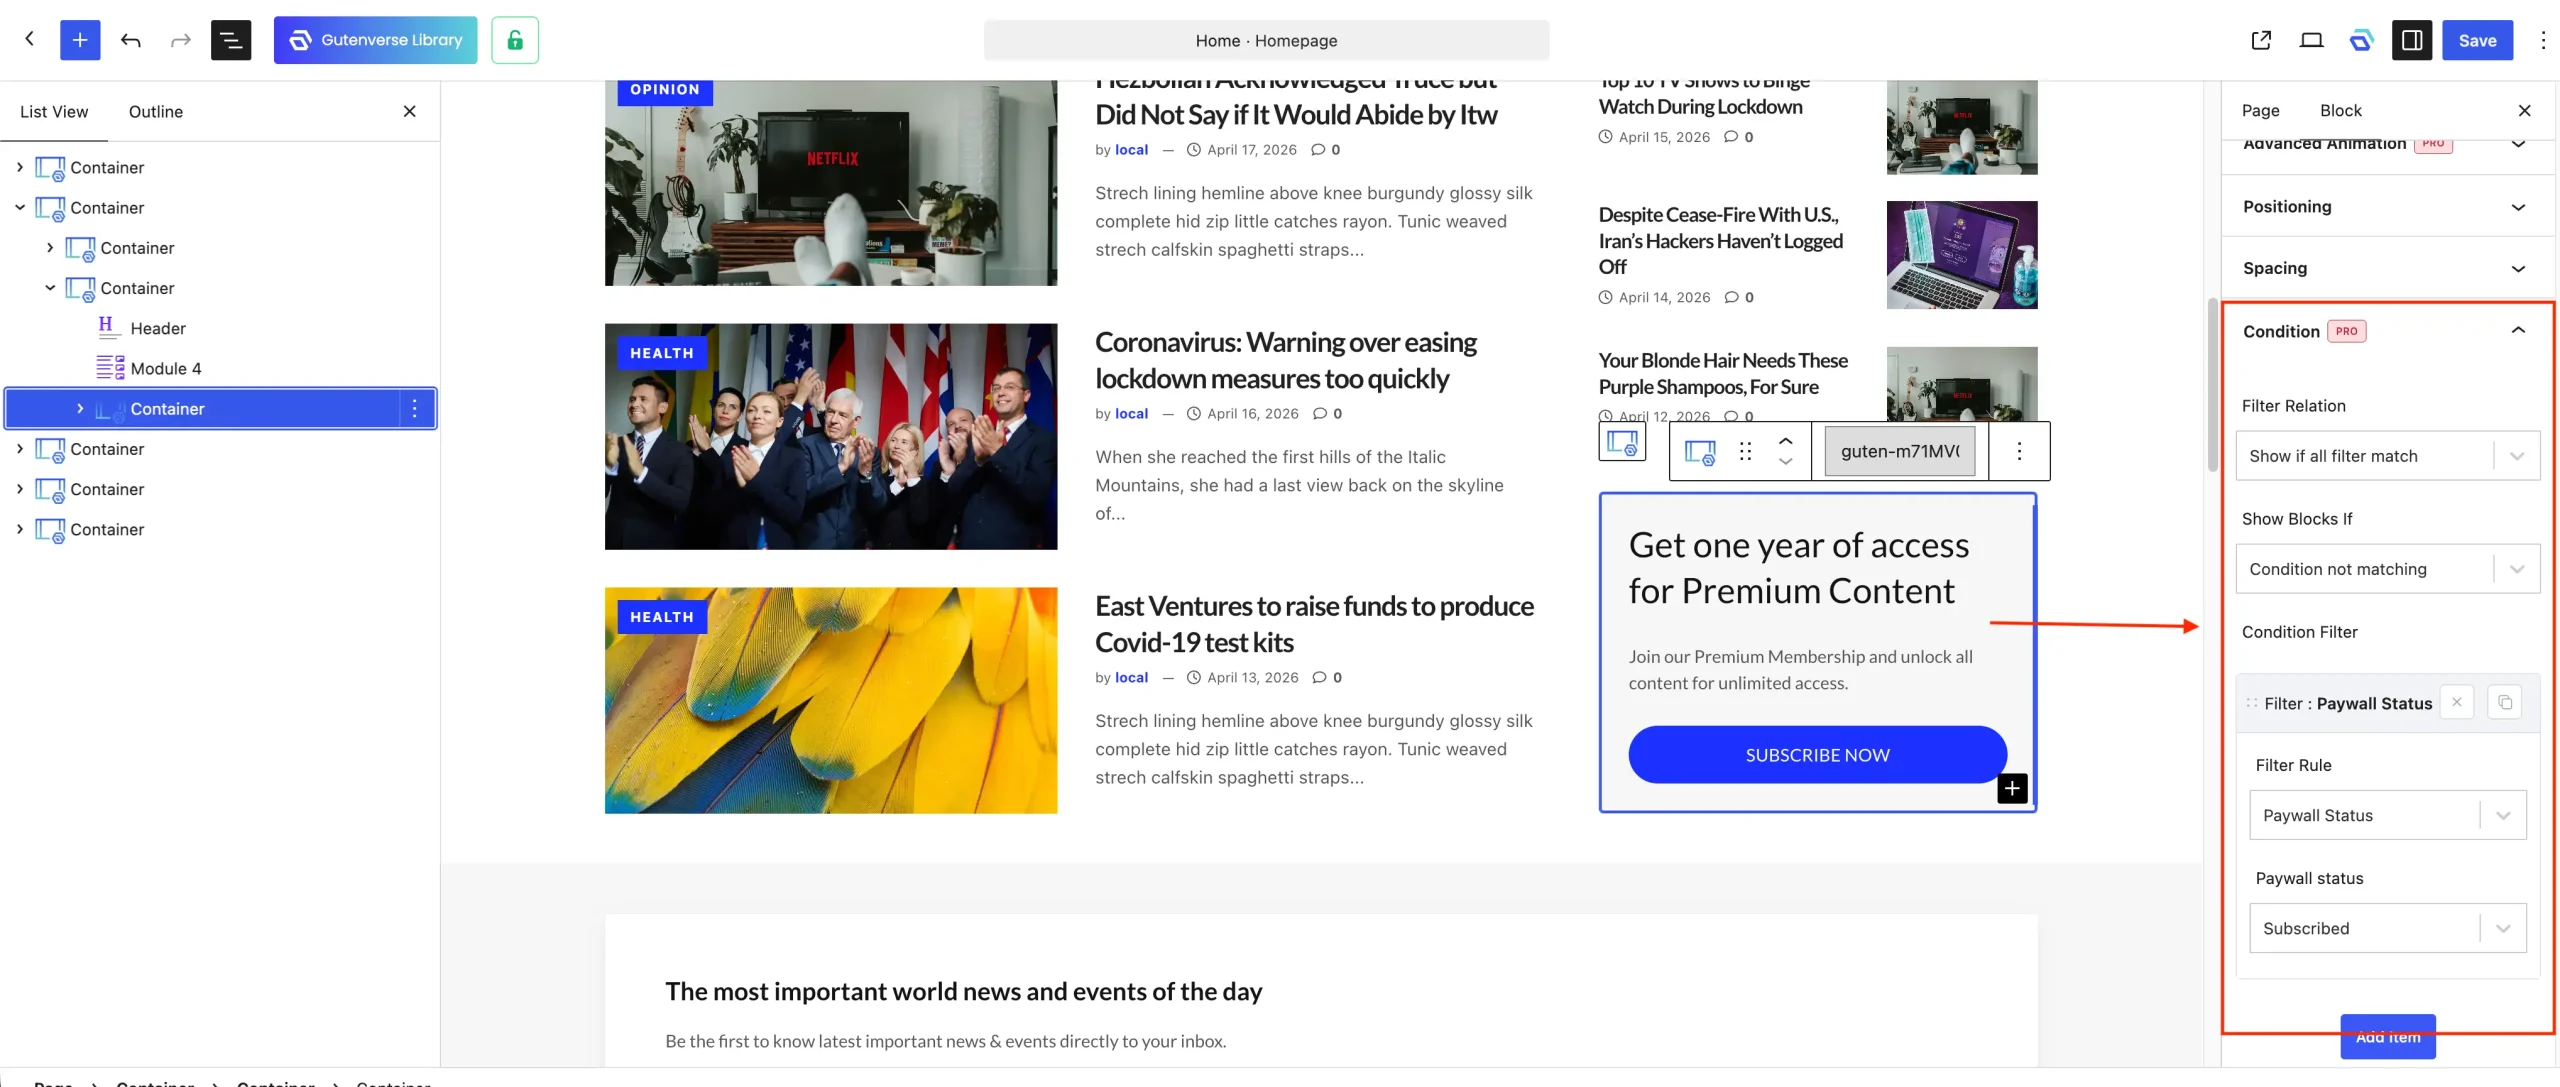
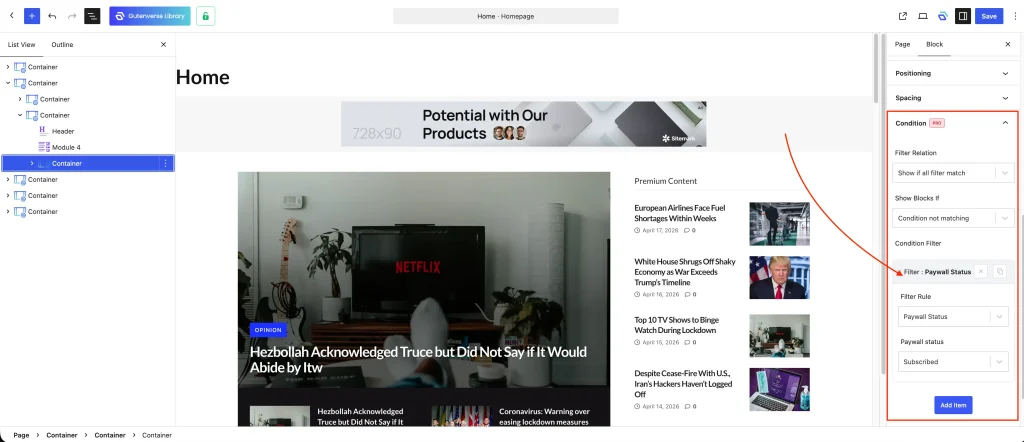
You can show or hide specific blocks based on the user’s paywall subscription status by configuring the block’sConditionssettings. To do this, select the block you want to control and open itsConditionssettings. Configure theFilter RelationandShow Blocks Ifoptions based on your requirements, then addPaywall Statusto theCondition Filterlist. For example, if you want to hide a banner block from users who have an active paywall subscription, you can configure the conditions as shown in the following image.