
In Gutenverse, we’ve designed the Account Details block to be the cornerstone of your user management experience. This block empowers you to build a dedicated Account Page where registered users can manage their personal information in one place.
By integrating this into your site, you provide a seamless experience for your community. Users can quickly update essential account data—such as their name, display name, email address, and password—all without ever having to leave your website’s front-end.
1. Installation & Requirements
To enable and use the Account Page feature, you need to activate the following plugins:
- Gutenverse
- Gutenverse Pro
Once all of these plugins are activated, make sure you have activated your Gutenverse Pro license with the Professional tier or higher. Alternatively, you can also use this feature by activating your JNews Blocks license.
2. Account Settings
Before using the Account Details block, you must define which page will serve as your website’s account page. To achieve that, you can go to the Gutenverse -> Settings > General Settings > Account menu.
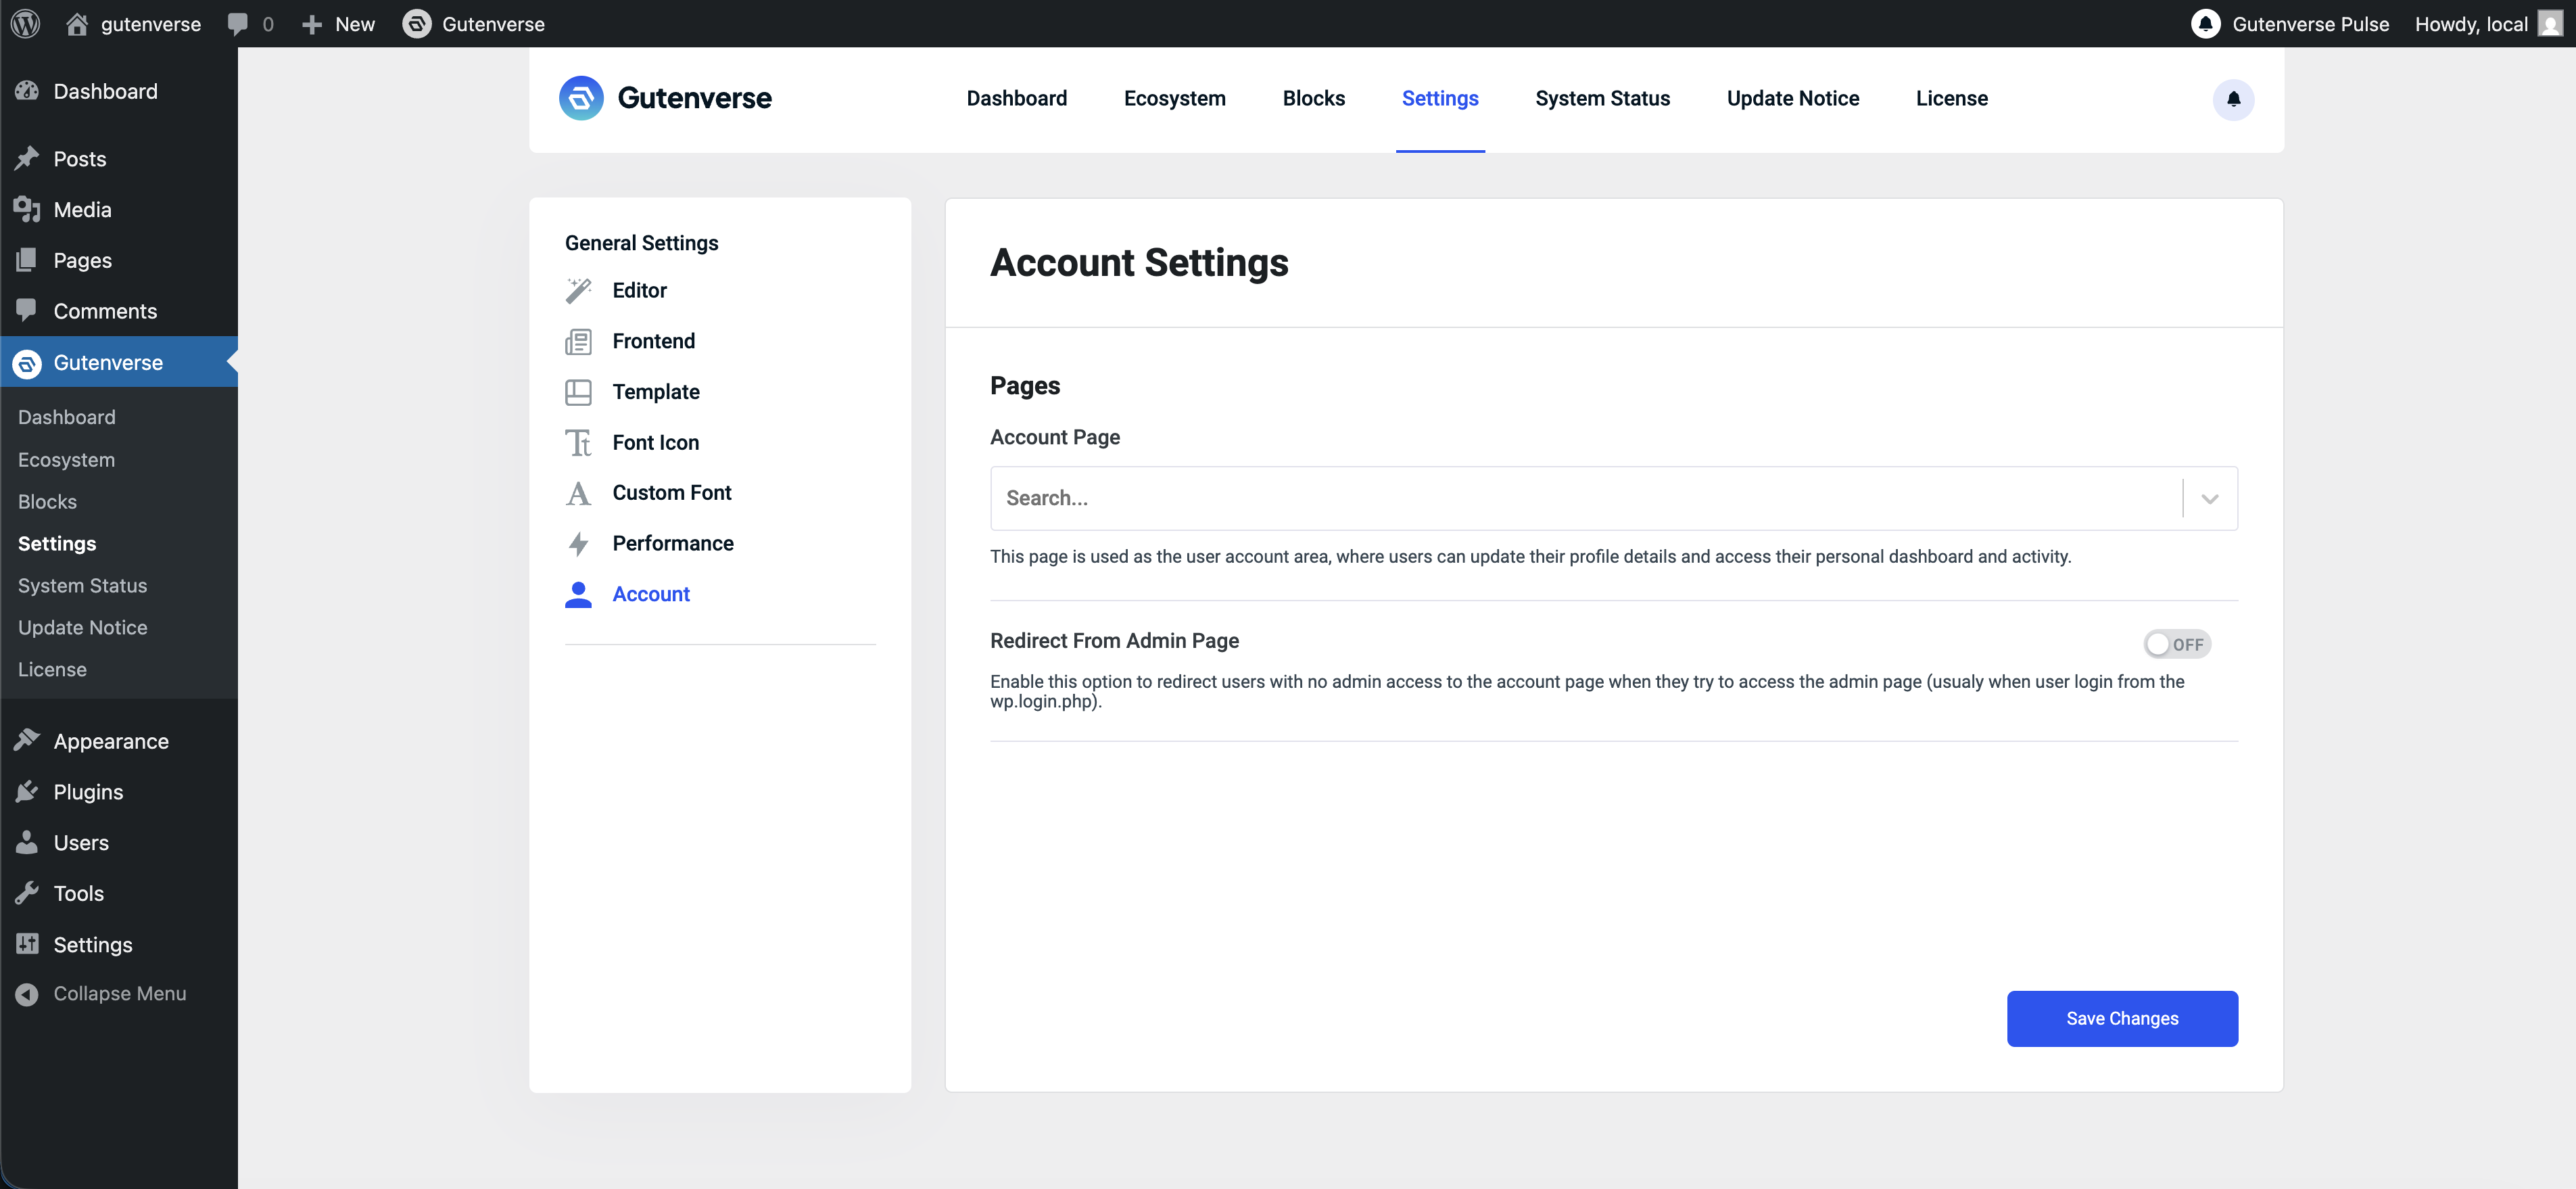
Below is a detailed explanation of the options available in the Account Settings:
- Account Page
Select the page you want to use as the user account page from the dropdown. This is where users will manage their profiles. - Redirect From Admin Page
(Optional) Enable this to automatically redirect non-admin users to your account page if they try to access the WordPress back-end (wp-admin).
3. Account Details Block
After defining a page in the Account Settigns, WordPress will automatically label it ‘Gutenverse Account Page’. You’ll see this indicator next to the page title in your Pages list. This label confirms that this specific page is now the official hub for your users account management, and it is where you should place the Account Details block.

Once you have identified the correctly labeled page, follow these simple steps to build your account dashboard:
1. Go to the page marked as the Gutenverse Account Page.
2. Click the (+) Add Block button and search for Account Details.
3. Add the block to the page. It will immediately act as the central dashboard, automatically pulling and displaying the profile picture and name of the logged-in user.
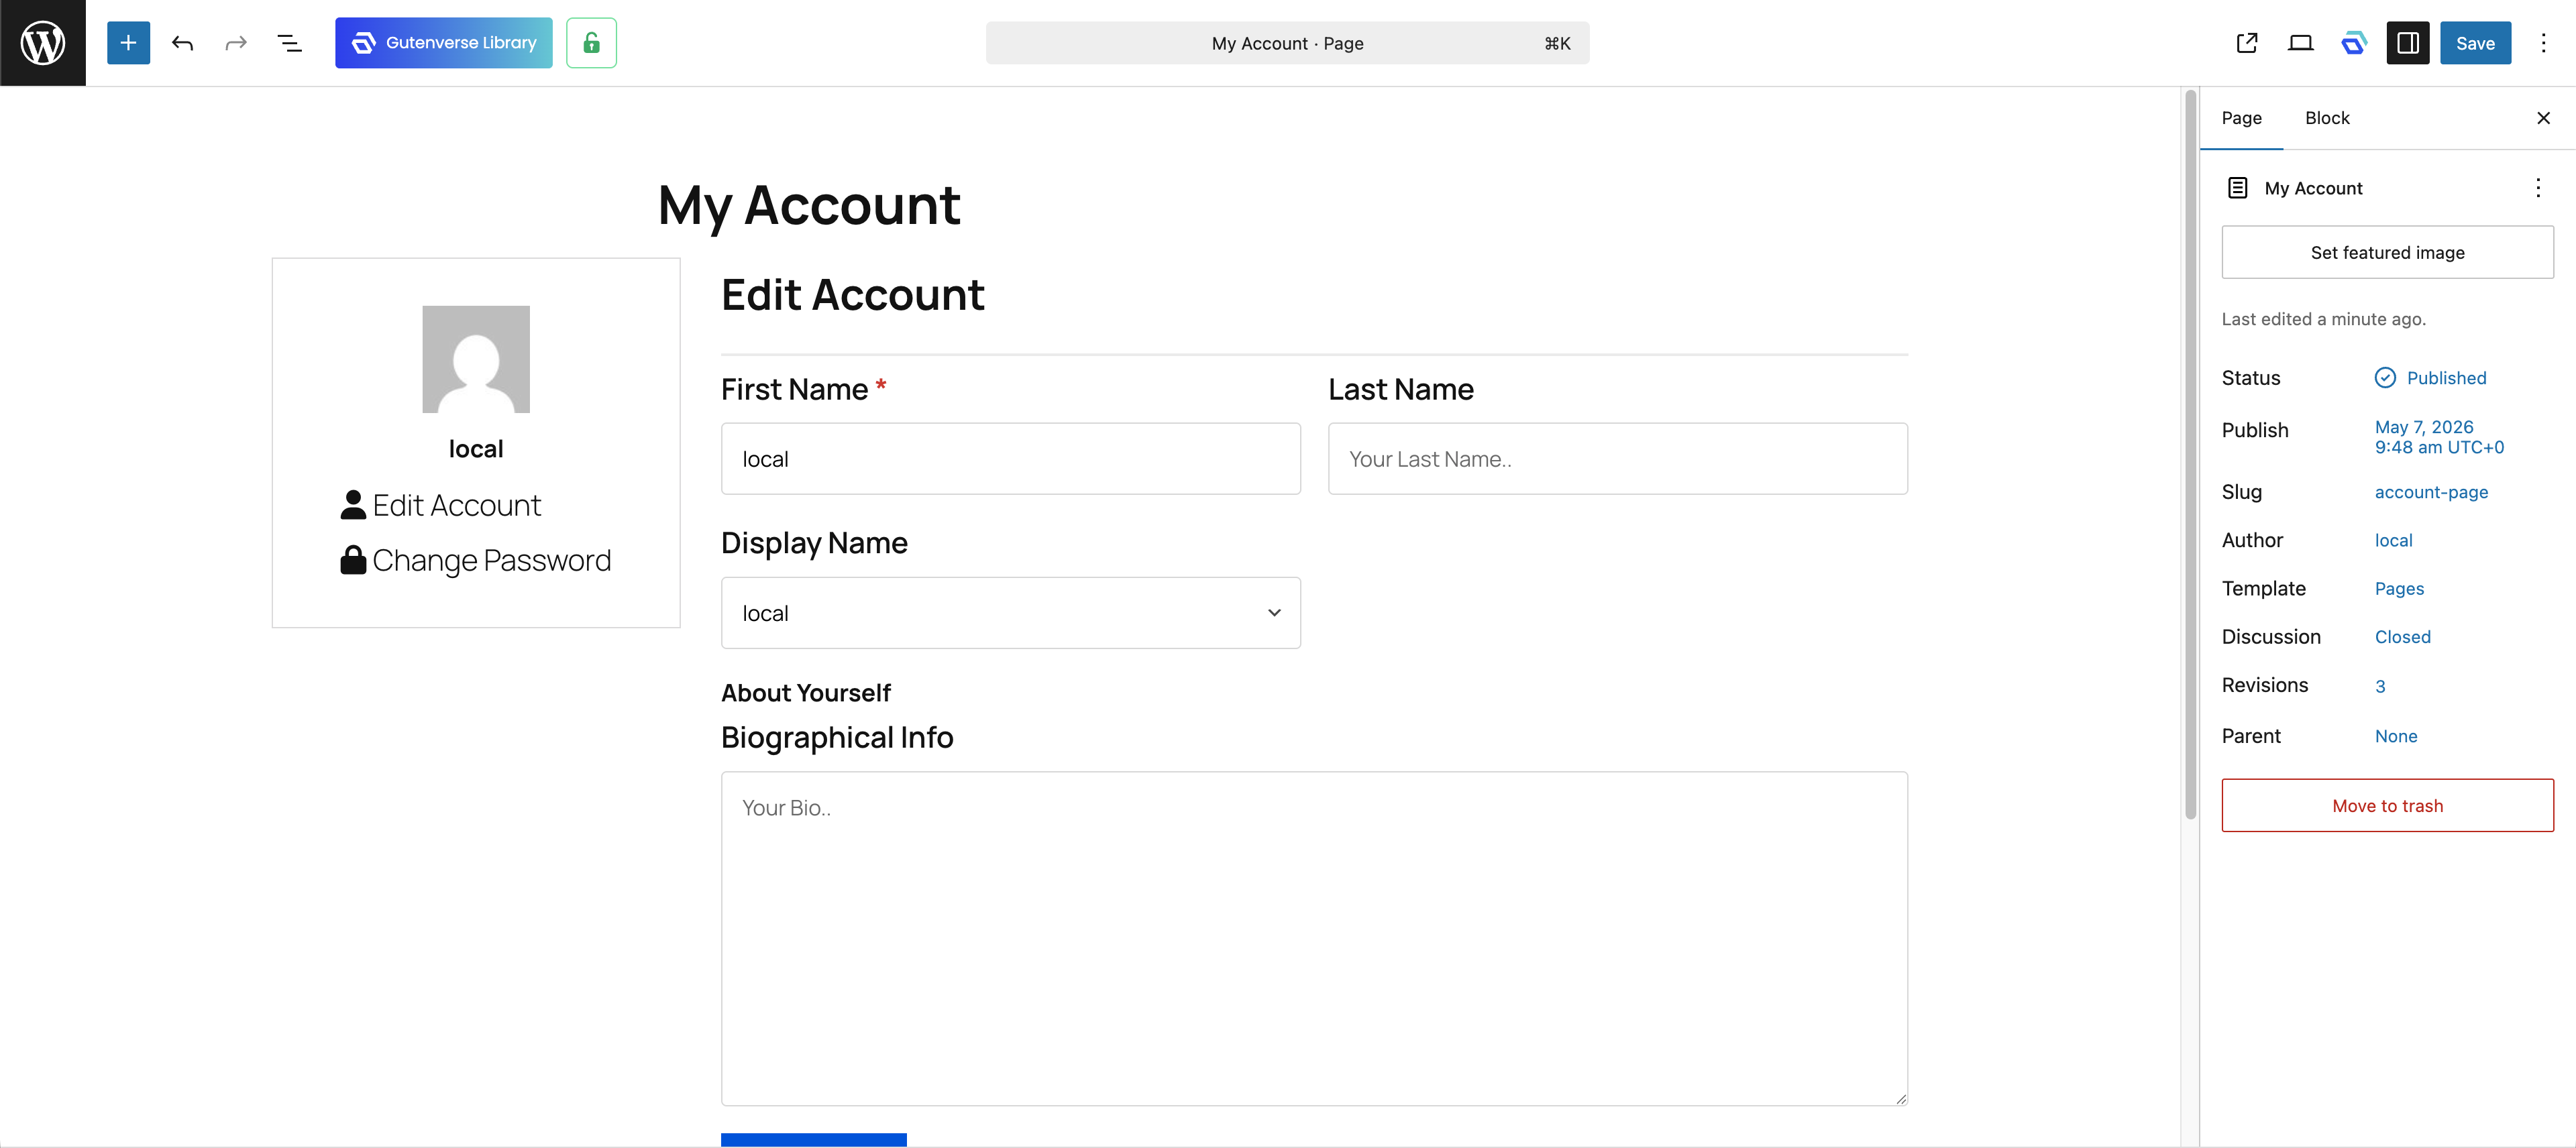
The Account Details block operates as a modular container. When first added, it comes pre-loaded with two essential child blocks:
- Edit Account
Block that allows users to manage and update their primary profile information. - Edit Password
Block that allows users to change their account password.
These components are linked to the dashboard’s navigation menu. You can further expand your account page by adding more menu items, each acting as a dedicated section where you can drop other child blocks or content.
4. Managing Your Dashboard Menus
You can customize the navigation tabs directly in the editor. To modify your menu, click on the Account Details block and open the Settings panel on the right sidebar. Inside the Sidebar section, you will find the Items options—this is the place where you can add, remove, and configure your dashboard menus.
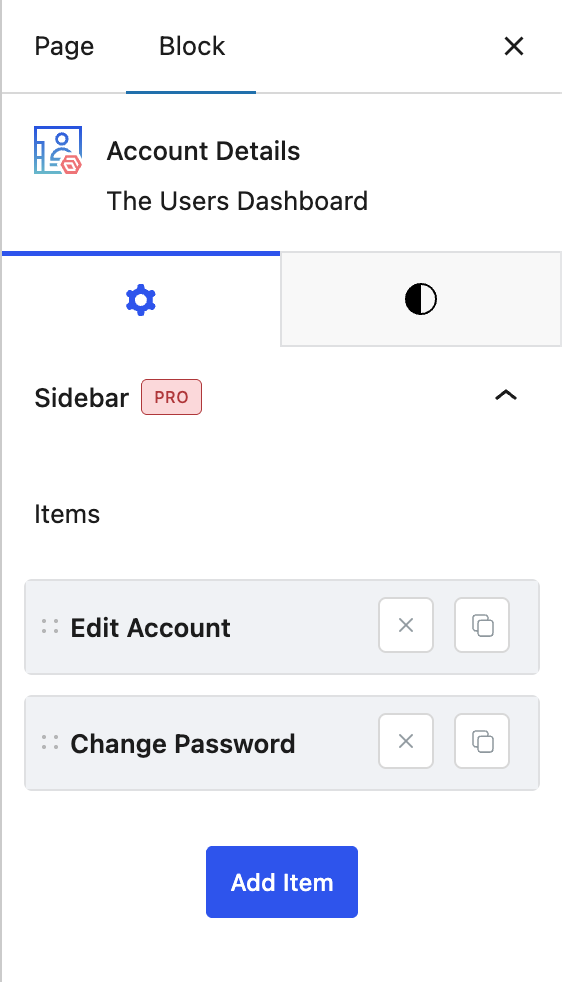
Within the Items list, you have full control over your dashboard’s structure. You can click the Add Item button to create a new menu, or use drag and drop to quickly reorder the tabs as they appear on your site. If you want to duplicate the menu, use the Copy icon to duplicate a menu item and its configuration, or click the (x) icon if you need to remove a menu item entirely.
To see these actions in practice, refer to the step-by-step images below for a detailed walkthrough on how to create, reorder, and manage your custom account page menus:
1. Inside the editor, search and add a block called Account Detail
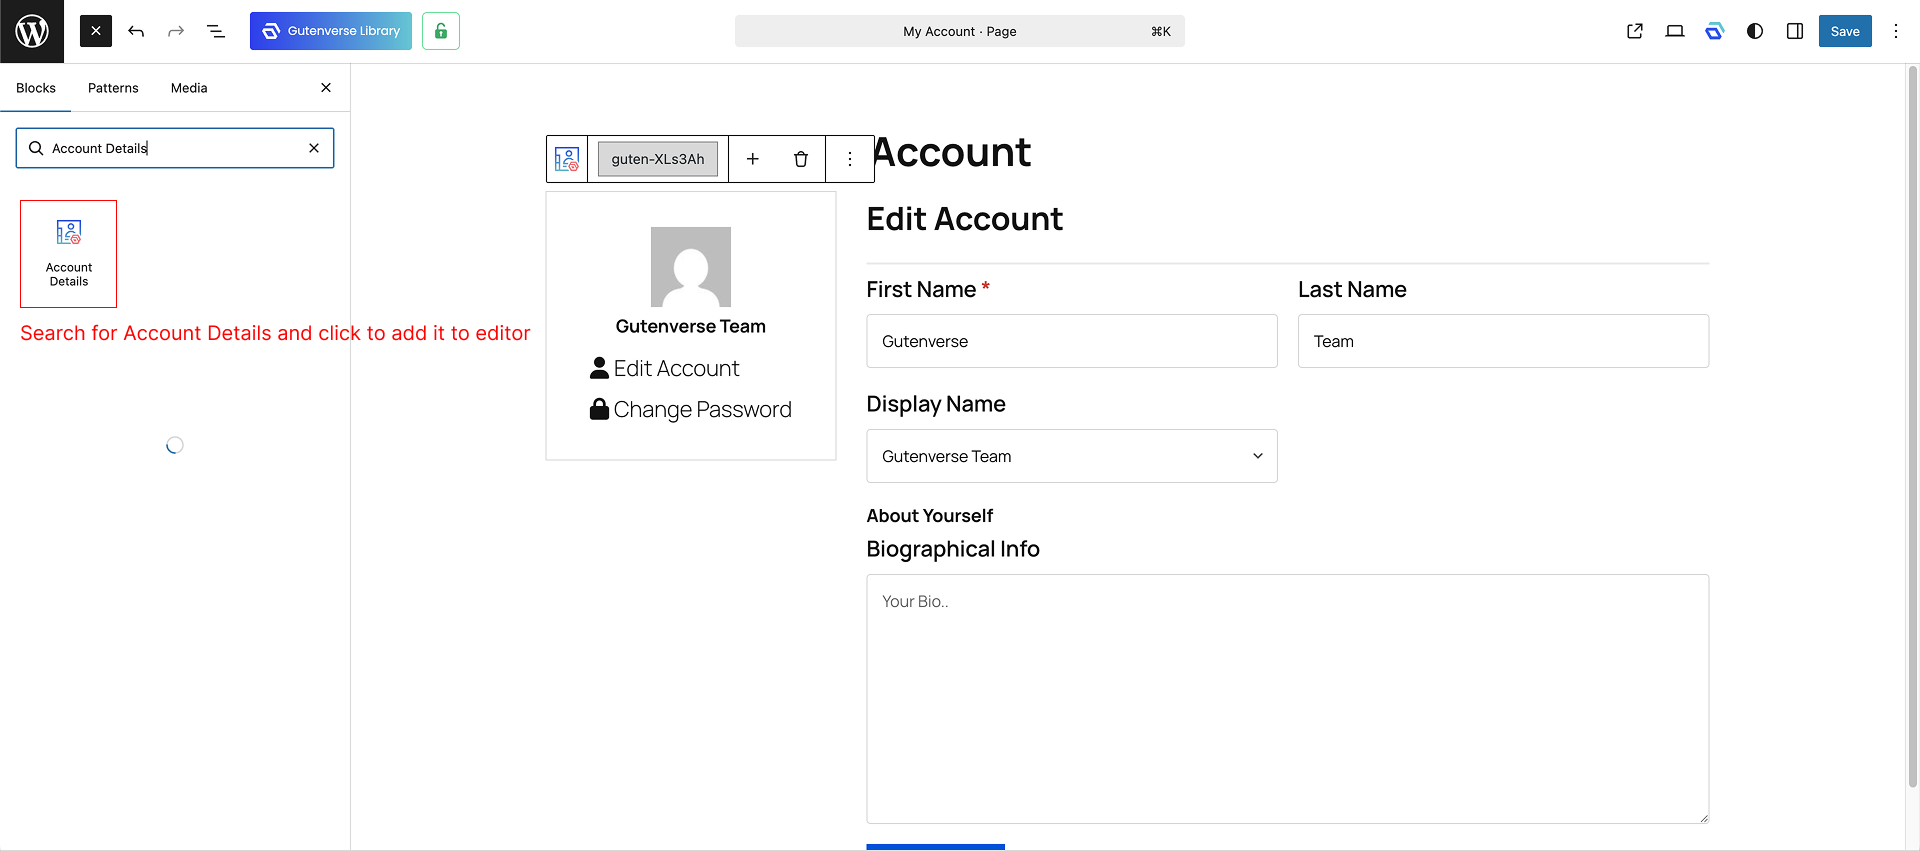
2. Select Account Detail block and click Add Item
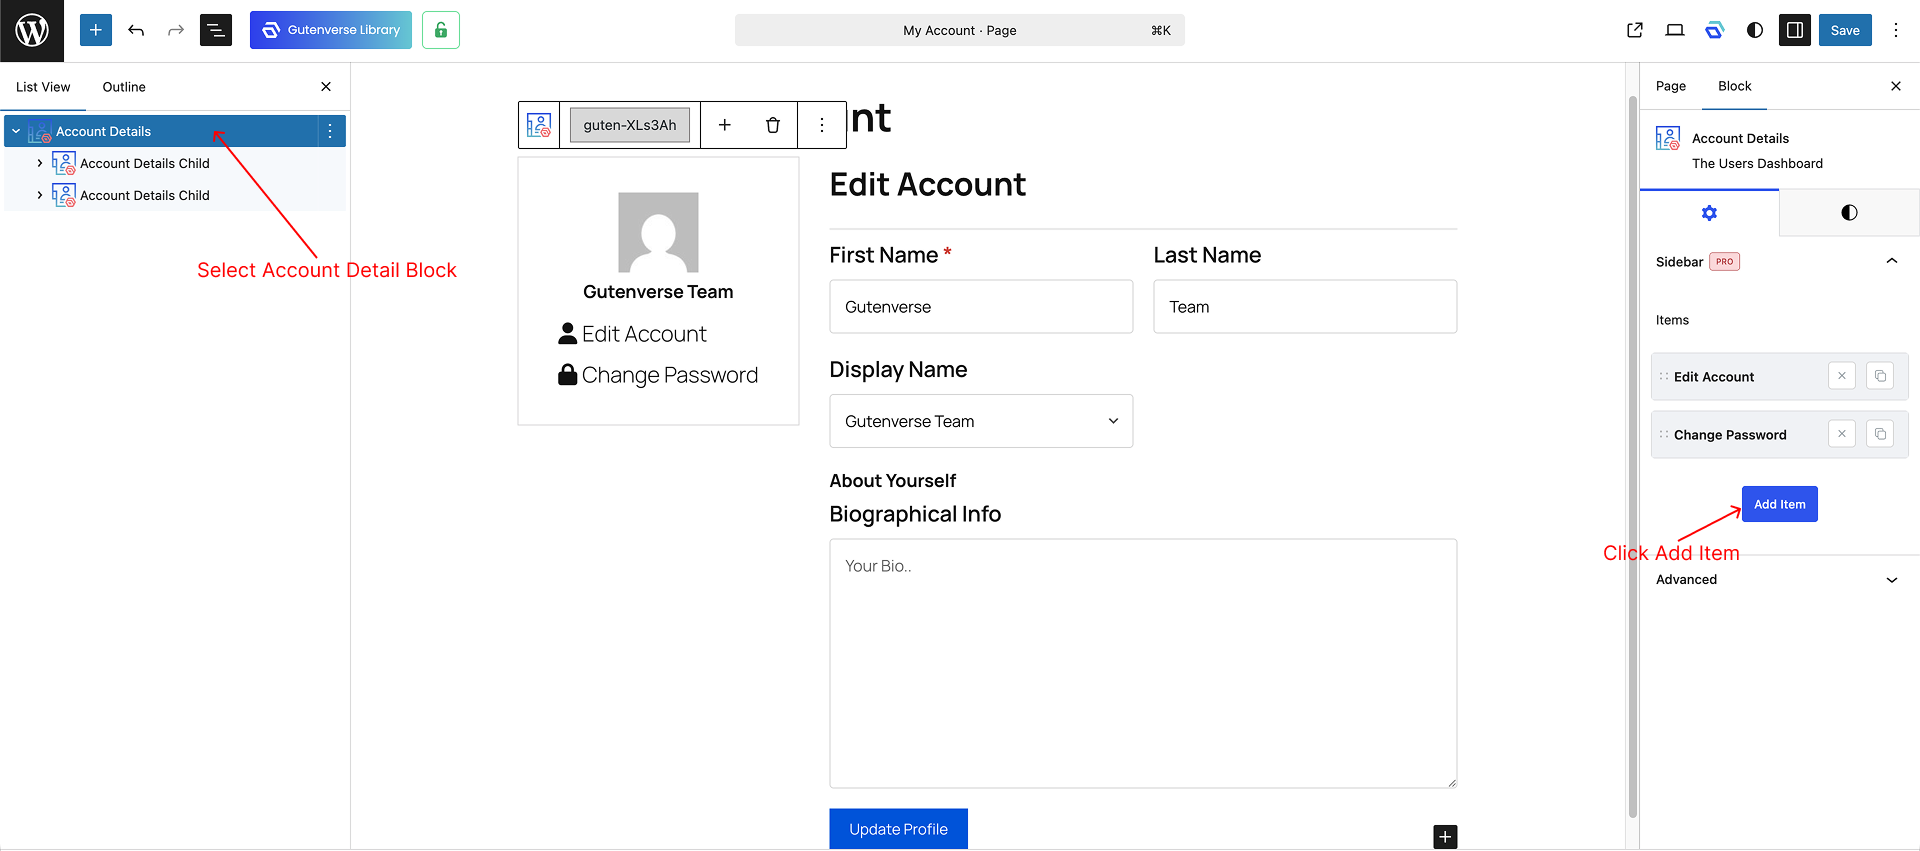
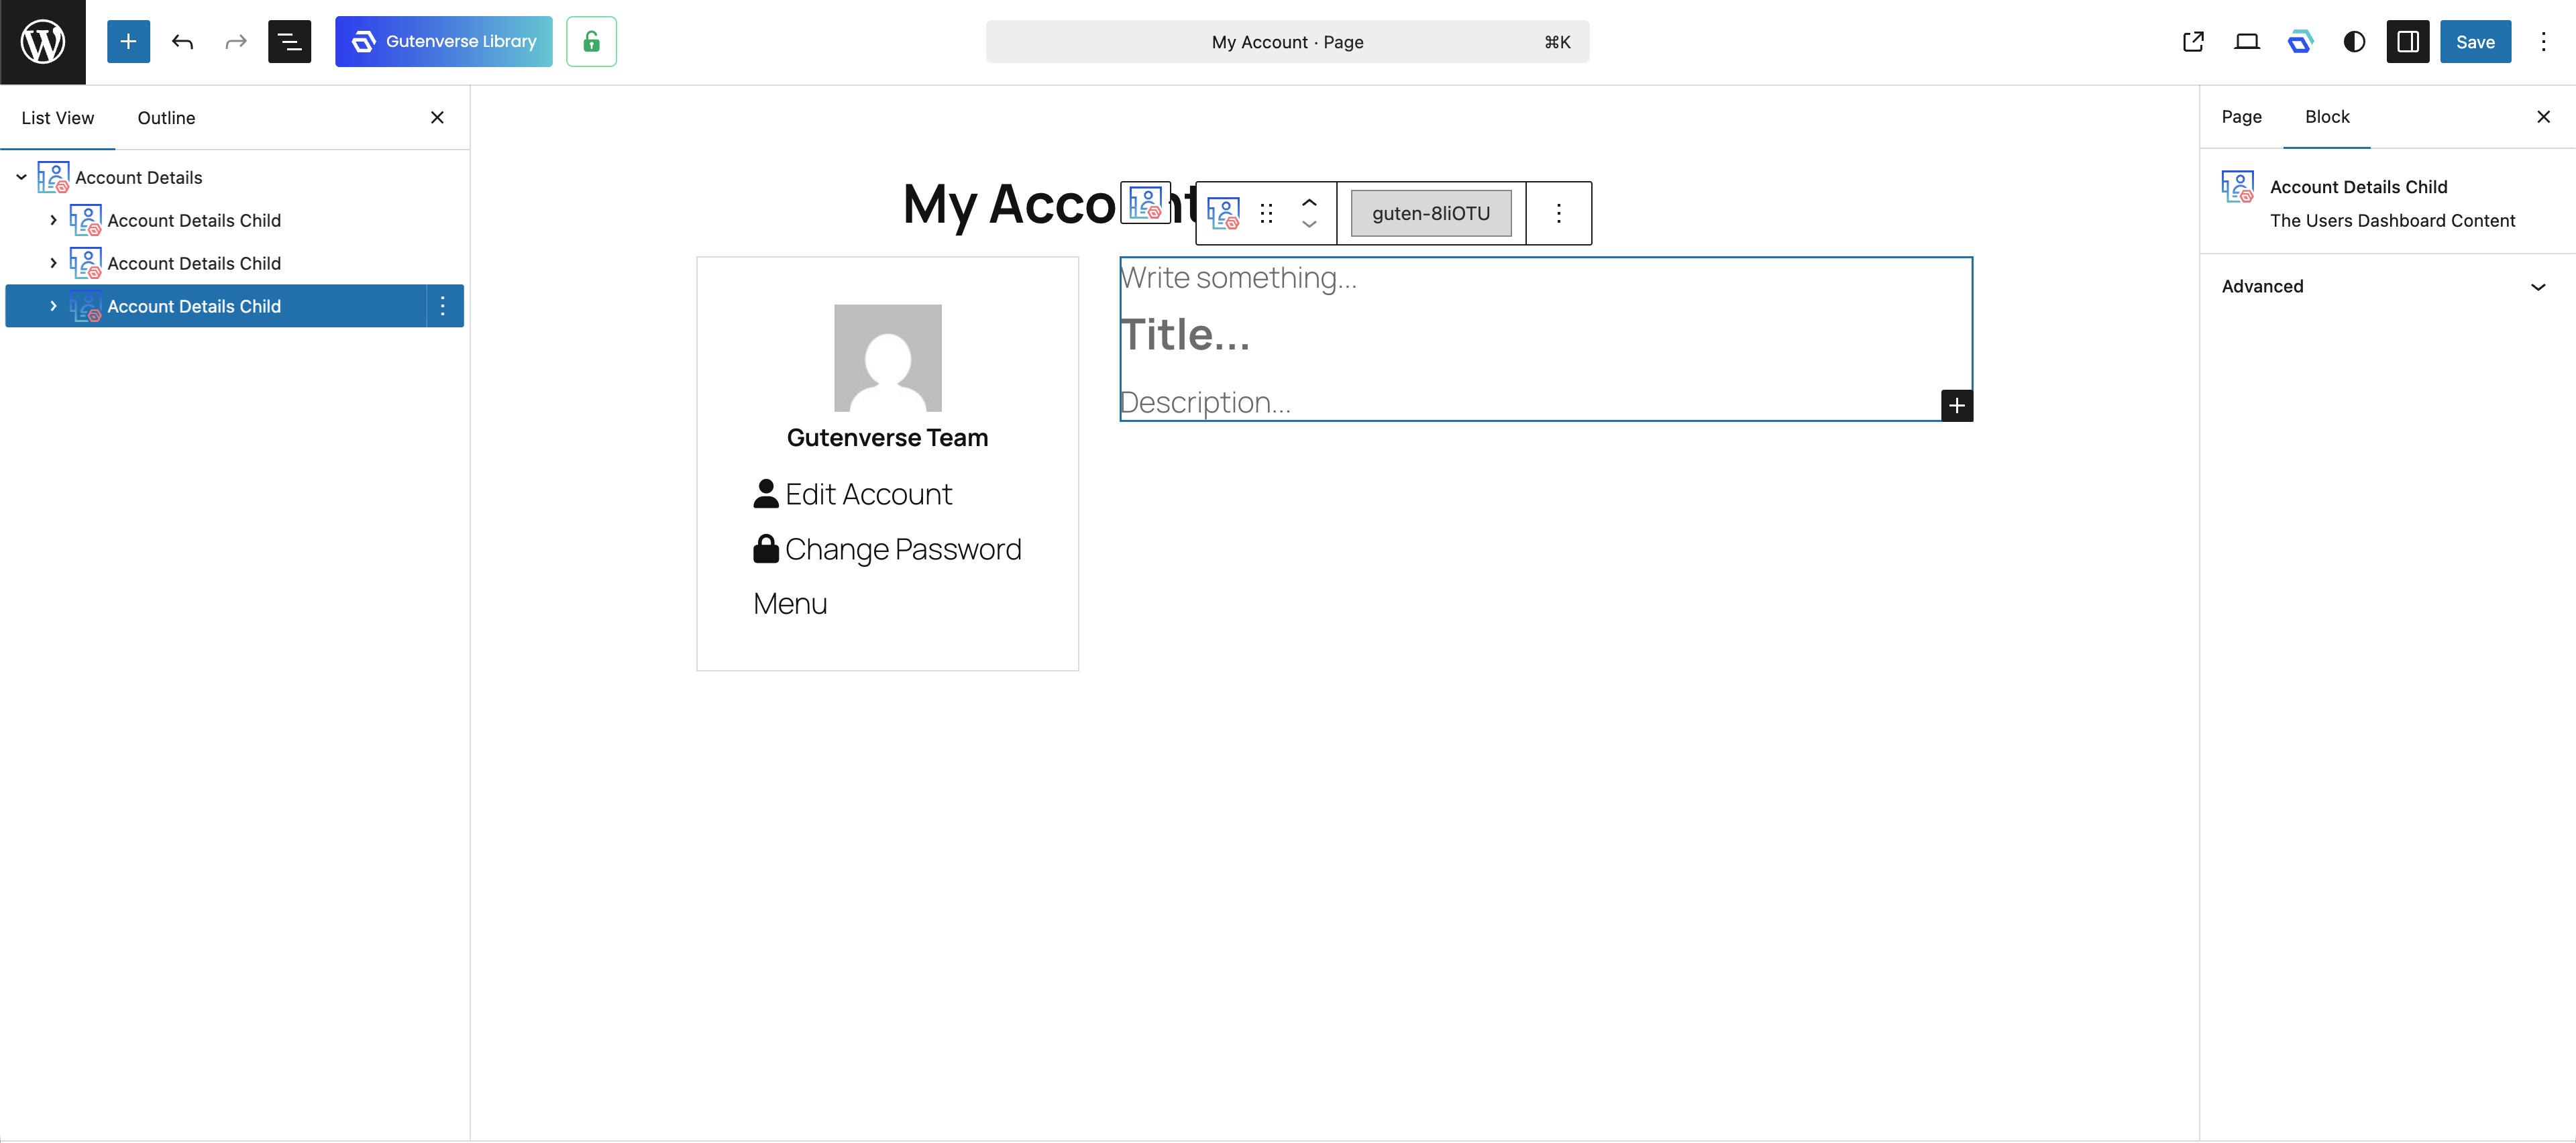
3. After clicking the Add Item button, it will automatically create a new Account Details Child. By default, it contains a Heading and Paragraph block. You can replace the child with any other block you need.
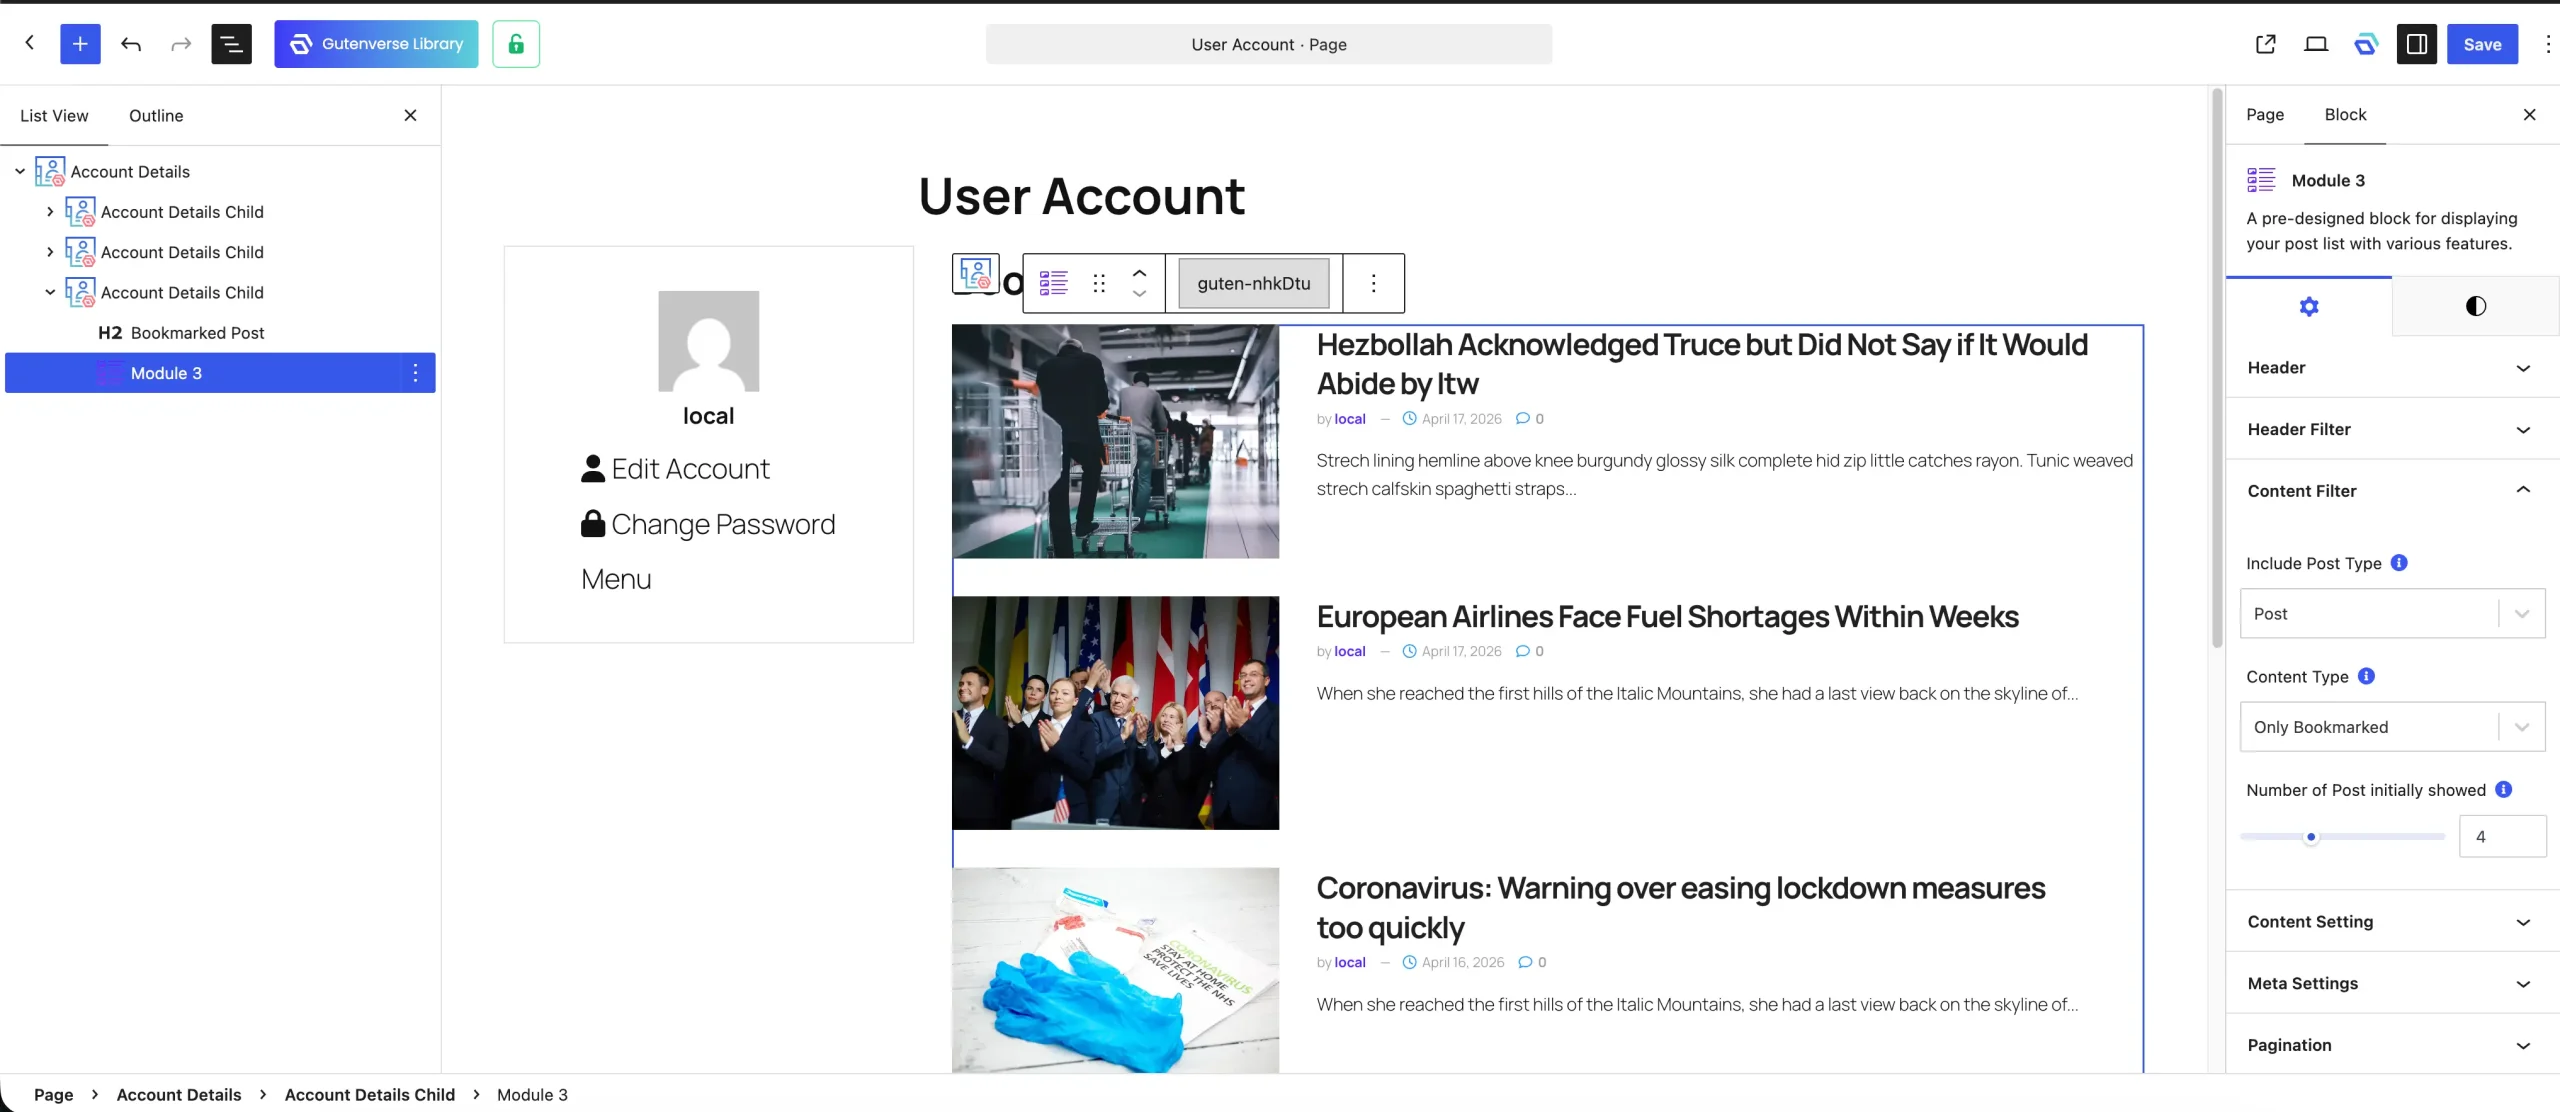
4. For example, we added module block from JNews Blocks to create a dedicated “Bookmarked Post” section within the dashboard.
5. After adding child blocks, modify the sidebar menu settings to match. For example, set the menu title to “Bookmark” to accurately reflect the content you’ve just added.
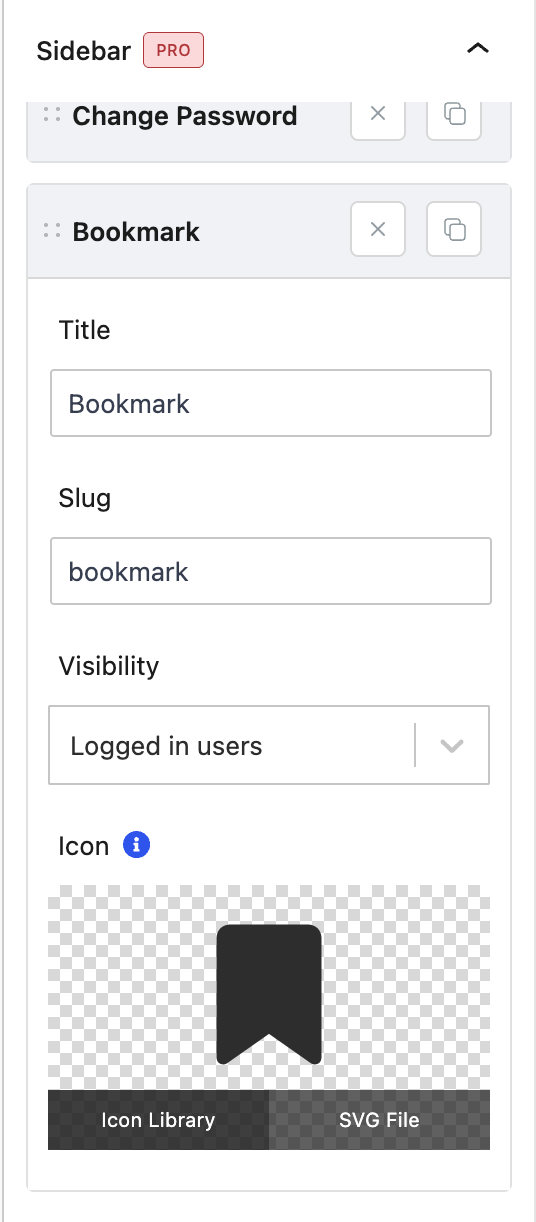
Below is an explanation of the configuration settings available for each individual menu item:
- Title
Set the display item name. - Slug
a unique identifier for each menu item. The slug also functions as a direct URL path; for example, if your account page URL is /my-account and your slug is bookmark, navigating to /my-account/bookmark will open the dashboard directly on that specific tab. - Visibility
Define who can see each tab. Choose from Everyone, Logged-in Users, Guests, or restrict access to Specific User Roles. - Icon
Apply unique icon or SVG icon to each menu item to be in the sidebar.
In the Style tab, you can also adjust the overall layout of your menu, such as moving the navigation sidebar to the Top, Left, Right, or Bottom of the page. You can fine-tune the sidebar’s width (for left/right layouts), the gaps between the sidebar and the main content, the alignment of the menu list, and even choose whether icons appear at the start or end of each menu title.
5. My Account Block
To complete your users account management flow, Gutenverse provides the My Account block. While the Account Details block is used to design the internal dashboard, the My Account block acts as the essential entry point, typically placed in your site’s header to provide a navigation experience for both guests and members.
Quick Setup:
1. Open your Header Template (or any page area where account access should appear).
2. Add the My Account block from the block inserter.
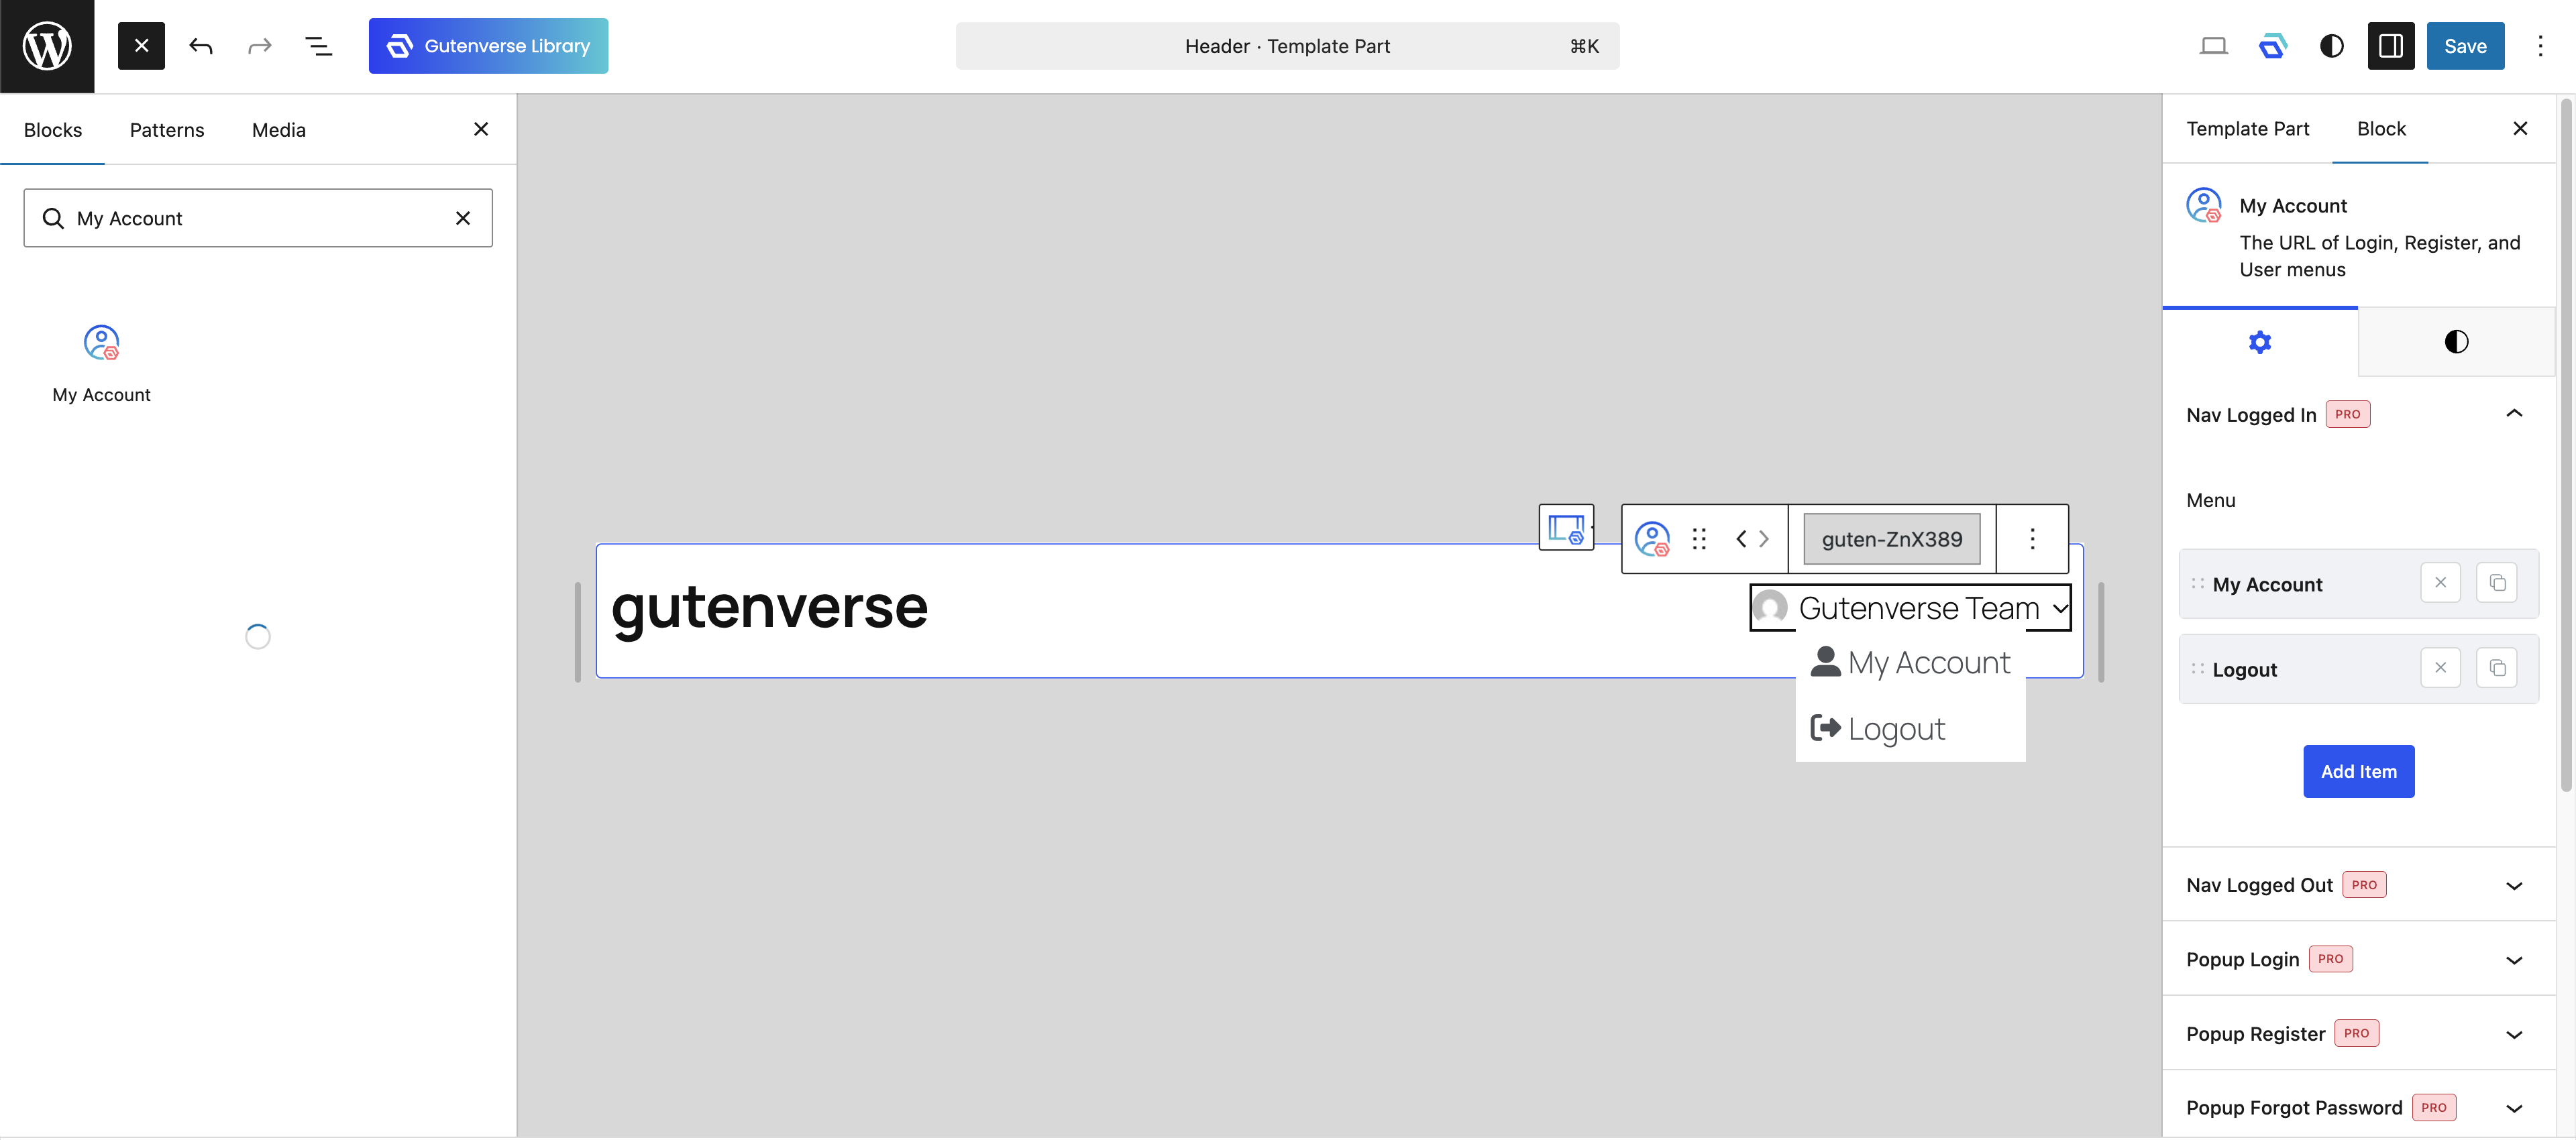
For logged-in users, the block shows user identity (name/avatar) and opens a dropdown menu for account navigation, and this dropdown is intended only for authenticated users.
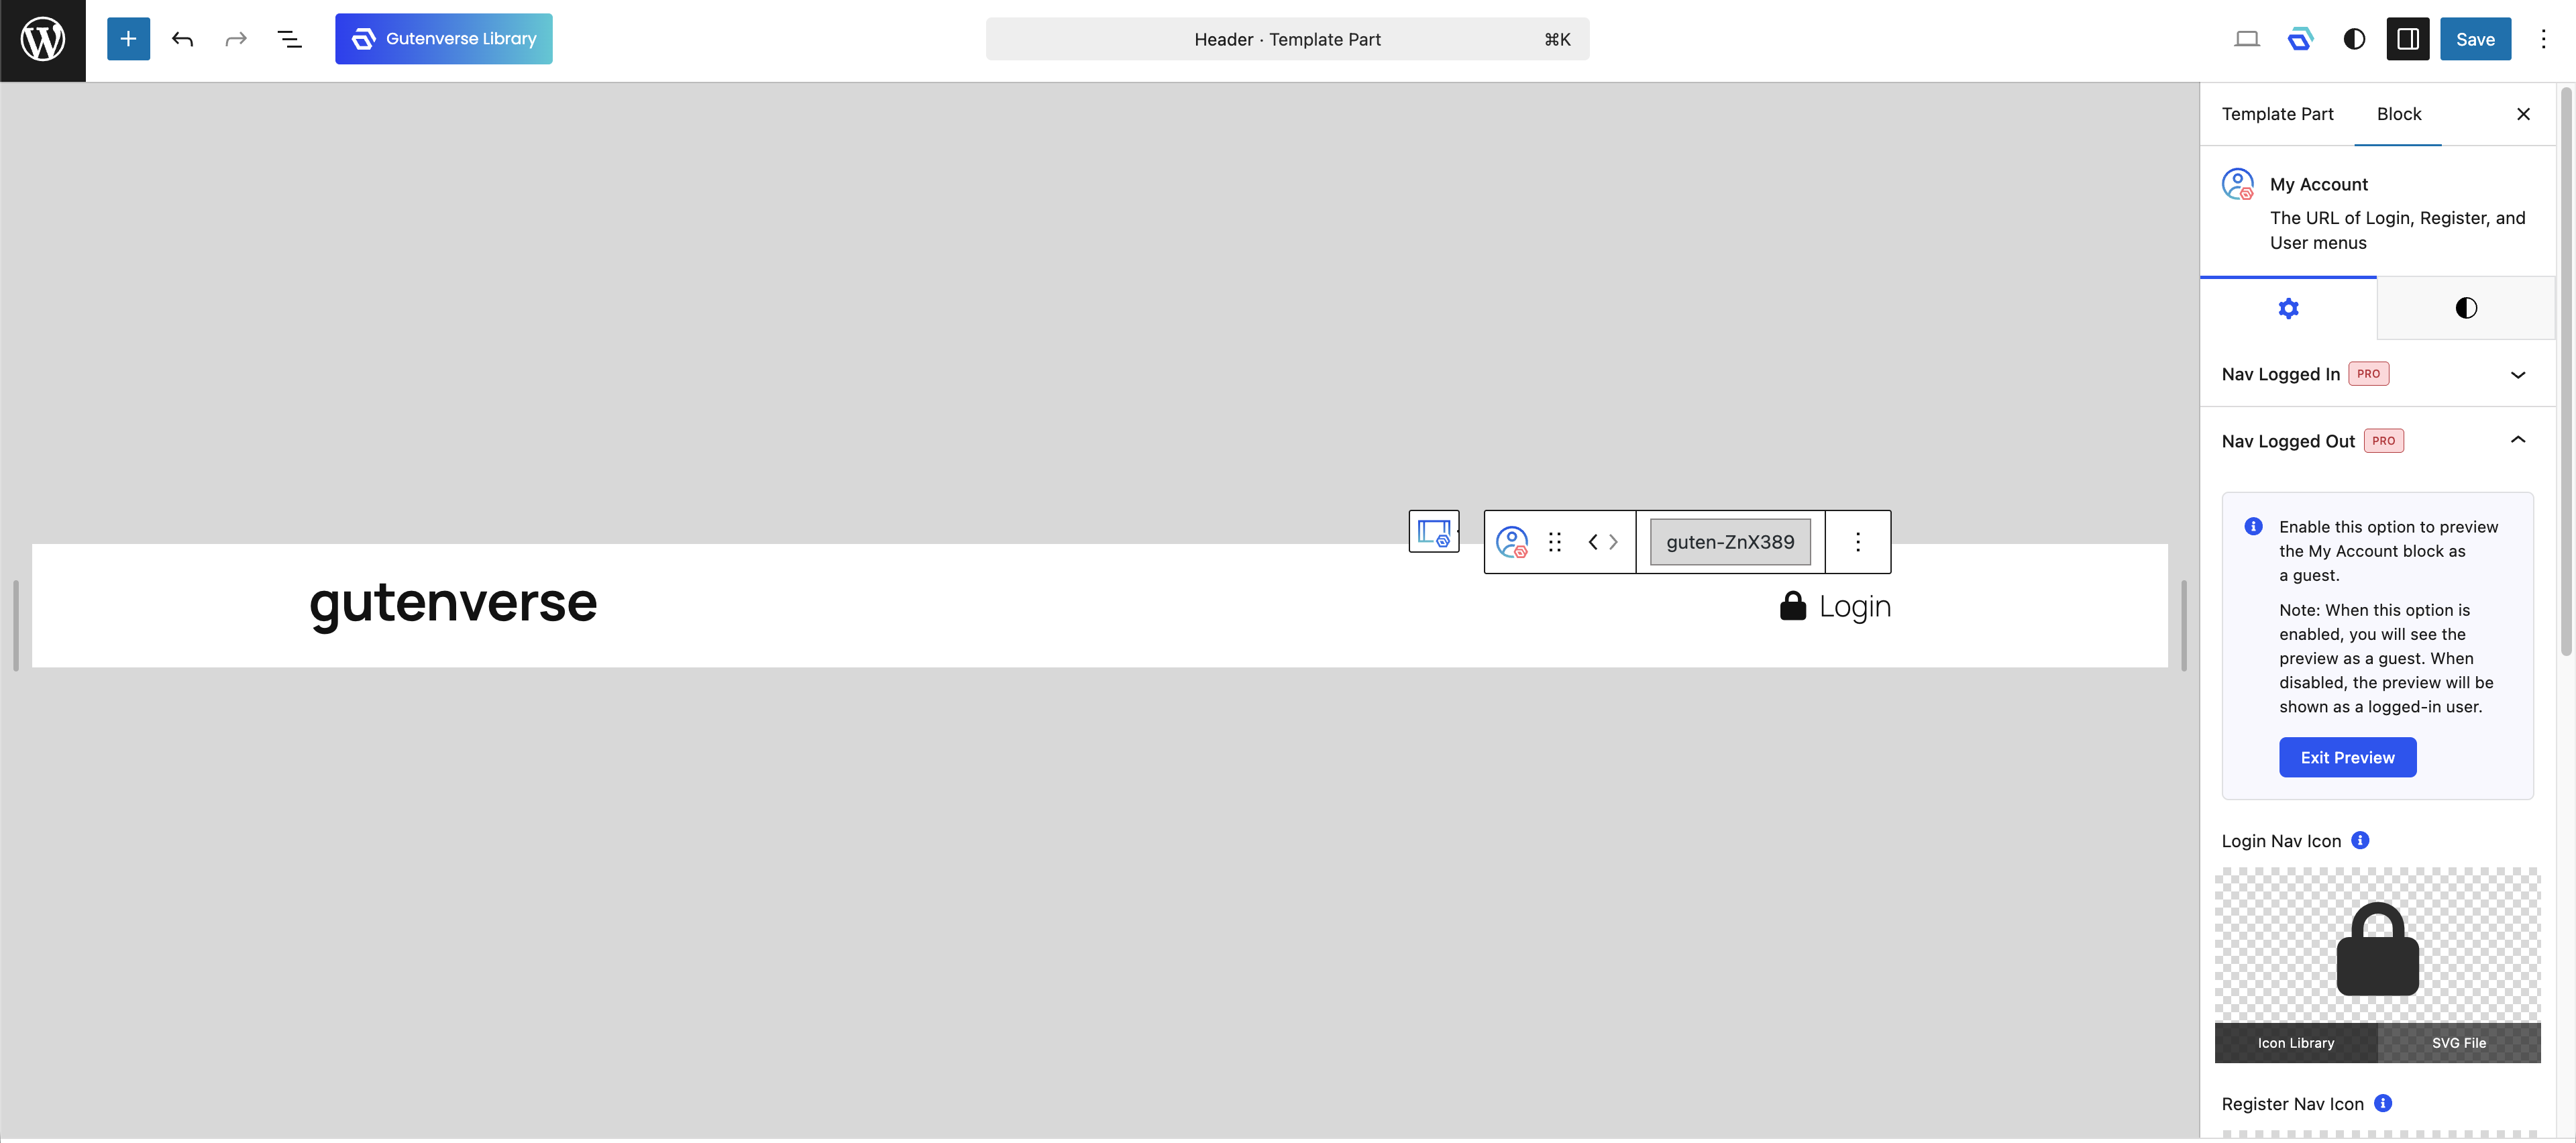
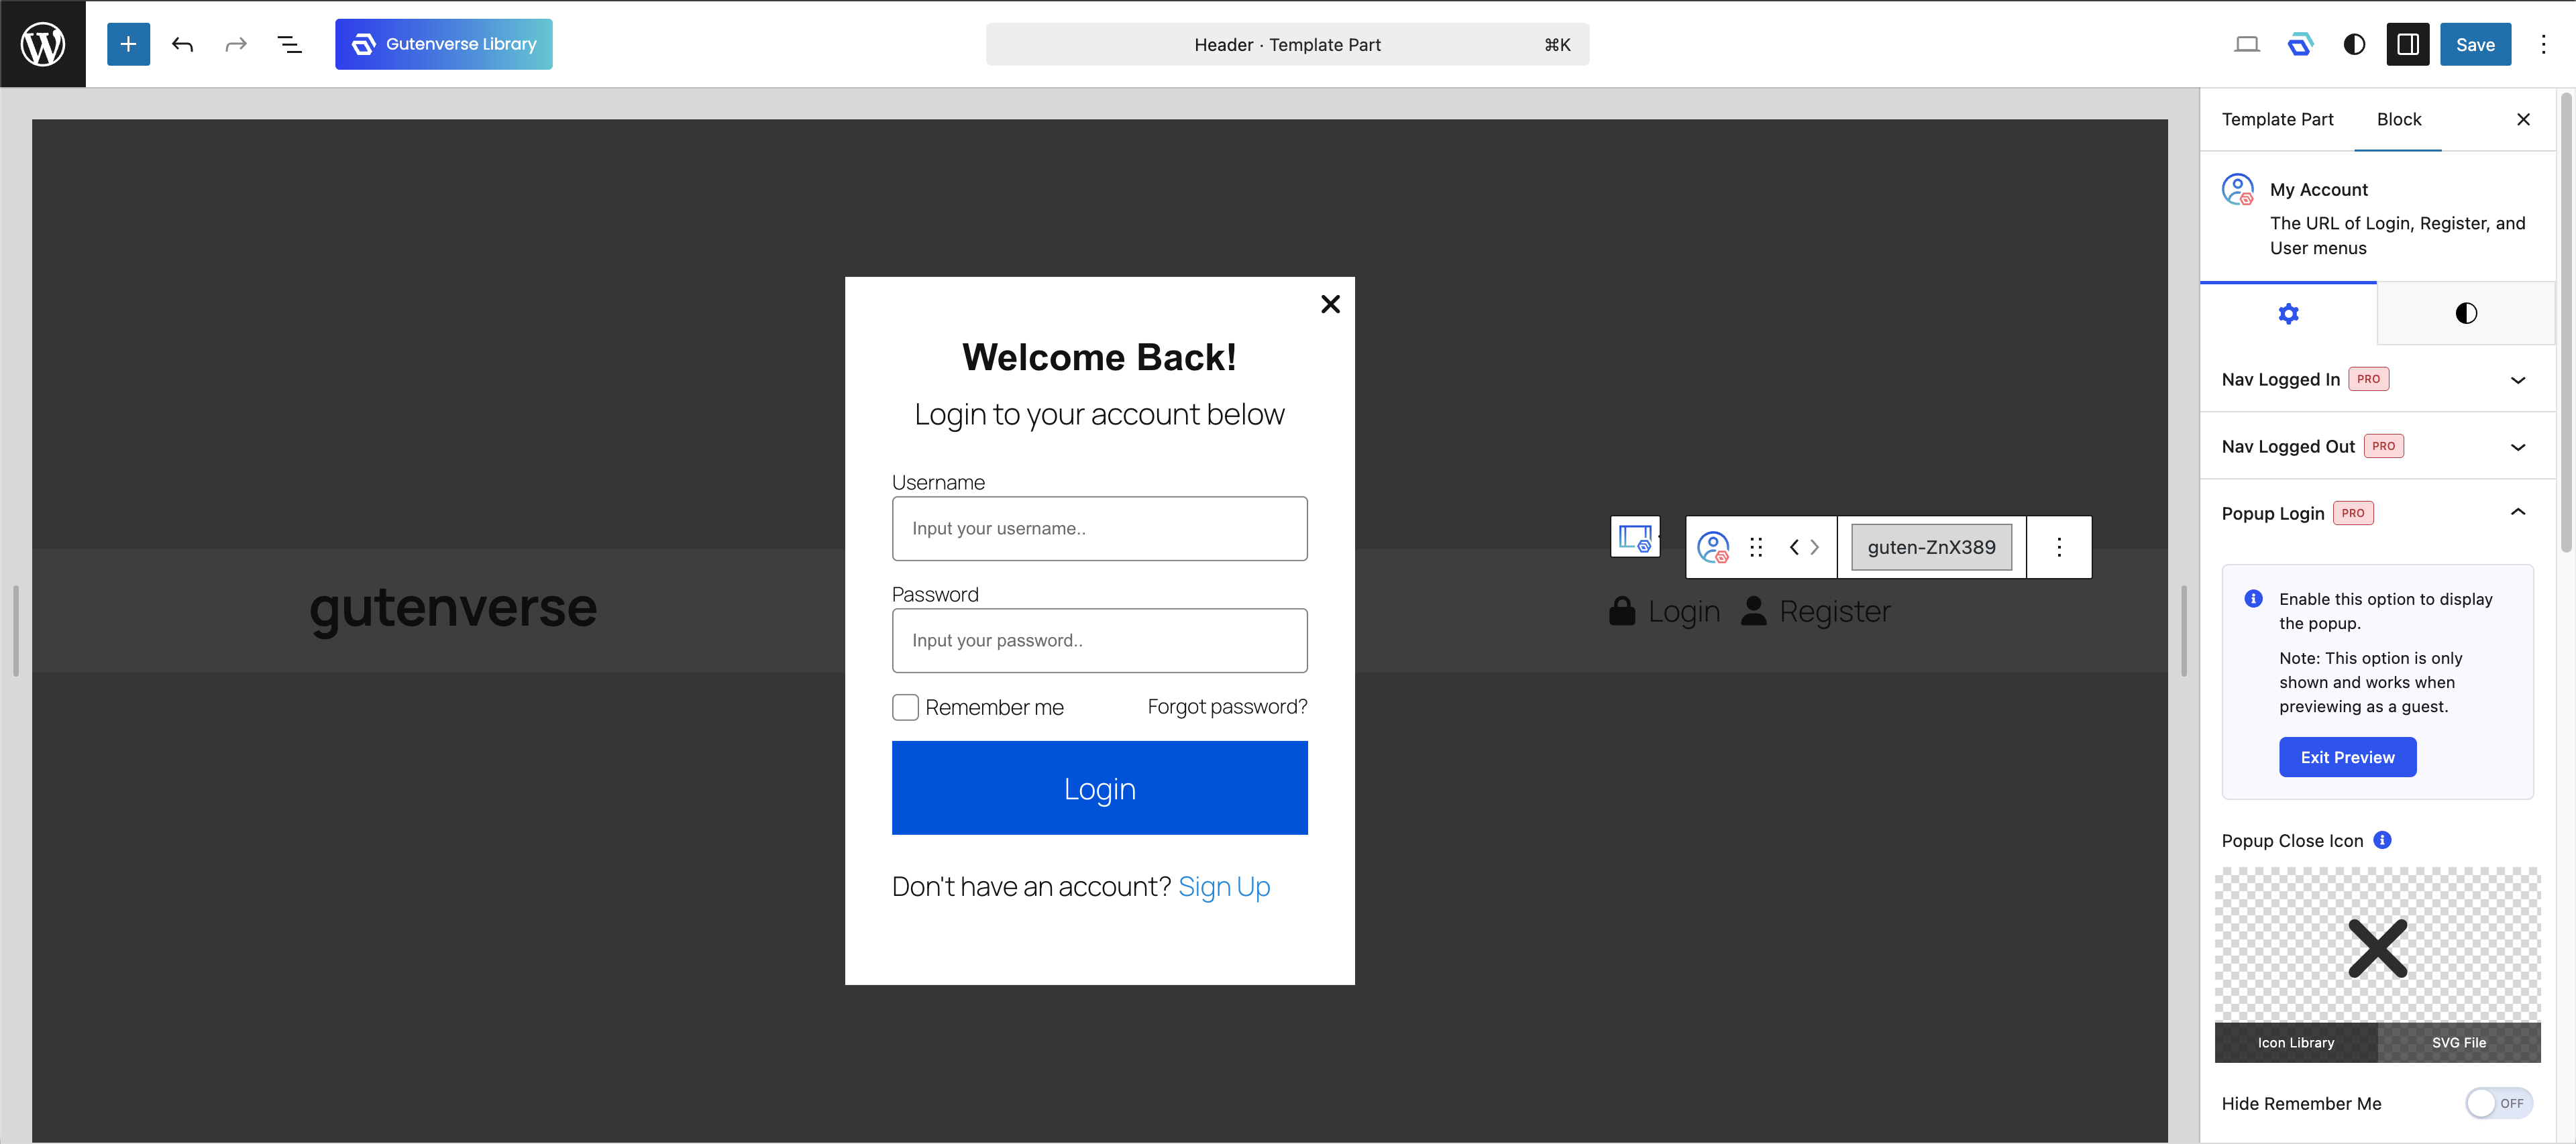
For guests (not logged in), the block does not show the logged-in dropdown, but instead shows a Login action that opens a popup form without redirecting users to another page.
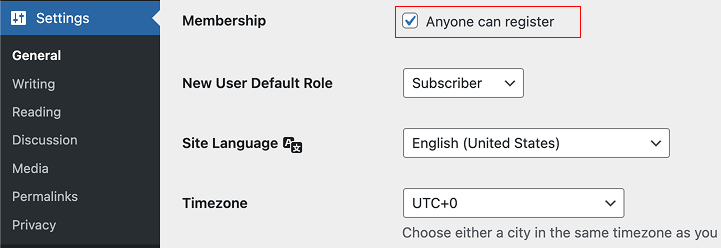
If the WordPress option Settings > General > Anyone can register is enabled.
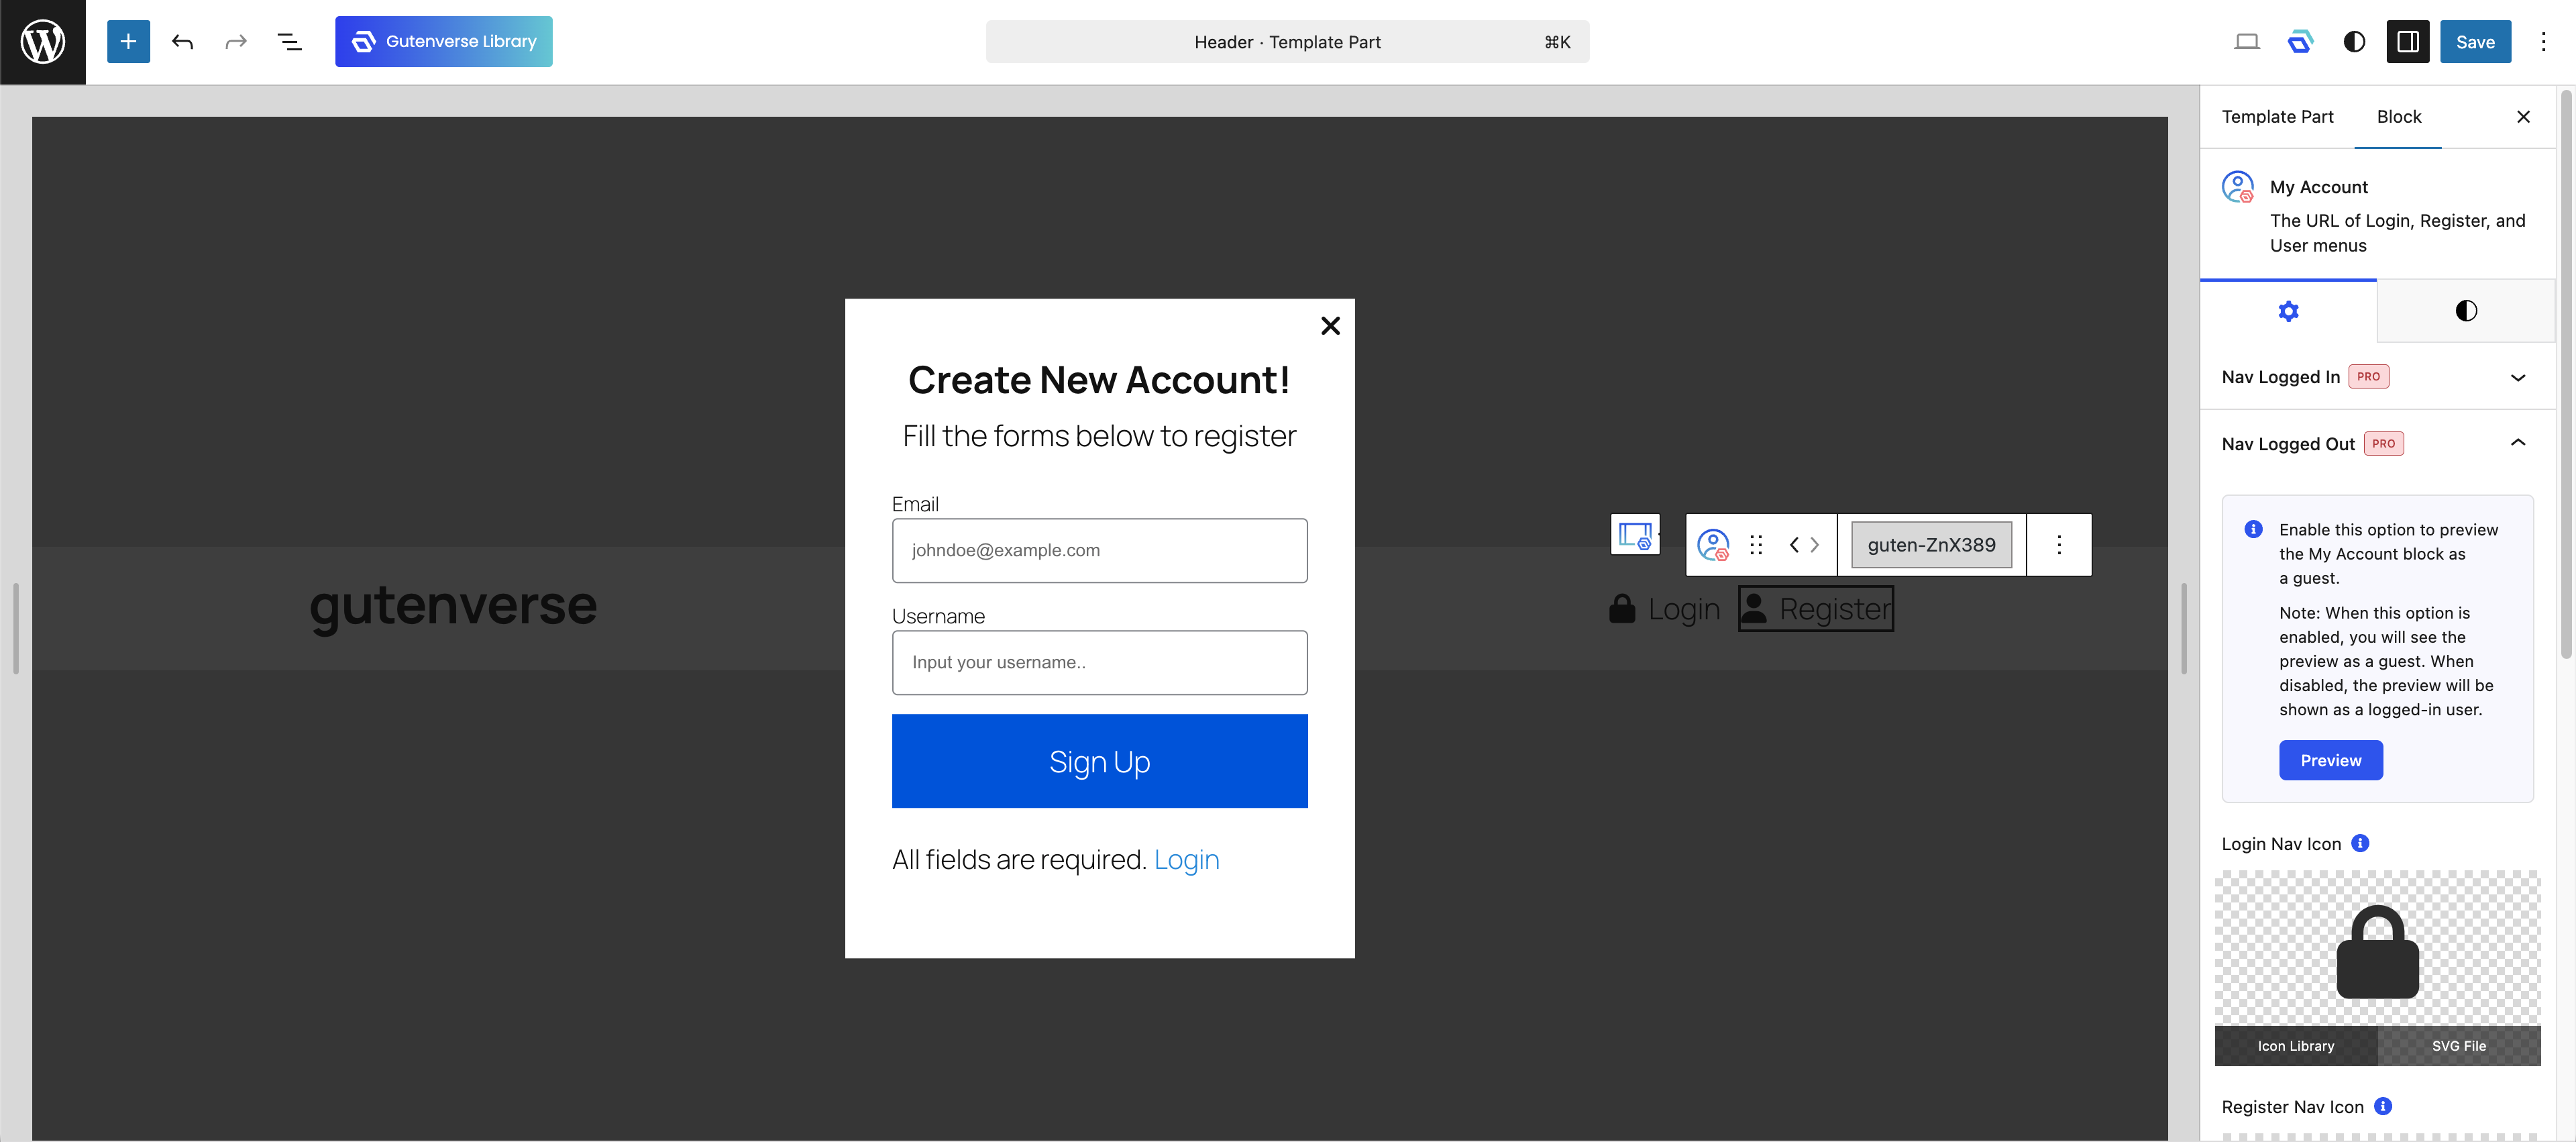
the block will display both Login and Register, and both actions use popup behavior.
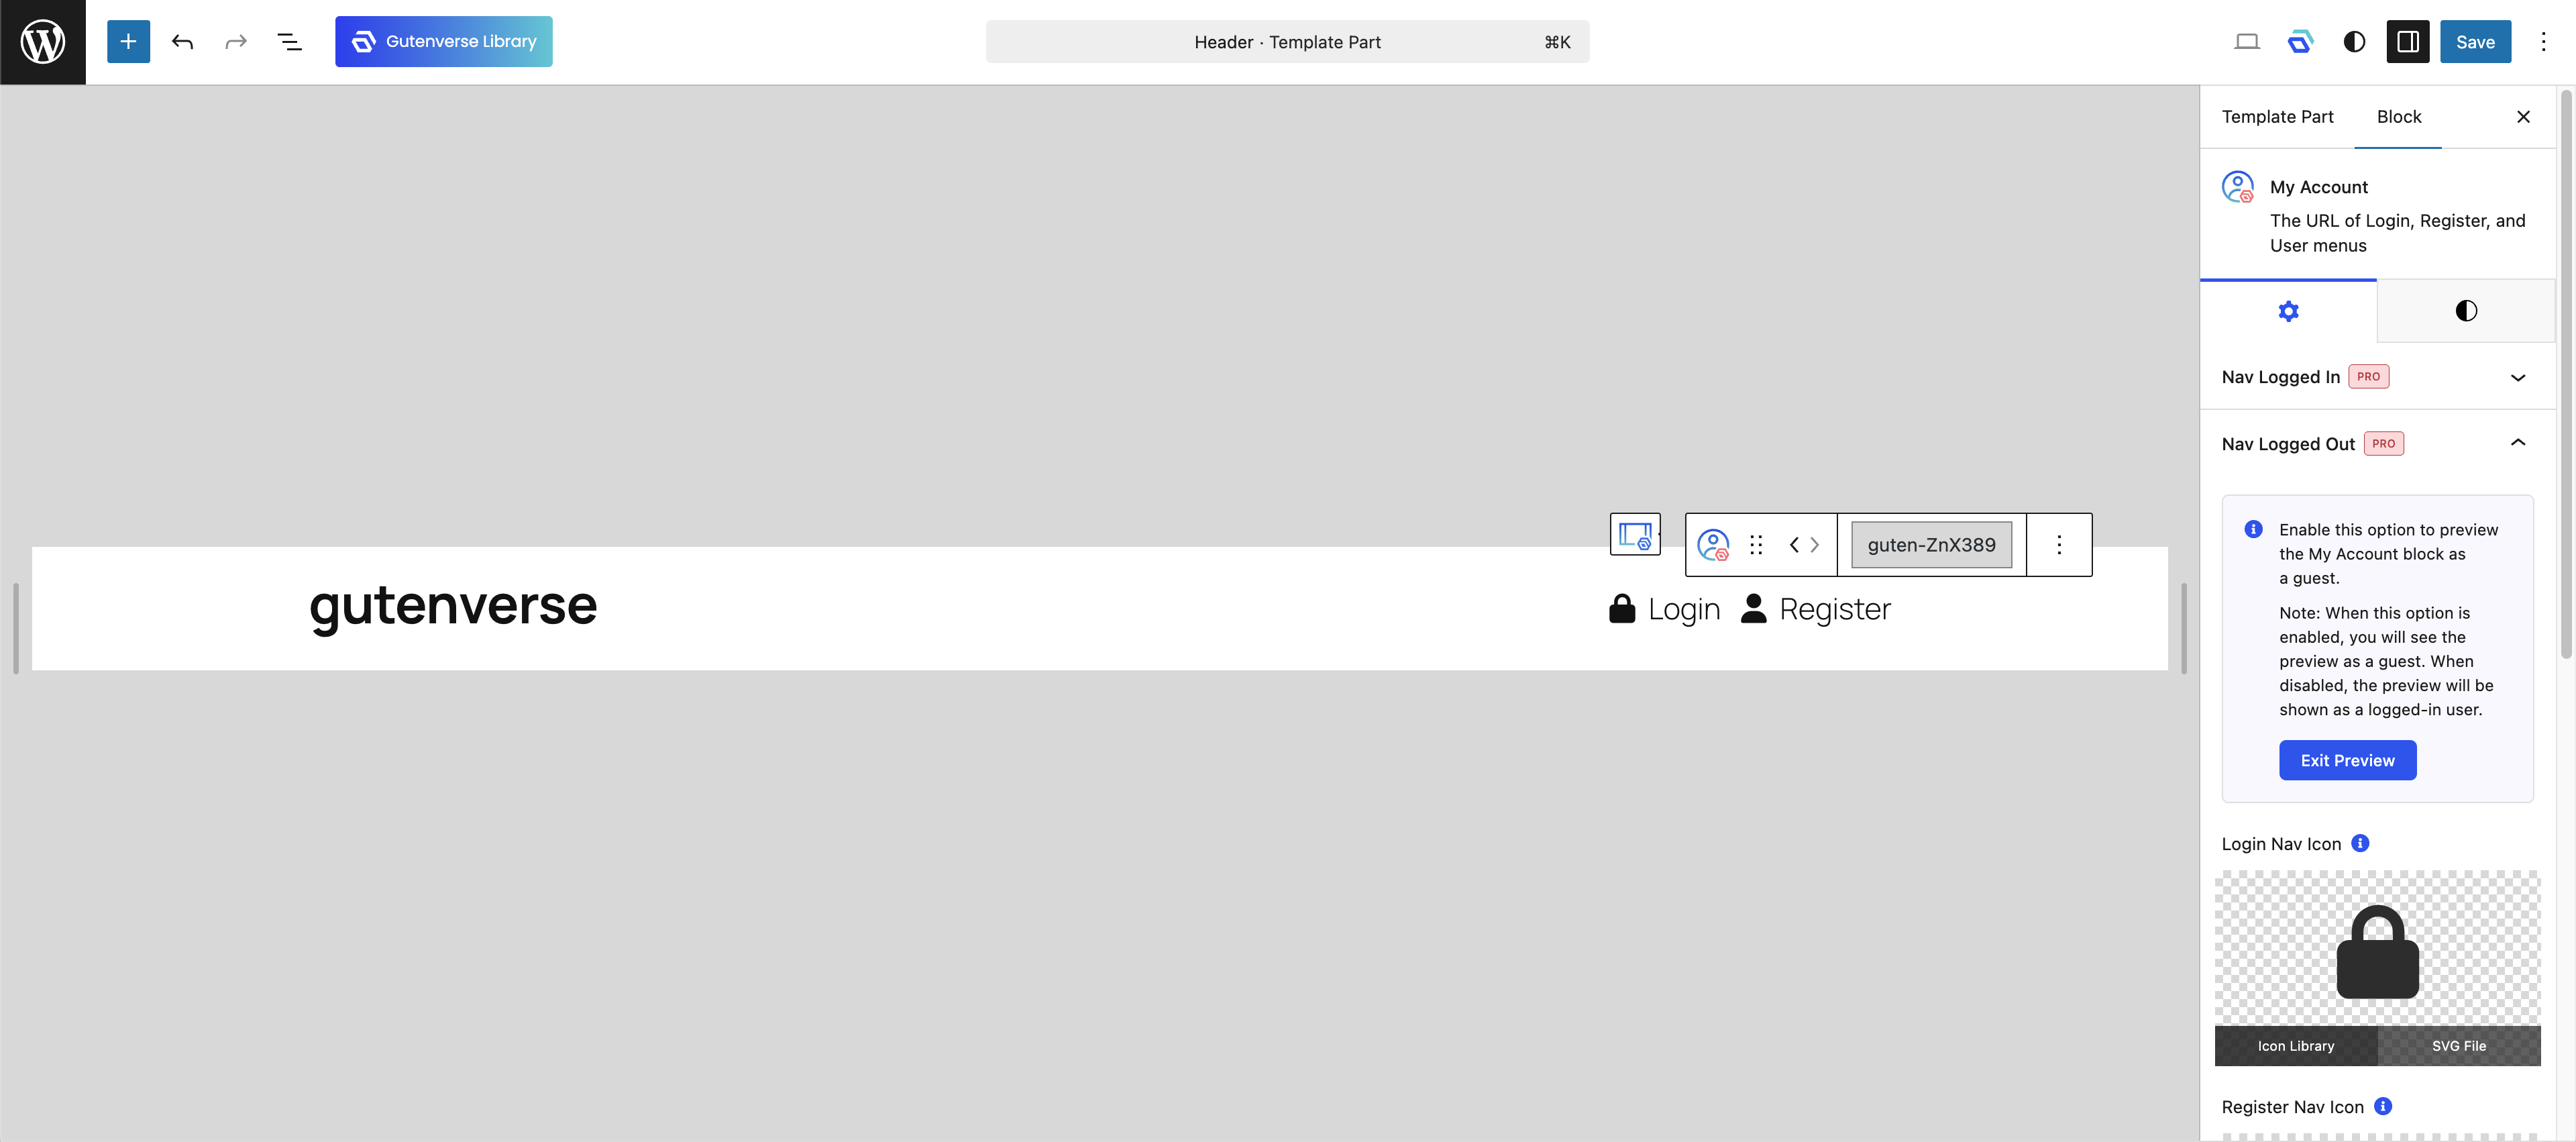
If we click Login or Register, the block opens an authentication popup. The popup supports three connected types:
1. Login Popup
2. Register Popup
3. Forgot Password Popup
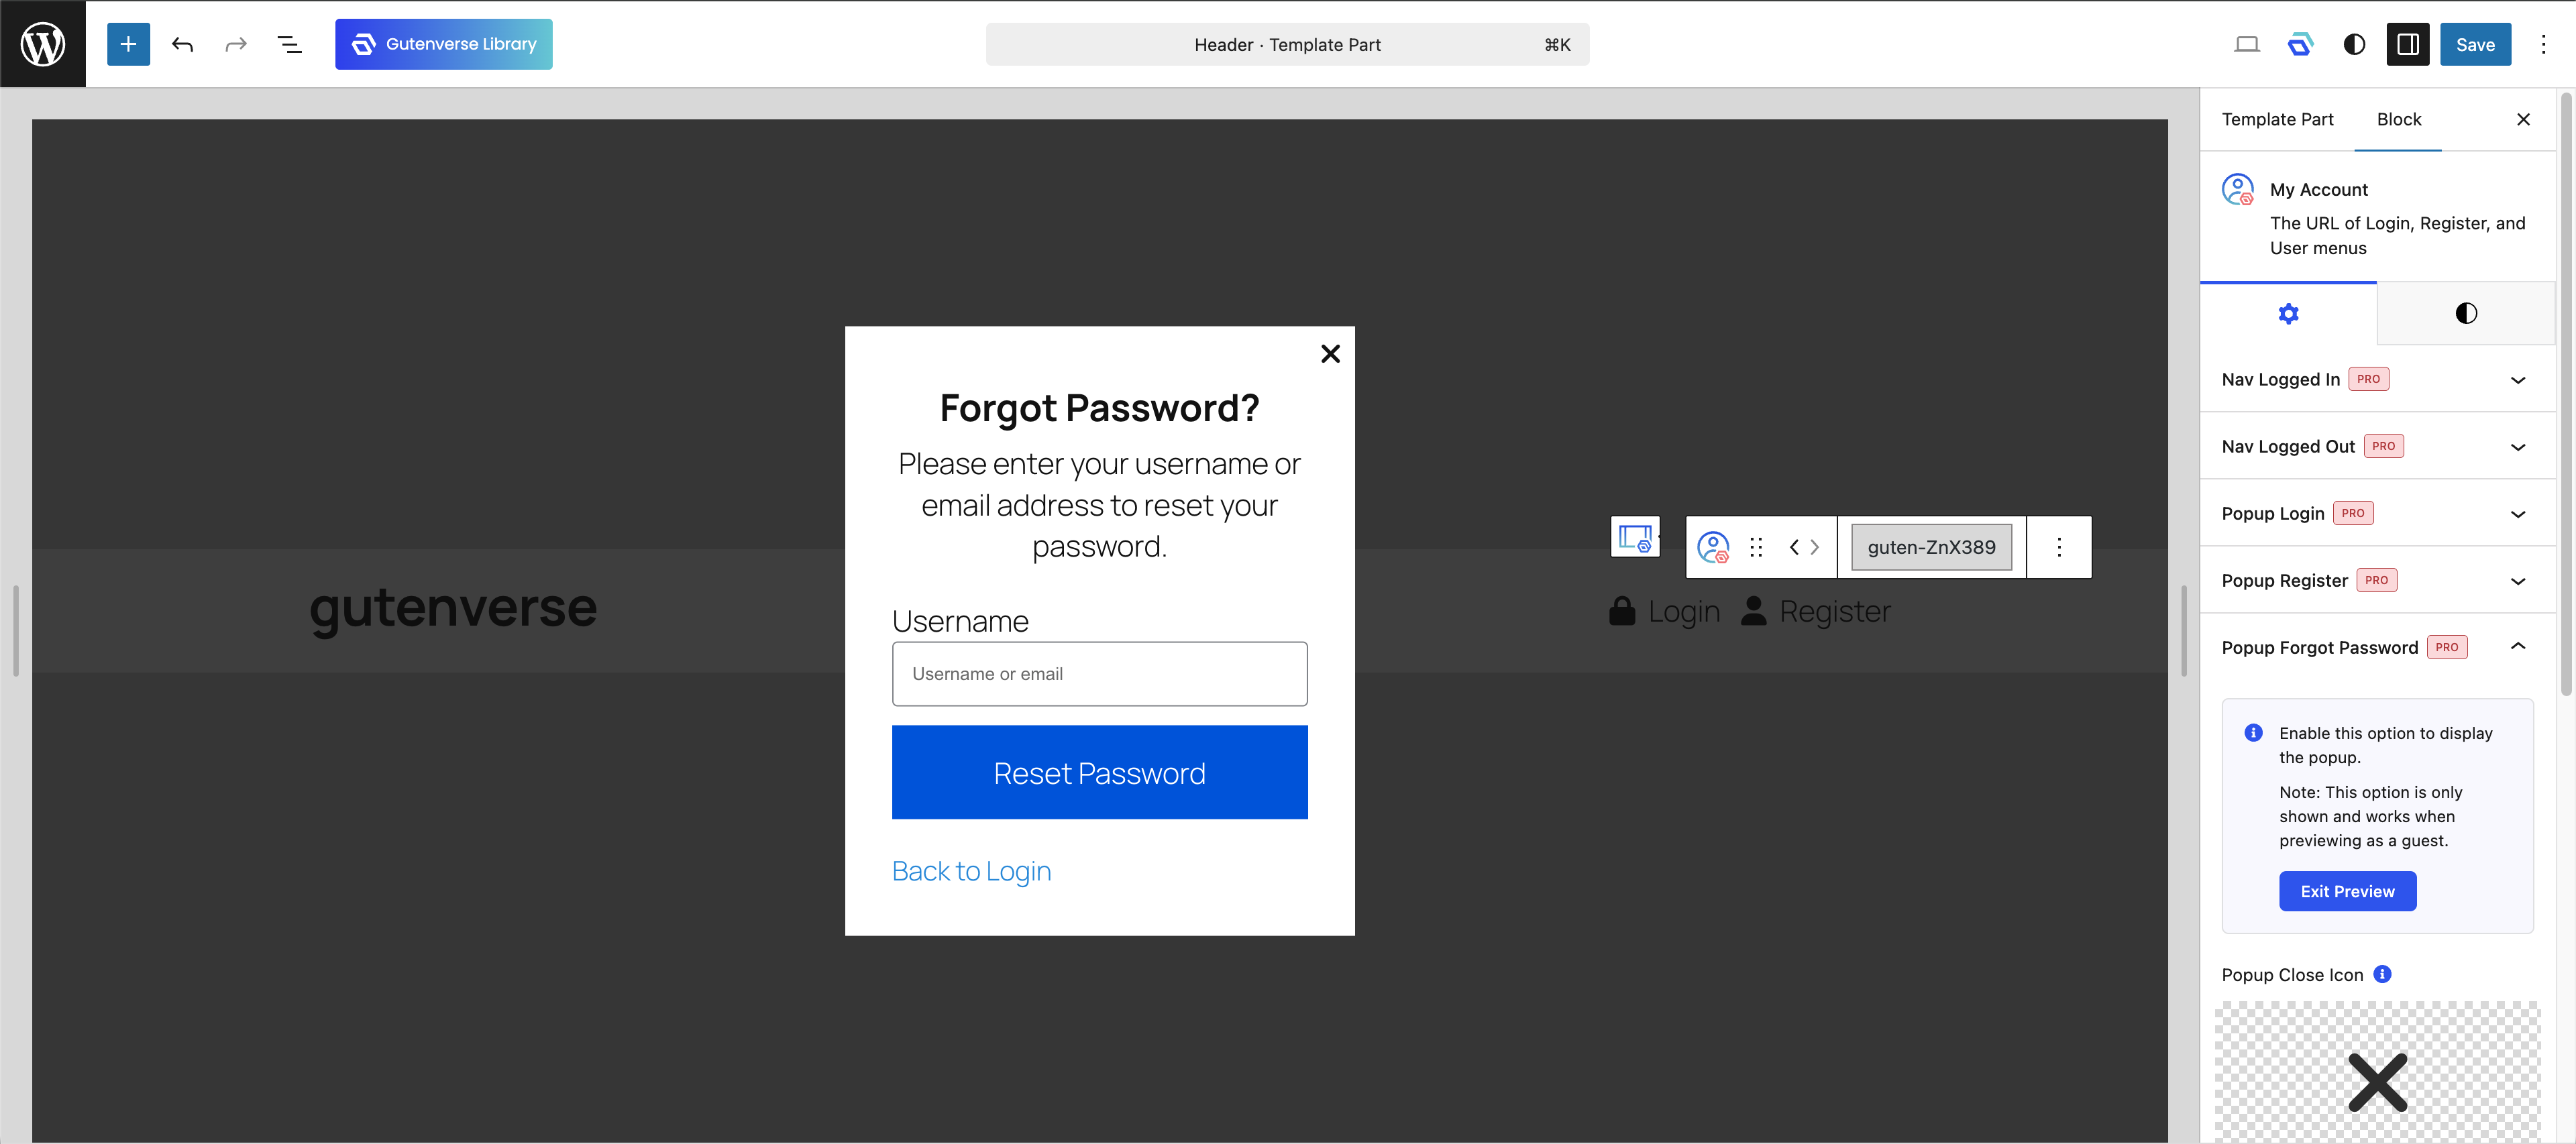
This gives guests a complete access flow in one place, and users can reset their password directly from the login form without leaving the current page.
Below is an explanation of the configuration settings available for each individual menu item:
- Title & Slug
Set the display item name and a unique ID (slug) for each menu item. - Visibility
Define who can see each tab. Choose from Everyone, Logged-in Users, Guests, or restrict access to Specific User Roles. - Icon
Apply unique icon or SVG icon to each menu item to be in the sidebar.
6. Managing Logged-In Dropdown Menus
You can customize the dropdown menu directly in the editor. To modify your menu, click on the My Account block and open the Settings panel on the right sidebar. Inside the Nav Logged In section, you will find the Menu options—this is the place where you can add, remove, and configure your dropdown menu.
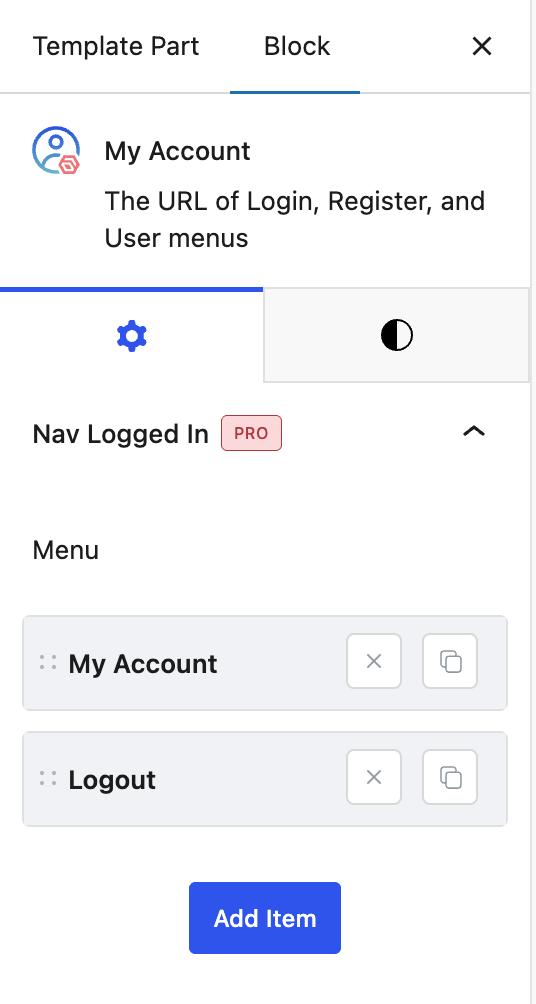
By default, the My Account menu for logged-in users contains two items: My Account and Logout. The My Account item links directly to your Account Page and points to the edit-account slug, while Logout signs the user out immediately.
To add a new dropdown item, simply click Add Item in the Nav Logged In settings, then complete the main fields such as Title, Menu Type, and Icon. For example, to connect this with the earlier dashboard example, you can create a Bookmarked Posts menu item that points users directly to your bookmark section.
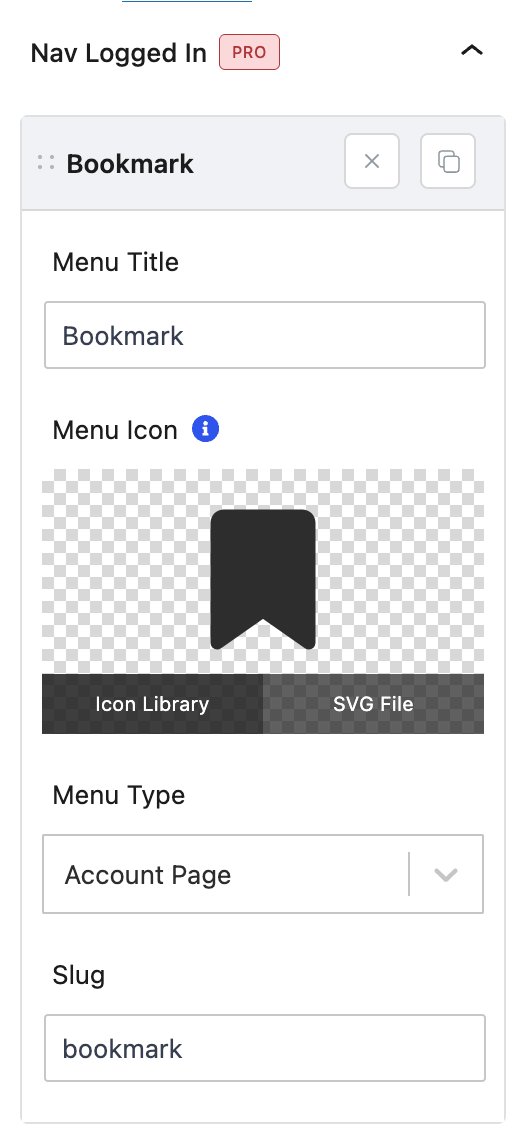
Below is an explanation of the configuration settings available for each individual menu item:
- Menu Title
Set the display item name. - Menu Icon
Apply unique icon or SVG icon to each menu item to be in the dropdown. - Menu Type
You can use Account Page to link users directly to your account dashboard, and by setting a Slug (for example, “bookmark”), the link can open a specific section of that page. You can also use Logout to provide a direct sign-out action, or choose Link URL to point users to any internal or external page based on your navigation needs.
In the Style tab of the My Account block, you can style each part of the user access experience in detail, including Nav Logged In, Submenu, Nav Logged Out, Popup Login, Popup Register, Popup Forgot Password, and Form Message. You can adjust typography, colors, spacing, backgrounds, and borders so the header menu and authentication popups stay visually consistent with your site design.