In this part, we will guide you on how to setup the font preview on the WooCommerce product.
Right after you’ve done with the plugin activation, next you can setup the font preview, you can follow the instructions below :
- First, edit a certain WooCommerce product that you want to show font preview.
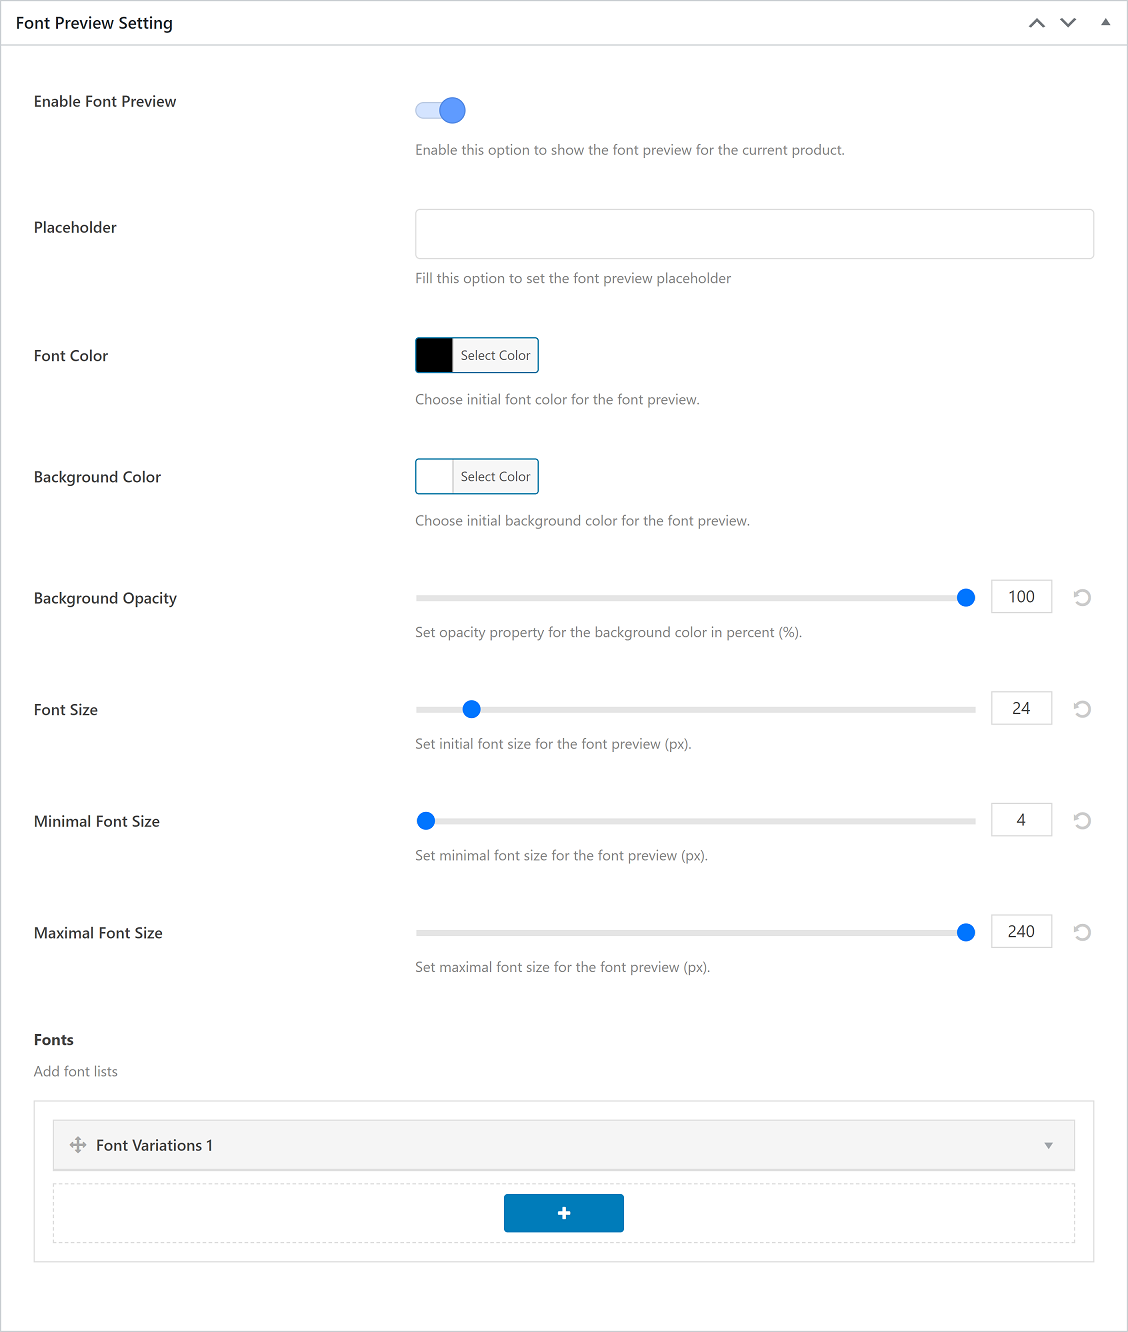
- If you have selected a product, then at the bottom section you will notice there’s Font Preview Setting meta box.

- After you turn on the Enable Font Preview option, all font preview options will occur.
 As you can see in the image above, you will notice there are several options that you need to set up.
- Placeholder
On this option, you can set the font preview placeholder text. - Font Color
On this option, you can set the color of the font preview. - Background Color
On this option, you can set the background color of the font preview. - Background Opacity
On this option, you can set the background opacity value in percent (%). - Font Size
On this option, you can set the initial font-size (px). - Minimal Font Size
On this option, you can set the minimum font size (px). - Maximal Font Size
On this option, you can set the maximum font size (px). - Fonts
On this option, you can add several font lists, manage the sequence, and remove a certain font from the font list.
- Placeholder
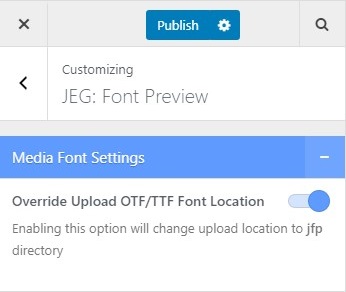
We also provide some additional options that we put on the WordPress Customizer. You can go to WP Admin Dashboard → Appearance → Customize → JEG: Font Preview → Media Font Settings.
We have the Override Upload OTF/TTF Font Location option. By enabling this option, it will change the upload location directory to “jfp” directory.
Created in Denpasar, Bali by Jegtheme. 2026

