In this section, we will explain about creating a new ad. There are a few things that we’ll explain to you such as:
- Create Ad
- Dashboard Overview
1. Create Ad
You can create a new ad on the Epic Advertisement dashboard. Go to the WordPress Dashboard → Epic → Advertisement. If you already at the Epic Advertisement dashboard, then click the Add New Ad button and you can start setup the ad options.
On the ad panel editor, there’re 2 tab options, General tab, and Placement tab.

Firstly we will explain the General tab options. On this tab, you can set up the general option for the current ad. Here’s the list of general options:
- Ads Title
Insert some text for the ad title. - Ads Type
Choose which ads type you want to use. - Publisher ID
Insert the data-ad-client or google_ad_client ID. Please note, this option only available if you choose to use Google Ads. - Ads Slot ID
Insert the data-ad-slot or google_ad_slot ID. Please note, this option only available if you choose to use Google Ads. - Desktop Ads Size
Choose ads size to show on desktop. Please note, this option only available if you choose to use Google Ads. - Tab Ads Size
Choose ads size to show on tab device. Please note, this option only available if you choose to use Google Ads. - Phone Ads Size
Choose ads size to show on phone devices. Please note, this option only available if you choose to use Google Ads. - Ads Image Desktop
Upload your ads image that will be shown on the desktop device. Please note, this option only available if you choose to use Image Ads. - Ads Image Tablet
Upload your ads image that will be shown on the tablet device. Please note, this option only available if you choose to use Image Ads. - Ads Image Phone
Upload your ads image that will be shown on the phone device. Please note, this option only available if you choose to use Image Ads. - Ads Image Link
Insert the link to your image ads. Please note, this option only available if you choose to use Image Ads. - Open New Tab
Open in a new tab when ads image clicked. Please note, this option only available if you choose to use Image Ads. - Ads Script Code
Put your full ads script right here. Please note, this option only available if you choose to use Script Code Ads. - Ads Shortcode
Insert your ads shortcode. Please note, this option only available if you choose to use Shortcode Ads.
After you have done with the General options we will explain to you the Placement tab options. On this tab, you can set up the automatic placement for the current ad.
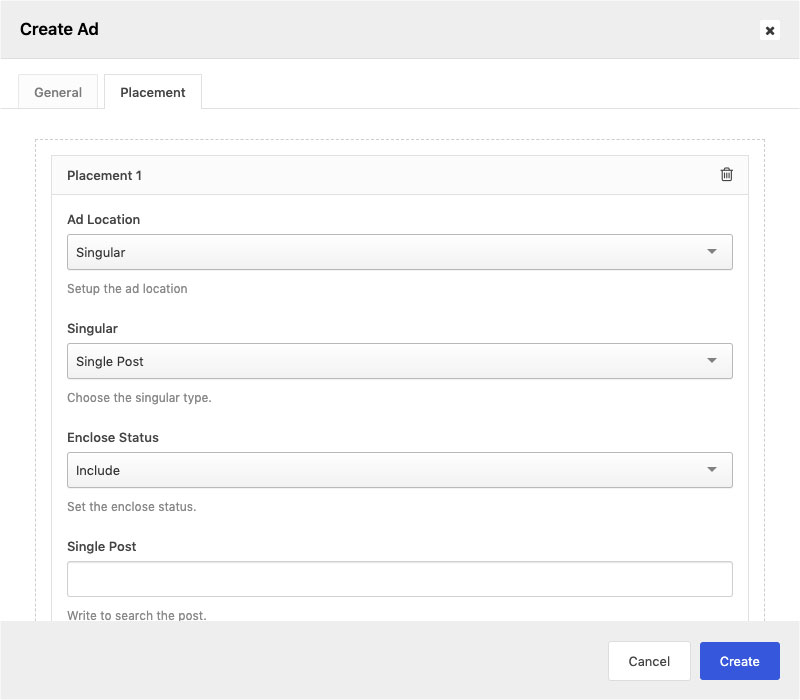
Here you can setup where you want the current ad to be shown. You also can add multiple ad placements. Here’s the list of placement options:
- Ad Location
Setup the ad location. - Singular
Choose the singular type. Please note, this option will available if you choose to use Singular on the Ad Location option. - Enclose Status
Set the enclose status. Please note, this option will available only for several cases. - Single Post
You need to write the post title to search for the post. Please note, this option will available if you choose to use Single Post on the Singular option. - Single Page
You need to write the page title to search for the page. Please note, this option will available if you choose to use Single Page on the Singular option. - Archives
Choose the archive type. Please note, this option will available if you choose to use Archive on the Ad Location option. - Author Archive
You need to write the author’s name to search for the author. Please note, this option will available if you choose to use Author Archive on the Archive option. - Category Archive
You need to write the category name to search for the category. Please note, this option will available if you choose to use Category Archive on the Archive option. - Post Tag Archive
You need to write the post tag name to search for the post tag. Please note, this option will available if you choose to use Post Tag Archive on the Archive option. - Ad Placement
Setup the ad placement. - Show After Paragraph
Set after which paragraph you want the inline content ad to show. Please note, this option will available if you choose to use Inline Content on the Ad Placement option. - Random Position
Set on which paragraph the inline content ad will show randomly. Please note, this option will available if you choose to use Inline Content on the Ad Placement option. - HTML Selector
Insert the HTML selector as an ad placement. Please note, this option will available if you choose to use HTML Selector on the Ad Placement option. - Ads Load
Choose the loading mechanism for this ad. Please note, this option will available if you choose to use HTML Selector on the Ad Placement option. - Ads Position
Choose the position for this ad. Please note, this option will available if you choose to use HTML Selector on the Ad Placement option.
2. Dashboard Overview
You can manage all the ads that you have on the Epic Advertisement dashboard.
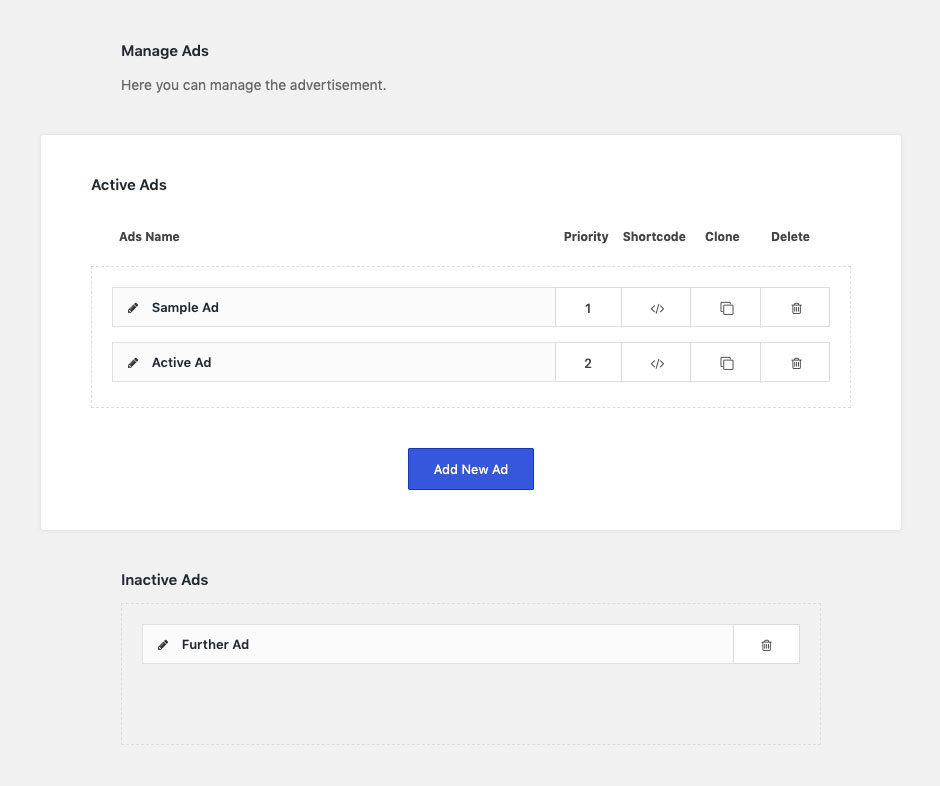
We have the Active Ads area and Inactive Ads area. You can drag the unused ad into the Inactive Ads area and you also can move it back to the Active Ads area for further use.
There’re several buttons that you can use, such as the Shortcode button (to copy the shortcode ad), the Clone button (to duplicate the ad) and the Delete button (to delete the ad).
You also can reorder the sequence of active ads. This sequence will take effect on auto ad placement. Higher ad priority will be shown at first.
To create a new ad you can simply click the Add New Ad button.