Installing FSE Themes is quite easy. Basically installing this theme is almost the same as installing other themes. This part will guide you on how to install FSE Themes for a few minutes only.
You can download the FSE Themes through the Themeforest Download dashboard. You have 2 options for downloading your theme as shown below:
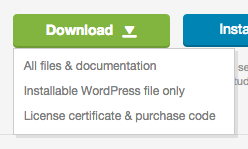
1. All files & documentation
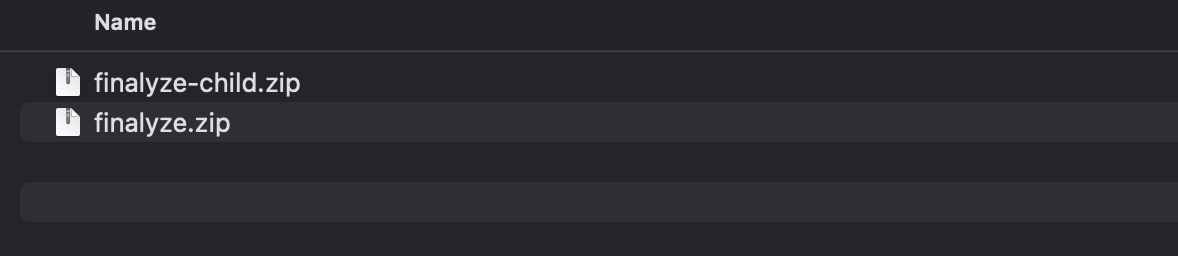
When you choose to download the All files & documentation option, you should unzip the downloaded file first. Then open the folder and find the filename-theme.zip to upload into your website (in the example below, it’s finalyze.zip).
A common issue that can occur when installing WordPress themes is “The package could not be installed. The theme is missing the style.css stylesheet “ error message being displayed when uploading or activating the theme.
In this case, the reason you may receive this error is if you have uploaded directly the downloaded file without unzipping them first or you may upload the incorrect file.
After you unzip the downloaded file and find the filename-theme.zip now you are ready to install FSE Themes to your website. You can choose to install via WordPress admin or via FTP.
Installation via WordPress
- Go to Appearance → Themes on your WordPress Admin Dashboard.
- Click the Add New button at the top of the page and then choose Upload Theme option.
- After that upload file filename-theme.zip (look at the image above) and click Install Now button.
- If the upload process has finished, click the Activate button.
- Right after installing the theme, a wizard page will appeared and the next step you can follow in this article.
Install via FTP
- Login into your FTP client.
- Then access wp-content/themes/ directory on your host web server.
- After that browse to find the filename-theme.zip file (look at the image above) and unzip the file.
- Upload the filename-theme folder into wp-content/themes/ directory.
- After uploading process finishes, go to your WordPress Admin Dashboard → Appearance → Themes and hit the Activate button.
- Right after installing the theme, a wizard page will appeared and the next step you can follow in this article.
2. Installable WordPress file only
When you choose to download the Installable WordPress file only option, you can directly use the downloaded file to upload to your website. You can choose to install via WordPress admin or via FTP.
Installation via WordPress
- Go to Appearance → Themes on your WordPress Admin Dashboard.
- Click the Add New button at the top of the page and then choose Upload Theme option.
- After that upload the downloaded file and click Install Now button.
- If the upload process has finished, click the Activate button.
- Right after installing the theme, a wizard page will appeared and the next step you can follow in this article.
Install via FTP
- Login into your FTP client.
- Then access wp-content/themes/ directory on your host web server.
- After that browse to find the downloaded file and unzip the file.
- Upload the filename-theme folder into wp-content/themes/ directory.
- After uploading process finishes, go to your WordPress Admin Dashboard → Appearance → Themes and hit the Activate button.
- Right after installing the theme, a wizard page will appeared and the next step you can follow in this article.